Gravity Forms to Google Sheets: Step-by-Step Data Sync
A practical guide to automatically push Gravity Forms submissions into Google Sheets using webhooks and automation tools. Includes setup, testing, security basics, and maintenance tips for reliable form-to-sheet workflows.

Goal: automatically push Gravity Forms submissions into Google Sheets to centralize data, reduce manual entry, and speed reporting. You’ll need a Gravity Forms site, a Google Sheet with headers, and a webhook or automation tool (like Zapier or Make) to connect the two. This guide shows you how.
Understanding Gravity Forms and Google Sheets integration
Gravity Forms is a popular form builder for WordPress, while Google Sheets provides a flexible data store and reporting surface. When you connect Gravity Forms to Google Sheets, every new submission can automatically appear as a new row in your Sheet. This seamless flow reduces manual copy-paste, minimizes errors, and accelerates reporting for teams handling lead capture, support requests, or event registrations. In this guide, we’ll explore practical approaches and best practices to implement a reliable Gravity Forms Google Sheets workflow that scales with your data.
The combination of Gravity Forms and Google Sheets creates a lightweight, auditable data pipeline. You can start with a simple one-to-one mapping and evolve to more complex scenarios such as multi-sheet dashboards, conditional routing, or time-stamped logs. Throughout, focus on a clear data model, consistent field naming, and robust validation to keep data clean as you scale.
According to How To Sheets, automating data flow from Gravity Forms to Google Sheets can save hours per week and improve data accuracy. The How To Sheets team found that teams using webhook-based integrations report faster reporting cycles and fewer manual corrections.
Planning your sheet structure and field mapping
Before you wire things up, design your Sheet with a clear header row that mirrors the form fields. Use consistent identifiers such as Name, Email, Message, and Timestamp. Add a timestamp column to capture when submissions arrive. Decide whether to store the raw form data or to parse it into separate columns. Plain text values, checkboxes, and multi-select fields may require different mapping rules. This planning reduces mapping errors later and makes reporting easier. How To Sheets recommends starting with a minimal, test-friendly sheet to validate the data pipeline. A well-planned sheet also helps when you need to export or share data with teammates who may not interact with the form directly.
When Gravity Forms collects structured data, you’ll often see fields like name, email, phone, message, and a timestamp. Map these to your sheet columns exactly as they appear in the form, avoiding ambiguous labels. If you plan to attach metadata (submission ID, form ID, or user IP), reserve dedicated columns for readability and auditing.
Finally, document the mapping decisions in a separate reference sheet or a shared doc. This practice makes onboarding new team members easier and helps you remember why certain fields are mapped a particular way. How To Sheets emphasizes documenting the data model early to prevent drift as forms evolve.
Connection options: Webhooks, Zapier, Make, or Apps Script
There are several paths to connect Gravity Forms to Google Sheets. The simplest is a Gravity Forms Webhooks Add-On sending data to a middleware like Zapier or Make, which then updates Sheets. An alternative is Google Apps Script: set up a small endpoint that receives the form payload and writes to Sheets directly. Each method has trade-offs in latency, cost, and complexity. In general, Webhooks + Zapier/Make offers rapid setup, while Apps Script gives full control and no ongoing middleware costs. If you need real-time updates with minimal latency, a webhook-to-script approach can be very effective.
Choosing the right path depends on your team’s familiarity with automation tools, whether you require conditional logic, and how you want to handle errors. It’s common to start with a no-code tool for speed and then move to a custom Apps Script endpoint if you need tighter control or cost optimization over time.
Implementing a webhook-driven flow: a practical example
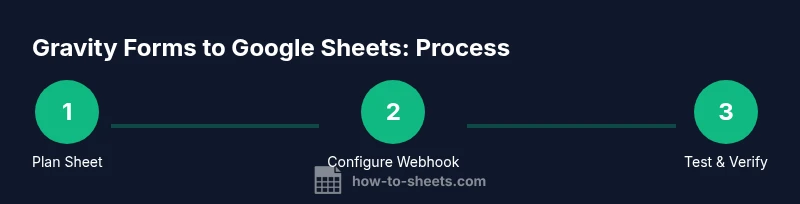
This section outlines a typical data flow: (1) a form is submitted; (2) Gravity Forms fires a webhook; (3) the webhook payload is received by Zapier or Make; (4) the automation maps fields to your sheet columns and writes a new row. If you need to append data without duplicates, consider using a unique ID field or a dedicated deduplication step in your automation. Keep error reporting visible so you can catch failed submissions quickly. Regular tests with sample data help ensure mappings stay accurate even as your forms evolve.
A practical tip is to log the payload payloads in a separate reference sheet during initial runs. This makes it easier to troubleshoot if fields shift or if new form fields require mapping adjustments. Over time, you'll develop a compact playbook for updating mappings without breaking existing submissions.
Data validation, error handling, and maintenance
To keep the pipeline robust, validate the mapping with sample submissions, enable retries on webhook failures, and monitor for errors. Use Sheets data validation for column types and sanitize inputs to avoid formula breakage. Regularly review the mapping if you add new form fields. Finally, schedule periodic checks to ensure the integration remains compatible with any changes to Gravity Forms or your automation tool. Keeping a versioned changelog for mappings makes it easier to roll back if a change creates issues.
Tools & Materials
- Gravity Forms Webhooks Add-On(Enable from WordPress admin > Gravity Forms > Add-Ons; required for sending payloads to external services.)
- Google account with Sheets access(Must have access to create and edit the target Sheet.)
- Prepared Google Sheet(Headers should match Gravity Forms fields; include a Timestamp column if desired.)
- Zapier or Make (Integromat) account(Optional middleware for mapping and updating Sheets.)
- Webhook URL (from Zapier/Make or Apps Script endpoint)(Used as the destination for Gravity Forms webhook.)
- Test data form (sample submissions)(Helps validate mapping without affecting live data.)
- Google Apps Script (optional)(If choosing a direct Sheets write approach, you can deploy a small script.)
Steps
Estimated time: 60-90 minutes
- 1
Plan your sheet and field mappings
Define the target Google Sheet and align each column header with a Gravity Forms field. Create a Timestamp column and a status column if needed. This upfront mapping reduces mapping errors later and helps maintain data integrity.
Tip: Document the mapping decisions in a separate sheet or notes section to simplify future updates. - 2
Install and activate the Webhooks Add-On
From WordPress, install and enable the Gravity Forms Webhooks Add-On. Create a basic feed with a placeholder endpoint to confirm connectivity and test payload structure.
Tip: Use Gravity Forms’ built-in test submission to validate the webhook payload before going live. - 3
Choose your connector and create endpoint
Set up a Zapier zap or a Make scenario to catch the webhook. Copy the generated endpoint URL and use it as Gravity Forms’ webhook destination. This endpoint acts as the bridge to Google Sheets.
Tip: If you are security-minded, consider adding a secret token in headers to verify requests. - 4
Configure Gravity Forms feed to map fields
In Gravity Forms, add or edit a Webhooks feed. Map each form field to the corresponding Google Sheet column and enable the feed for new submissions.
Tip: Avoid mapping optional fields until you confirm the core fields work correctly. - 5
Test end-to-end with sample submissions
Submit test entries from the form and verify that each field lands in the expected Sheet column. Check for formatting and order, adjust mappings if necessary.
Tip: Enable retry settings in Zapier/Make to handle transient failures. - 6
Monitor, secure, and maintain
Set up error alerts and routinely review mappings when fields change. Rotate credentials if you suspect any exposure and document changes for future audits.
Tip: Schedule periodic reviews to keep the integration aligned with form updates.
FAQ
Do I need a paid plan to connect Gravity Forms to Google Sheets?
You can start with free or lower-cost plans on popular automation tools, but higher task limits or more complex workflows may require a paid tier. Evaluate based on your submission volume and required features.
You can begin with a free plan, but expect to upgrade if your data needs grow or you require more tasks.
Can Gravity Forms write directly to Sheets without third-party tools?
There is no built-in direct export from Gravity Forms to Google Sheets. At minimum you’ll need a webhook to an intermediary like Zapier, Make, or Apps Script. This approach keeps data moving automatically without manual exports.
No direct integration exists; you’ll use a webhook through a middle tool or a small Apps Script endpoint.
How do I map Gravity Forms fields to Google Sheets?
Create a mapping in your chosen automation tool, selecting Gravity Forms fields as inputs and the Sheets headers as outputs. Validate each mapping with a test submission to ensure accuracy.
Map each form field to its corresponding sheet column and test with a sample submission.
What if a webhook fails to deliver data?
Check the endpoint URL and payload structure, verify authentication if used, and enable retry logic in your automation tool. Review error logs to adjust mappings or payload fields as needed.
Investigate endpoint issues and enable retries to handle temporary failures.
How can I prevent duplicate rows in Sheets?
Use a unique submission ID or a deduplication step in your automation flow to avoid writing the same row twice. This is especially important for retry scenarios.
Add a unique ID and check for existing rows before inserting a new one.
Can I update existing rows instead of appending new ones?
Updating existing rows is possible but requires a stable key to locate the correct row. It’s more complex and often less reliable than appending and maintaining an original copy.
It's doable with a key and careful scripting, but not as straightforward as appending.
Watch Video
The Essentials
- Plan field mappings before wiring the integration
- Use webhooks for real-time updates
- Test end-to-end before going live
- Secure the webhook endpoint and monitor for failures