Google Sheets Filter: Master Data Filtering in Sheets
Learn how to filter data in Google Sheets using built-in filters and the FILTER function. This comprehensive guide covers step-by-step usage, practical examples, and best practices for students and professionals.

You will learn how to filter data in Google Sheets using both the built-in Filter controls and the FILTER function. You’ll see when to use each method, how to apply single or multiple criteria, and how filters interact with charts and pivots. By the end, you’ll confidently extract relevant data views without altering your original dataset.
What is a filter in Google Sheets and why it matters
Filters in Google Sheets let you view a subset of your data without changing the underlying records. You can use the built-in filter controls for quick, on‑the‑fly views, or leverage the FILTER function to return a filtered array you can reuse in other formulas. According to How To Sheets, mastering both approaches gives you flexibility: fast, in‑sheet slicing for day‑to‑day work and robust, formula‑driven filtering for dynamic dashboards. This section lays the foundation: when to filter, what you filter, and how filters influence calculations, sorting, and shared workbooks.
- Visual focus: Filtering narrows what you see without deleting data.
- Reusability: The FILTER function yields a new dataset you can feed into charts, pivot tables, or further formulas.
- Collaboration: Filter views let teammates see different slices of the same data without affecting others.
By understanding these ideas, you’ll build filters that scale with datasets and use cases.
Getting started: built-in filter vs FILTER function
Google Sheets offers two primary filtering pathways: the built‑in UI filter for quick viewing, and the FILTER function for dynamic, reusable results. Built‑in filters change what rows are visible in the sheet, but do not create a separate output you can reuse elsewhere. The FILTER function, in contrast, returns a filtered array that can be assigned to a range or used inside other formulas. This distinction matters in reporting, automation, and collaborative work. How To Sheets recommends choosing the method based on whether you need a temporary view or a reusable data subset for dashboards and analyses. Understanding both empowers you to switch seamlessly between quick checks and robust calculations.
- Built‑in filter: fast, visual, browser‑friendly; best for ad hoc checks.
- FILTER function: programmable, composable, ideal for dashboards and automated reports.
- UX vs output: UI filters affect your current view; FILTER creates new data you can reference.
Step-by-step: Using the built-in Filter
The built-in Filter is a practical way to quickly sift data in a spreadsheet. Start with a header row so Google Sheets knows which columns to filter.
- Select the header row and click the Filter icon to enable filtering. Tip: If you’re sharing the sheet, consider using a Filter View so you don’t disrupt others’ work.
- Open the dropdown on the column you want to filter and choose your criterion (text matches, numeric comparisons, date ranges, etc.). Tip: Use “Clear” to reset a single column without removing other filters.
- Apply the filter and review the visible rows. If you need multiple conditions, repeat for other columns. Tip: Use multiple criteria with AND logic by selecting criteria across columns.
- Save a Filter View for later use or to share a specific configuration. Tip: Name the view clearly (e.g., “Open Orders Q2”).
- Clear or disable filters when you’re done to return to the full dataset. Tip: Use keyboard shortcuts (Ctrl/Cmd + Shift + L) to toggle filters quickly.
Building dynamic filters with the FILTER function
The FILTER function creates a dynamic, reusable view of your data. Its syntax is straightforward: FILTER(range, condition1, [condition2], ...). The range is the data to filter; each condition is a logical test that must be true for a row to be included. You can combine multiple conditions with logical operators like AND, OR, and NOT. Optional arguments such as if_empty let you define a fallback result when no rows match. Typical use cases include filtering by status, date ranges, or numeric thresholds, all while preserving the original data intact. For example, =FILTER(A2:D100, B2:B100="Open", C2:C100>100) returns rows where Status equals Open and a numeric value exceeds 100.
- Range selection: ensure headers are consistent with your data structure.
- Conditions: combine as needed to reflect real-world criteria.
- Output reuse: filter results can feed charts, summaries, or additional formulas.
Practical examples for common scenarios
Practical filtering helps you handle real-world data. Consider a sales sheet with columns for Date, Region, Product, and Amount. Filter by a date range to inspect Q3 sales, filter by Region to analyze a specific market, or filter by Amount to highlight high‑value deals. You can also filter for text patterns using wildcards such as * and ? within the FILTER or with standard comparison operators in the UI. When combining conditions, structure your criteria to reflect business logic, like showing only completed orders in the most profitable region.
- Date ranges: show records within a set period.
- Text filters: search for keywords or patterns.
- Numeric filters: isolate high‑value rows based on thresholds.
Combining filters with other tools: SORT, UNIQUE, QUERY
Filters shine when paired with other tools. Use SORT to order filtered results, or wrap FILTER with UNIQUE to remove duplicates. The QUERY function can substitute FILTER in some scenarios with SQL‑like syntax. Example: =QUERY(A2:D100, "select A, B, sum(D) where C='Open' group by A, B label sum(D) 'Total'", 1) offers a powerful alternative while keeping your workflow in Sheets. Combining filtering with charts ensures visuals reflect only the filtered subset, which is essential for accurate dashboards.
- FILTER + SORT: order filtered results for readability.
- FILTER + UNIQUE: deduplicate results after filtering.
- FILTER vs QUERY: choose based on familiarity and needs; both can export clean data subsets.
Troubleshooting common filter issues
Filters can fail to behave as expected for several reasons. If you see no results, verify that your range includes the header row and that your criteria correctly match data types. Mismatched data types (text vs. number) often yield empty results. UI filters are case-insensitive for text, but exact matching in FILTER is sensitive to data type and syntax. If a chart or pivot table shows unexpected data, confirm that it references the same filtered range and that any dynamic ranges update correctly. Lastly, confirm you aren’t accidentally applying filters on hidden rows or across merged cells, which can obscure results.
- Ensure header alignment.
- Match data types and syntax for conditions.
- Check linked charts/pivots reference the same data.
Performance tips and best practices for large datasets
As datasets grow, filters can become sluggish if applied to entire columns. Use explicit ranges (A2:D1000) rather than entire columns (A:D) when possible to improve performance. Consider creating named ranges for common data subsets and applying filters within those ranges. If you share sheets, rely on Filter Views to avoid broadcasted changes that disrupt collaborators. For complex filtering, break tasks into smaller steps or use auxiliary columns (helper columns) to precompute criteria, then apply filters to the results.
- Use fixed ranges to improve speed.
- Precompute criteria in helper columns when necessary.
- Prefer Filter Views for collaboration.
A reusable filter template you can adapt
Set up a template that uses a header row and a few criterion cells. Use a dropdown for each criterion (Date range, Category, Status), then apply FILTER with those dynamic criteria. This approach creates a consistent, shareable workflow for teams and students learning to filter data in Google Sheets. Duplicate the template for new datasets and adjust column references as needed.
- Create dynamic criteria with data validation.
- Map criteria to corresponding FILTER conditions.
- Save as a template for repeated use.
Next steps: practice, templates, and resources
Practice makes filtering second nature. Start with a simple dataset, apply basic filters, and gradually add complexity with multiple criteria and the FILTER function. Explore ready‑to‑use templates and practice datasets from reliable sources to reinforce concepts. For ongoing learning, revisit advanced techniques like combining filters with ARRAYFORMULA, SORT, and QUERY to build robust data pipelines. Remember, consistent practice and real‑world scenarios are the fastest path to mastery and confidence.
Tools & Materials
- Computer with internet access(Chrome or a modern browser; sign in to Google account)
- Google Sheets access(A sheet with a header row to filter)
- Sample dataset(Dataset with text, numbers, and dates for practice)
- Keyboard shortcuts reference(Helps speed up filtering tasks)
- Data validation setup(For reusable templates and filter criteria)
Steps
Estimated time: 15-25 minutes
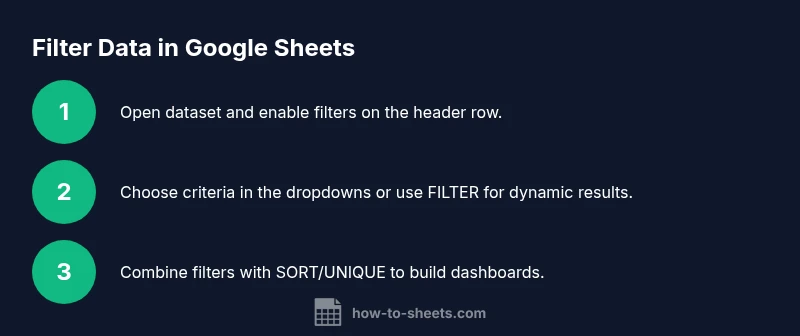
- 1
Open your dataset in Google Sheets
Launch Google Sheets and open the workbook containing the data you want to filter. Confirm the header row is clear and uniquely named, as this guides each filter control. This step sets the stage for reliable filtering.
Tip: Ensure the header row is on the topmost row and contains unique names. - 2
Enable filter controls
Select the header row and click the Filter button to activate the built-in controls. This makes you eligible to filter each column via a dropdown.
Tip: If you’re working with others, consider using a Filter View to avoid changing the main view. - 3
Apply a single criterion
Click the filter dropdown on the target column and choose a criterion (text match, number comparison, date range, etc.). Review the results and adjust as needed.
Tip: Start with a straightforward criterion to validate the setup. - 4
Add a second criterion
Filter on an additional column to tighten results (AND logic). The sheet now shows rows that meet both conditions.
Tip: Remember, each extra criterion narrows the dataset further. - 5
Save as a Filter View
If you anticipate needing this exact view again, save it as a Filter View for quick reuse by you or teammates.
Tip: Name the view descriptively so you can retrieve it later. - 6
Clear or modify filters
When analysis is complete, clear filters or switch off the Filter View to return to the full dataset for review.
Tip: Use the Clear option to reset a single column rather than removing all filters.
FAQ
What is the difference between the built-in filter and the FILTER function?
The built-in filter alters the visible rows in the sheet, while FILTER returns a separate, usable array that can feed other formulas or dashboards.
The UI filter changes what you see. FILTER creates a new filtered dataset you can reuse.
Can I filter by multiple conditions at once?
Yes. You can apply several criteria either through multiple column filters in the UI or by combining conditions in the FILTER function using logical operators like AND and OR.
Yes, you can filter with multiple criteria using either UI filters or the FILTER function.
Do filters affect charts and pivot tables?
Filters affect any charts or pivot tables that reference the filtered range. If the underlying data changes due to filtering, charts reflect those changes.
Yes, charts and pivots reflect the filtered data if they draw from the same range.
How do I save a filter for later use?
Use Filter Views to save a specific filter configuration so you or others can switch to it without changing the main sheet.
Create a Filter View to save and reuse the filter setup.
Why am I not seeing any results after applying a filter?
Check that the range includes the header, criteria match data types, and there isn’t an exclusion that filters everything out.
Make sure your criteria match your data and that the range is correct.
Are Google Sheets filters case-sensitive?
Most text filters are case-insensitive in Google Sheets. For exact text matches, use helper formulas like EXACT or adjust criteria.
Filters usually ignore case, but you can enforce exact matches with formulas.
Watch Video
The Essentials
- Filter before altering data visuals
- Use both UI filters and FILTER functions for flexibility
- Combine filters with sort/unique for clean dashboards
- Save reusable filter views to streamline workflows