Delete Google Sheets Cells on iPhone: A Practical Guide
Learn how to delete Google Sheets cells on iPhone by clearing contents or removing rows/columns. This practical, mobile-focused guide covers step-by-step actions, tips, and fallbacks to keep your data intact.

On iPhone, you delete Google Sheets cells by either clearing the contents or removing the entire row or column. Open Google Sheets, select the target cells, and use the menu to Clear contents. For structural edits, tap the row or column header and choose Delete row or Delete column. This quick guide shows both approaches and when to use each.
Quick Start on iPhone: Delete Google Sheets Cells
Deleting google sheets cells on iphone is usually done by clearing contents or by removing entire rows or columns. In the iPhone app, you won’t find a traditional cut and paste approach; instead use the toolbar menus. According to How To Sheets, mobile editing follows the same logic as desktop editing: clear the contents to preserve the cell’s position, or delete a row/column to alter the structure. Before you begin, open the Google Sheets app, sign in to your Google account, and load the sheet you want to edit. Having a backup copy is wise, especially when making structural changes. Tip: remember the exact phrase delete google sheets cells on iphone when searching for steps. In this guide, you’ll learn when to clear vs delete and step-by-step actions tailored for iPhone.
Understanding the difference: clear contents vs delete cells on mobile
In Google Sheets for iPhone, you typically clear a cell’s contents rather than physically deleting the cell itself. Clearing leaves the cell in place, preserving alignment, formulas, and formatting. Deleting a cell is usually achieved by removing the entire row or column, which shifts surrounding data. This distinction matters when you’re cleaning up data without changing the sheet’s layout. If your goal is to remove a value but keep the grid intact, choose Clear contents. If you intend to restructure the sheet, deleting a row or column is often the correct choice.
When to delete an entire row or column on iPhone
Deleting a row or column on mobile edits the sheet structure. This action removes the complete row or column and shifts adjacent data accordingly, which can affect formulas, references, and layouts. Use this option only when you’re sure the row/column is no longer needed or when you’re reorganizing data to fit a new structure. Always consider backing up before structural edits to prevent accidental data loss.
Common workflows: cleaning data in a sample sheet
A typical workflow on iPhone starts with identifying the range of cells containing extraneous data or placeholders. If the goal is to remove values but retain the grid, Clear contents is preferred. If you’re tidying up an entire section, deleting the affected rows or columns is more efficient. In practice, you’ll often clear several blocks and then insert new data or formulas to maintain dataset integrity. This approach minimizes unexpected shifts in your dataset while keeping the sheet readable and usable.
Navigating the mobile UI: menus, taps, and gestures
The iPhone app uses touch-based interactions and a top/bottom toolbar for edits. To clear, select cells, tap the three-dot menu or Edit options, and choose Clear contents. To delete, tap the row/column header to select, then choose Delete row or Delete column from the menu. Long-press selection helps when identifying non-contiguous ranges, and the Undo button remains your safety net if you misstep.
Tips for accuracy and data safety
Always verify the range you edit, especially on small screens where mis-taps are common. Use the Undo function to revert mistakes, and consider keeping a backup copy of the sheet before making major deletions. If formulas reference the edited area, double-check formulas after the operation to avoid broken calculations. Finally, test on a duplicate sheet to gain confidence before applying changes to production data.
What to do if you delete by mistake: undo and recovery
If you delete something unintentionally on iPhone, immediately use the Undo action (usually a curved arrow) or shake to undo depending on your device settings. If the app closes, re-open the sheet and check the version history to restore from a prior save when necessary. Regular backups make recovery easier and safer.
Quick decision guide: clear vs delete
- Clear contents when you want to preserve the grid and formulas but remove values.
- Delete a row or column when you need to remove entire data blocks and adjust the layout.
- In all cases, keep a backup and verify references after edits to maintain data integrity.
Troubleshooting mobile edits: device differences
Different iPhone models or iOS versions can slightly alter where you tap to access edit options. If you don’t see Clear contents or Delete options immediately, try updating the app, restarting the phone, or using the browser version as a fallback. Always ensure you are signed in to the correct Google account and that the sheet isn’t in a protected mode.
Tools & Materials
- iPhone with Google Sheets app installed(Ensure the app is up to date from the App Store)
- Stable internet connection(Editing requires syncing with Google Drive; Wi-Fi recommended for large sheets)
- Active Google account sign-in(Needed to access and modify your Sheets files)
- Backup copy of target sheet(Optional safety net before performing deletions)
- Accessible sheet with edit permissions(Make sure you have editing rights on the target file)
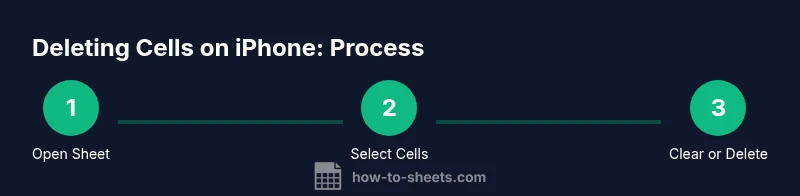
Steps
Estimated time: 10-15 minutes
- 1
Open the target sheet
Launch Google Sheets on iPhone and open the workbook containing the cells you want to delete or clear. Confirm you’re editing the correct tab and range.
Tip: If the sheet is hard to locate, use the search within the app to find the file quickly. - 2
Select the cells or range
Tap to place the selection cursor, then drag the handles to cover all target cells. For non-adjacent cells, use the multi-select feature if available.
Tip: Zoom in a bit to ensure accurate selection on a small screen. - 3
Clear contents of the selection
With the range selected, open the menu and choose Clear contents to remove values while preserving the grid and formulas.
Tip: Clearing is safer for preserving layout and references. - 4
Delete an entire row
If you need to remove a full row, tap the row header to select the row, then choose Delete row from the menu.
Tip: Deleting a row shifts cells up and may affect formulas referencing that row. - 5
Delete an entire column
To remove a column, tap the column header to select it, then choose Delete column.
Tip: Deleting a column shifts cells left and can impact column-dependent formulas. - 6
Undo if you make a mistake
If something goes wrong, use the Undo button or shake your device (if enabled) to revert.
Tip: Undo can usually revert multiple steps; act quickly after the mistake. - 7
Review and save
After edits, scroll through the sheet to verify changes are correct and saved. If needed, revisit the version history.
Tip: Backups make recovery painless if you need to revert later.
FAQ
Can I delete a single cell on iPhone without affecting surrounding cells?
On iPhone, you typically cannot delete a single cell without affecting surrounding cells. You can clear its contents or delete the entire row or column to remove data, which shifts adjacent cells. For simple value removal, clearing is usually safer.
You can clear a cell, or delete its row or column if you need structural changes, but you can’t delete a single cell without impacting the grid.
What happens if I delete a row or column on iPhone?
Deleting a row or column removes that entire line from the sheet and shifts remaining data. This can affect formulas and references, so back up first and verify dependent cells.
Deleting a row or column removes it entirely and shifts data; check formulas afterward.
How do I undo deletions on iPhone Google Sheets?
Use the Undo action in the toolbar or shake your device if the feature is enabled. You can typically undo multiple steps to revert unintended deletions.
Tap Undo or shake your device to revert recent edits; you can usually undo several steps.
Is there a way to recover data after closing the app?
Google Sheets maintains version history, so you can restore a previous version from within the app if needed. Having backups makes this easier.
Yes, you can restore an earlier version from version history; backups help if you need to revert safely.
Can I delete non-contiguous cells on iPhone?
Non-contiguous selection is supported in some cases; however, deletions often apply to entire rows or columns. Clearing can target multiple non-adjacent cells if the app supports it.
You can clear multiple non-adjacent cells in some cases, but deletions typically affect rows or columns.
Are there mobile keyboard shortcuts to delete data in Sheets on iPhone?
Mobile keyboards offer limited shortcuts; most actions are tap-based via the app’s menus. Check for any device-specific shortcuts in the app settings.
Shortcuts on iPhone are limited; you’ll mainly use taps and menus, not keyboard shortcuts.
What’s the best practice for large cleanups on mobile?
Plan changes, back up first, and perform deletions or clears in small batches. Verify related formulas and references after each batch.
For large cleanups, back up, work in small batches, and check formulas after each step.
Watch Video
The Essentials
- Back up your sheet before deleting cells or rows/columns
- Clear contents to preserve layout and formulas
- Delete rows or columns to restructure data
- Use Undo to recover mistakes quickly
- Mobile editing relies on the app's toolbar; expectations differ from desktop