Delete a Google Sheets Row: A Practical Step-by-Step Guide
Learn how to delete a Google Sheets row safely, when to archive instead, and best practices to avoid data loss. This guide from How To Sheets provides practical, executable steps for students, professionals, and small business owners.

This quick answer shows you how to delete google sheets row safely, including when to delete versus archive, and how to undo if you make a mistake. How To Sheets recommends starting with a backup and using precise selection to keep data intact.
How to delete google sheets row
Deleting a row in Google Sheets is a common maintenance action when cleaning up datasets, removing placeholders, or correcting misentries. According to How To Sheets, the key to a clean deletion is precision, backed up data, and a clear plan for what happens to downstream data. This section will outline when to delete, how to approach single-row removals, and the broader implications for your sheet’s structure, formulas, and data relationships. You’ll learn to distinguish between deleting a row, archiving its contents, and simply hiding rows for temporary work. Emphasizing auditability and undo-ability helps maintain trust in your spreadsheets, especially in collaborative environments where multiple people edit the same sheet.
Quick cleanup vs archiving: choosing the prudent approach
Before you delete any data, decide whether the row should be permanently removed or preserved for history. Archiving is often safer when rows contain answers, dates, or identifiers that may be referenced later. Archiving can be as simple as moving the row to a separate sheet, adding a status flag, or tagging the row with an “archived” label. Deleting should be reserved for entries that are clearly erroneous or irrelevant to ongoing work. The decision impacts formulas, data integrity, and the ability to reconstruct historical records. In practice, a quick check of dependent formulas, filters, and pivot tables will reveal whether deletion may ripple through your analysis.
Deleting a single row in Google Sheets
To delete a single row, first locate it and select the entire row by clicking its header (the grey box with the row number). Right-click the header and choose Delete row, or use the Edit menu and select Delete row. This operation removes the row entirely and shifts subsequent rows upward. If your sheet uses formulas that reference the deleted row, those formulas may adjust automatically or return errors. Always review affected cells to confirm results and avoid cascading mistakes. If you prefer a keyboard shortcut, Ctrl+- (Cmd+- on Mac) will delete the selected row in many configurations.
Deleting multiple consecutive rows
Select the first row, hold Shift, and click the last row you want to delete to include a continuous block. Right-click any selected header and choose Delete rows X–Y. Alternatively, use the Edit menu to perform the same action. Deleting a block is efficient when you need to prune out a range of malformed data or placeholders. After deletion, verify data continuity, especially in adjacent columns that contain lookups or references. If you inadvertently remove more rows than intended, immediately use Undo (Ctrl+Z / Cmd+Z) to revert the change.
Deleting non-adjacent rows efficiently
For non-contiguous deletions, select the first row and then hold Ctrl (Cmd on Mac) while clicking additional row headers to include multiple non-adjacent rows. Right-click any selected header and choose Delete rows. This approach minimizes the number of steps and keeps your workflow efficient. After deletion, re-check any dependent ranges, named ranges, or array formulas to ensure everything still computes correctly. If you use filters, reapply them to confirm that the remaining data is visible as expected.
Using filters and helper columns to identify rows
If you’re unsure which rows to delete, use filters to reveal rows that meet specific criteria (e.g., errors, duplicates, or out-of-range values). A helper column can mark rows to delete (e.g., with a TRUE/FALSE flag) so you can quickly delete all flagged rows in one go. After filtering, delete all visible rows, then clear or delete the helper column. This technique reduces the risk of removing valuable data by mistake and preserves an auditable trail of what was removed.
Preventing accidental deletions: backups and protections
Always back up before performing deletions, especially in large datasets. Create a quick copy of the sheet (File > Make a copy) or export a CSV/XLSX as a safety net. Enable protected ranges or sheet protections to restrict who can delete rows in sensitive files. Consider using version history to track changes over time, which helps you revert if needed. For teams, establish a deletion protocol and document the decision to delete or archive to avoid miscommunications.
Best practices for audit trails and data recovery
Maintain an explicit record of deletions in a separate sheet or log, including the user, timestamp, and rationale. Use Google Sheets version history to restore earlier versions if a deletion causes problems, and communicate changes to collaborators. When deleting rows that are tied to critical calculations, review any dependent scripts, add-ons, or automation that might rely on row positions. Establish a standard operating procedure (SOP) for deletions so every team member follows the same safe process.
How to recover a deleted row and rollback changes
If a deletion was unintended, immediately use the Undo command or press Ctrl+Z / Cmd+Z. If Undo is not available, open Version history (File > Version history > See version history) to restore a previous version of the sheet. You can copy the deleted row from the older version and paste it back into the correct position, or import a backup copy. Regular backups make these recoveries far more reliable, especially for large datasets.
Keyboard shortcuts and menu paths to delete quickly
Fast deletion can be achieved via keyboard shortcuts or menu paths. Common shortcuts include Ctrl+- to delete the selected row on Windows or Cmd+- on Mac. Menu paths include Edit > Delete row or right-click the row header and select Delete row. Practicing these shortcuts reduces misclicks and speeds up your workflow, particularly when cleaning up repetitive data tasks. For complex sheets with formulas and nested references, a quick audit before deletion saves time later.
Authority sources
- Support resources from Google Docs Editors Help (https://support.google.com/docs)
- Google for Education (https://edu.google.com)
- U.S. National Institute of Standards and Technology (https://www.nist.gov) for data integrity and change management practices
Tools & Materials
- Computer or device with internet access(Desktop or mobile; ensure you can access Google Sheets)
- Google account with access to the target Sheets file(The file must be owned or editable by you)
- Backup method (optional)(Create a copy of the sheet before deletion (File > Make a copy))
- Mouse, trackpad or keyboard for shortcuts(Have right-click functionality or keyboard shortcuts available)
- Notes on data dependencies(Especially important for sheets with formulas, lookups, or scripts)
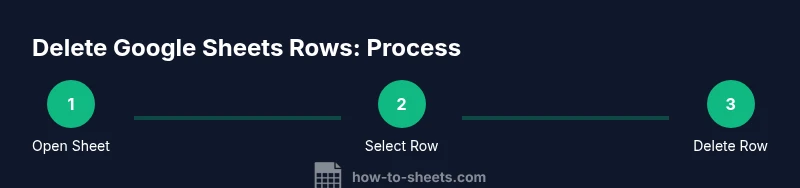
Steps
Estimated time: 5-10 minutes
- 1
Open the Google Sheet
Launch your browser, navigate to Google Sheets, and open the exact file containing the row you want to delete. This ensures you’re working on the right dataset and avoids accidental deletions in other files.
Tip: Tip: Bookmark the file or pin it in your browser for quick access. - 2
Locate the target row
Scroll or use the search function to find the row containing the data you want to remove. Confirm the row’s contents and its relation to adjacent data to prevent unintended data loss.
Tip: Tip: Double-check by cross-referencing key identifiers (IDs, dates, etc.). - 3
Select the entire row
Click the row header (the number on the far left) to highlight the whole row. This ensures the deletion affects all cells in that row and eliminates fragmented data.
Tip: Tip: If deleting multiple rows, select a range by clicking the first header, holding Shift, and clicking the last header. - 4
Delete the row
Use the right-click context menu and choose Delete row, or use the Edit menu and select Delete row. The row will be removed from the sheet immediately.
Tip: Tip: For speed, use the keyboard shortcut Ctrl+- (Cmd+- on Mac) after selecting the row. - 5
Confirm and review
If prompted, confirm the deletion. Review surrounding rows and formulas to ensure no unintended shifts or errors occurred.
Tip: Tip: Reopen Version history if you notice any issues and revert if needed. - 6
Backup and document the change
Create a quick backup of the sheet if you haven’t already and document why the row was deleted (e.g., data correction, duplicate removal).
Tip: Tip: Adding a note in a dedicated log can improve auditability.
FAQ
How do I delete a single row in Google Sheets?
To delete a single row, select the row header, then choose Delete row from the right-click menu or from the Edit menu. This removes the entire row and shifts other rows up. Always review dependent formulas after deletion.
To delete a single row, select its row header and use Delete row from the menu. Review effects on formulas afterward.
Can I delete multiple non-adjacent rows at once?
Yes. Hold Ctrl (Cmd on Mac) while clicking multiple row headers to select non-adjacent rows, then right-click to delete. This saves time but requires careful selection to avoid removing the wrong rows.
Yes. Use Ctrl on Windows or Cmd on Mac to select non-adjacent rows, then delete.
What should I do if I delete the wrong row?
Immediately use Undo (Ctrl+Z / Cmd+Z). If Undo isn’t available, open Version history to restore a previous version. Keeping backups simplifies recovery.
If you delete something by mistake, press Undo right away or restore a previous version from Version history.
Is there a way to delete rows with a script?
Yes. Google Apps Script or macros can delete rows based on conditions. This is useful for recurring cleanup tasks, but requires scripting knowledge and testing.
You can delete rows with Apps Script for automated cleanups, after testing your script.
What’s the difference between deleting and archiving?
Deleting removes the row permanently. Archiving preserves the data in another sheet or logs, which is safer for historical records and audits.
Deleting removes the row; archiving keeps a copy elsewhere for history.
How can I prevent accidental deletions in shared sheets?
Use protected ranges, exercise version history, and establish an SOP for deletions. Limiting who can delete rows reduces risk.
Protect ranges and keep a standard deletion process to reduce mistakes.
Watch Video
The Essentials
- Delete with precision and backups in place
- Use archiving to preserve data history when appropriate
- Leverage shortcuts and menus for speed
- Verify formulas and references after deletion
- Document deletions for auditability