Google Docs List Formatting: Bullets, Numbering, and Nesting
Practical guidance on google docs list formatting, covering bullets, numbering, nesting, indentation, and accessibility to keep lists clear, consistent, and readable across devices.

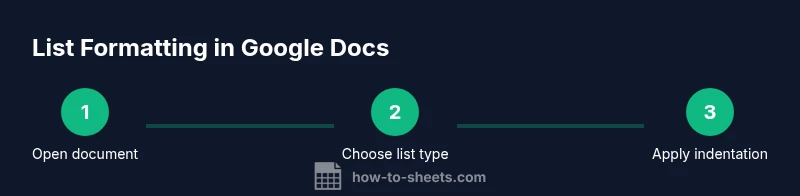
This guide helps you format bulleted and numbered lists in Google Docs, including nesting, indentation, and style customization. You will practice applying list styles, adjusting indentation, and fixing common formatting issues. To follow along, you only need a Google account and a document to edit. This comprehensive steps-based overview helps students, professionals, and small teams produce clean, accessible lists.
Why proper list formatting in Google Docs matters
Clear list formatting improves readability, skimmability, and comprehension in any document. In Google Docs, well-structured bullets and numbering help readers follow steps, hierarchies, and related items without confusion. According to How To Sheets, consistent list formatting is a small but critical factor in professional documents, especially when collaborating on shared work. The How To Sheets team found that even modest improvements in list styling can reduce reader cognitive load and errors in interpretation. Beyond aesthetics, proper lists support accessibility for screen readers, enabling equal access to information for all users. In this section you’ll learn how to distinguish bullets from numbering, when to use each, and the basic infrastructure that underpins reliable list formatting.
Understanding list types in Google Docs
Google Docs supports several list formats that you can mix and match depending on context. Bulleted lists use symbols such as dots, dashes, or custom icons to mark items, while numbered lists show a sequential order. You can also use alphabetic or roman numeral styles for outlines. Nested or multilevel lists let you indicate hierarchy, such as main points and subpoints. Knowing when to use each type improves readability and scanning efficiency for readers—both in print and on screens.
Starting fresh: creating bullets and numbering
To create a list from scratch, select text and click the Bulleted list or Numbered list button in the toolbar. Google Docs will automatically apply the selected style to all marked lines. If you already have plain text, you can convert it to a list with a single click. When building a document, aim for concise items and avoid overloading any single bullet with too much information. Keep a consistent tone and parallel structure for easier reading.
Customizing list styles: bullets, numbering, and multilevel
List customization in Google Docs lets you choose bullet shapes (dots, squares, hyphens) and numbering formats (1., a., i.). For multilevel lists, you can create a hierarchy by pressing Tab to indent or Shift+Tab to outdent. Consistency matters: keep the same bullet type for related levels and align text so subpoints line up cleanly with their parent items. Use the multilevel list tool to manage multiple levels in one go.
Indentation and alignment: how to align text with lists
Indentation determines how subpoints line up with their parent items. Left indentation controls the bullet or number position, while a secondary indent aligns the text block. If items appear misaligned after indentation changes, reapply the list style or adjust the indentation levels. Consistent indentation improves scanning and avoids visual confusion, especially in long documents with many nested points.
Nested and multi-level lists: best practices
Nested lists convey structure clearly when used judiciously. Use one or two nesting levels for main ideas and subpoints; deeper nesting can overwhelm readers. In Google Docs, convert your text to a multilevel list to automatically apply consistent indentation and markers across levels. Consider adding short headings or bolded labels to the main levels to guide readers through complex sections.
Maintaining consistency across documents and devices
To ensure consistency across devices and editors, define a standard list style at the document or template level. If you copy-paste from another source, use Paste without formatting to avoid bringing in incompatible styles. Employ paragraph styles (like List Paragraph) to maintain uniform spacing, font, and indentation. How To Sheets analysis shows that templates with standardized list styles reduce formatting drift in collaborative environments.
Accessibility considerations for lists
Accessible lists are readable by screen readers and navigable by keyboard. Use meaningful bullet types for context (for example, use checkmarks for tasks) and avoid overly decorative symbols that might confuse assistive technologies. Keep list items concise, and place important keywords at the start of each bullet. Providing semantic structure, rather than decorative formatting alone, enhances accessibility for all users.
Shortcuts and quick actions to format lists
Take advantage of toolbar controls for quick changes between bullets and numbering. Use the indentation controls to promote or demote levels, and switch to multilevel lists when hierarchy is needed. Leveraging formats saved in templates ensures consistent results across documents. Pro tip: keep a short, tested list of preferred bullets for recurring sections to speed up workflow.
Importing and converting lists from other apps
When pasting lists from Word or other editors, Google Docs often preserves structure but may require cleanup. Use Paste without formatting to strip extraneous styles, then reapply your standard list style. If a pasted list auto-converts unexpectedly, reselect and choose the appropriate bullet or numbering type from the toolbar.
Using styles to control lists globally
Apply List Paragraph style to items to unify spacing and font across your document. Styles also simplify updating lists later; change the style once and all list items reflect the update. This approach reduces manual edits and helps maintain visual coherence, especially in long documents shared with teammates.
Real-world examples: business, education, personal use
In a project plan, use a multilevel list to separate tasks and sub-tasks. In student papers, use bullets for bullet-lists of findings and a numbered sequence for steps of a protocol. For personal notes, keep short bulleted items and reserve numbering for checklists. Consistent formatting across these scenarios helps teammates read faster and comprehend tasks more efficiently.
Common pitfalls and how to fix them
Common issues include inconsistent indentation, mixed list types within the same section, and over-nesting. Regularly review your lists in draft mode, use templates for consistency, and reset formatting when needed. The How To Sheets team recommends adopting a disciplined approach to lists: choose one style per document, apply it consistently, and audit periodically for drift.
Tools & Materials
- Computer or device with internet(Any modern browser; Google Docs app optional)
- Google account(Needed to access Google Docs and save changes)
- Sample Google Docs document to practice on(Create a new doc or duplicate a template with lists)
- Optional reference materials(Style guides or accessibility guidelines for advanced tweaks)
Steps
Estimated time: 20-25 minutes
- 1
Open a Google Docs document
Launch the document you want to edit and locate the area where you will insert or modify a list. Decide whether you will use bullets, numbers, or a multilevel structure for this section.
Tip: If starting fresh, place the cursor where the list should begin and press Enter to create a new line. - 2
Create a bullet list
Select the text you want as list items or start a new line and click the Bulleted list button in the toolbar. Choose a bullet style if offered by the UI.
Tip: Use the Bulleted list dropdown to switch between dot, dash, and square bullets easily. - 3
Switch to a numbered list
With the list selected, click the Numbered list button to convert bullets to numbers. Google Docs will maintain order and indentation for existing items.
Tip: If you type a new line after a numbered item, Docs automatically numbers the next item. - 4
Demote or promote list levels
Move items deeper (indent) or shallower (outdent) to create subpoints. This builds a hierarchical structure without recreating items.
Tip: Use Tab to indent and Shift+Tab to outdent for quick level changes. - 5
Apply multilevel formatting
For complex outlines, select a list and choose Multilevel List to apply a consistent hierarchy with automatic markers.
Tip: Keep levels limited to 2–3 for readability. - 6
Adjust indentation and alignment
Fine-tune where bullets/ numbers sit relative to the text by using the Increase/Decrease indent controls or ruler guides.
Tip: Consistent indentation improves scanning and reduces visual drift. - 7
Format through Styles for consistency
Apply the List Paragraph style to all items to unify font, spacing, and indentation across the document.
Tip: If your list shifts after updates, reapply the style to normalize formatting. - 8
Review and test across devices
Open the document on another device or in a different browser to verify the list renders the same way for collaborators.
Tip: Ask teammates to view the lists and confirm readability.
FAQ
What is the difference between bulleted lists and numbered lists in Google Docs?
Bulleted lists mark items with symbols and are ideal for unordered points, while numbered lists assign a specific order, useful for steps or sequences. You can convert between them easily in Google Docs.
Bullets are for unordered items; numbers show order. You can switch between them in Docs with a click.
How do I create a multilevel list in Google Docs?
Select your list and choose the Multilevel List option to apply hierarchical markers automatically. You can customize levels and alignment to reflect your document structure.
Use Multilevel List to add hierarchy and auto markers.
Can I apply list formatting across multiple documents?
Yes. Use templates and the List Paragraph style to ensure consistency. Copying content between documents may require reapplying styles.
Templates help keep lists consistent across docs.
How do I fix misaligned bullets after indentation changes?
Check indentation levels and reset the list style if needed. Consistent use of the ruler and bullets helps keep alignment stable.
Adjust indentation and reapply the list style if misaligned.
Is there a keyboard shortcut for lists in Google Docs?
Google Docs supports quick actions via the toolbar; keyboard shortcuts exist for some actions, but are not universally fixed across all platforms. Use the toolbar for reliable formatting.
Toolbar controls are the most reliable shortcut in Docs.
Watch Video
The Essentials
- Start with the right list type for clarity
- Use multilevel lists to show hierarchy
- Keep indentation consistent across sections
- Apply paragraph styles to maintain uniform formatting