How to Crop Images in Google Sheets: A Practical Guide
Learn how to crop images in Google Sheets with a practical, actionable guide. This How To Sheets tutorial covers built-in crop controls, workarounds, and best practices for clean visuals in spreadsheets.

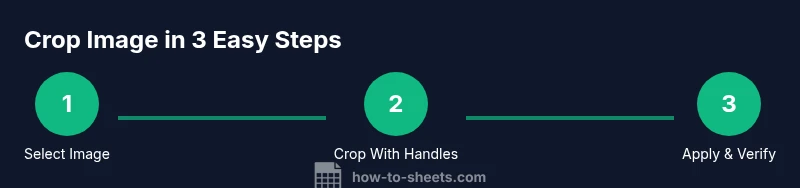
To crop an image in Google Sheets, select the image, click the Crop icon in the toolbar, and drag the crop handles to frame the area you want. Press Enter to apply the crop. The crop works whether the image sits over cells or is anchored in a cell, but you’ll use the same crop controls in both cases.
Why cropping images matters in Google Sheets
Cropping images in Google Sheets is a practical skill for students, professionals, and small business owners who use Sheets for data dashboards, catalogs, and project trackers. When visuals are cropped to fit specific cells or display areas, your spreadsheets look cleaner, more focused, and easier to scan. According to How To Sheets, a well-cropped image minimizes distraction, helps you align visuals with data, and improves readability across devices. In many real-world tasks, you’ll need to include product photos, charts, or logos without overwhelming the sheet. Mastering image cropping lets you present information clearly without leaving your audience guessing about what matters most in your data.
This guide walks you through the built-in cropping workflow, common scenarios, and reliable workarounds. You’ll learn when to crop inside a cell versus over cells, how to preserve image quality, and how to avoid common mistakes that make crops look off or misaligned. By following these steps, you’ll keep your Google Sheets visually polished and execution-ready for reports, dashboards, and collaborative workspaces.
Understanding image placement in Google Sheets
There are two primary ways to place images in Google Sheets: Image in a cell and Image over cells. Image in a cell behaves like a data element tied to that cell, adjusting its size with the cell’s dimensions. Image over cells floats on top of the grid and can be moved, resized, and cropped with the controls you see in the image toolbar. Cropping behaves similarly in both modes, but the implications differ:
- Image in a cell keeps the photo tied to the cell’s value and is ideal for compact data tables or annotated dashboards.
- Image over cells provides more freedom for layout and composition, which is useful for headers, banners, or visual-heavy sheets.
Knowing which mode you’re using helps you plan your crop precisely. If you frequently switch between modes, keep the cropping workflow consistent so your visuals stay predictable across sheets.
Built-in crop controls: where to find them
Cropping in Google Sheets uses the standard image editing controls found in the toolbar when an image is selected. Look for the Crop icon in the floating toolbar near the image, then click it to enter crop mode. Drag the handles on the image edges or corners to adjust the visible area, and press Enter to apply the crop. If you’re cropping an image that’s anchored in a cell, you’ll still access the same Crop tool from the toolbar.:
Tip: If you don’t see the Crop icon, ensure the image is selected (click on the image to activate the editing options) and verify you’re using a supported browser. The crop controls appear consistently across Chrome, Edge, and Firefox.
Step-by-step cropping workflow (overview)
Cropping an image in Google Sheets follows a straightforward workflow: insert the image, select it, choose Crop, adjust handles, and apply the crop. This section summarizes the steps and explains how to think about aspect ratio and placement so your final crop aligns with data and layout goals.
In practice, you’ll crop to emphasize the data point or visual element you want the viewer to notice, while maintaining a clean overall sheet appearance. The goal is to preserve essential details and avoid clipping important information. You can always undo a crop if the result isn’t right, or re-crop later when you adjust the sheet’s layout. This section connects the UI flow to real-world outcomes in dashboards and reports.
Workarounds when cropping isn’t precise
Sometimes the on-sheet crop tools aren’t precise enough, especially for small visuals or tightly-packed dashboards. In such cases, crop the image in an external editor (Photoshop, Paint, or online editors) to the exact dimensions you want, then re-upload or replace the image in Sheets. Another workaround is to crop in Google Drawings and then insert the drawing into Sheets as an image. These approaches give you pixel-perfect control while still delivering a clean sheet.
If you’re working with multiple images, consider cropping them to a uniform aspect ratio before import so your sheet remains consistent and visually balanced.
Tips for maintaining image quality after crop
Cropping can affect perceived sharpness. To keep results crisp:
- Maintain a consistent aspect ratio so cropped images align with grid lines and text.
- Avoid extreme crops that remove critical details; if important context is lost, revert.
- Use higher-resolution original images and crop conservatively to preserve clarity on high-DPI displays.
- After cropping, resize the image within the sheet to fit the intended cell or display area without stretching.
These practices help you deliver professional visuals in presentations, dashboards, and reports.
Real-world examples and use cases
A marketing dashboard may feature cropped product images beside KPI tiles, with a narrow image width that mirrors the table’s density. In an inventory sheet, cropped thumbnails align with product descriptions, making scanning faster for suppliers. For student projects, cropped images in headers provide a neat, guided narrative without crowding the data table. Each scenario benefits from consistent cropping that emphasizes the relevant data while maintaining legibility across devices.
Common mistakes and how to fix them
Common cropping mistakes include:
- Cropping too tightly and losing important context.
- Cropping to an aspect ratio that doesn’t fit the sheet’s layout.
- Inconsistent crops across multiple images, which creates a jarring visual rhythm.
- Cropping after resizing; changing the crop might distort the image’s focus. To fix these, plan your crop with a quick mock layout in mind, crop with intent, and verify the final display in both desktop and mobile views.
Best practices for sharing and collaborating
When sharing sheets with cropped images, communicate any layout changes in comments or changelogs so teammates understand the intent. Use version history to revert crops if the layout evolves. If you’re producing a shared dashboard, keep a consistent crop policy (e.g., always preserve the left edge for alignment) and document it in a notes section of the sheet. This ensures future collaborators can reproduce your visuals accurately.
Tools & Materials
- A computer with a modern browser(Google account access to Google Sheets.)
- Image to crop (URL or file ready for insertion)(Preferred in high resolution for better cropping results.)
- External image editor (optional)(Photoshop, Paint, or free online tools for pixel-precise crops.)
- Google Drawings (optional)(Alternative workflow for composing composite visuals.)
Steps
Estimated time: Total time: 10-15 minutes
- 1
Open your Google Sheet and insert the image
Navigate to Insert > Image, choose Image over cells or Image in cell, and place the image where you want it. This first step establishes the object you will crop and how it will relate to your data.
Tip: If you plan to crop heavily, place the image over cells for easier visual comparison with surrounding data. - 2
Select the image to activate editing tools
Click the image to reveal the editing toolbar. The Crop icon should appear on the toolbar; this is your entry point to cropping.
Tip: Ensure you’re editing the correct image if multiple visuals exist on the sheet. - 3
Click Crop and adjust handles
Click the Crop icon, then drag the handles to frame the desired area. Make sure you keep important details inside the crop window.
Tip: Use the corner handles for proportional resizing when necessary. - 4
Apply the crop
Press Enter to apply the crop. The image will be cropped to the selected area and will update in the sheet.
Tip: If you’re not satisfied, press Ctrl/Cmd+Z to undo and try a different crop. - 5
Fine-tune placement and size
After cropping, adjust the image’s position and size to fit the surrounding cells or headers without crowding text.
Tip: Hold Shift while resizing to keep aspect ratio consistent. - 6
Review on different devices
Open the sheet on another device to ensure the crop remains visually correct and readable across screens.
Tip: Property of image cropping may vary with screen scaling; verify in mobile view as well.
FAQ
Can you crop images that are inserted in cells in Google Sheets?
Yes, you can crop images anchored in cells by selecting the image and using the Crop tool from the toolbar, just like images over cells. The crop area applies to the visible portion of the image.
Yes, you can crop images within their cell anchors using the Crop tool in the toolbar.
What should I do if the crop tool isn’t visible?
Ensure the image is selected to reveal the editing controls. If the toolbar doesn’t show, try refreshing the page, disabling browser extensions, or trying a different browser.
If the crop tool isn’t visible, select the image again and refresh or switch browsers to access the editing controls.
Are there limits to how precisely I can crop in Sheets?
Sheets provides standard crop handles; for very precise crops, crop in an external editor before inserting or use Google Drawings as an intermediate step.
Crop precision is limited; use an external editor for pixel-perfect crops if needed.
Will cropping affect the image’s quality when shared?
Cropping in Sheets preserves the visible portion, but extremely large crops may affect sharpness on high-DPI displays. Start with higher-resolution images for better results.
Cropping may affect sharpness on some displays; start with high-resolution originals.
Can I crop multiple images the same way in a row?
Yes. Crop each image individually to ensure consistent framing, then use alignment guides to line them up across the sheet.
Crop each image consistently, then align them using the sheet’s layout guides.
Watch Video
The Essentials
- Crop with purpose to improve readability
- Use image over cells for more precise layout control
- Always verify crops on both desktop and mobile
- Keep a consistent crop ratio for dashboards
- Use undo when experimenting with different crops