How to Lock Cells in Google Sheets When Scrolling
Learn how to lock header rows and columns in Google Sheets so they stay visible while you scroll. This practical, step-by-step guide helps students and professionals manage large data with ease.

This guide shows you how to lock header rows or columns in Google Sheets so they stay visible as you scroll. You’ll follow simple menu-based steps, plus keyboard shortcuts and mobile tips, to keep essential labels in view while navigating large datasets. Perfect for students, professionals, and small business owners seeking reliable, repeatable scrolling navigation.
Why locking cells helps when scrolling
If you’re working with long data in Google Sheets, the header row is often the most important context. The question often is how to lock cells in google sheets when scrolling so titles, labels, and column headers remain visible as you move down the sheet. Locking, or freezing, preserves the top portion of the sheet while the rest scrolls. This makes it easier to compare values across rows, catch data entry errors, and maintain consistent column alignment. In practice, most users freeze the first row (or a few top rows) so that the header labels stay in view regardless of scrolling. You can also freeze a column to keep row identifiers visible when the dataset is wide. In this guide, we’ll cover desktop, mobile, and edge cases. The goal is to give you reliable, repeatable steps to implement this feature efficiently.
Desktop vs mobile: different routes to the same outcome
When you’re on a desktop computer, you’ll use the View menu to freeze panes. On mobile, the options live in the sheet’s menu, and you may see slightly different wording. The core idea remains the same: pin the rows and/or columns so they don’t scroll out of view. For the exact moment you need it, the phrase how to lock cells in google sheets when scrolling is a common search, and it’s precisely what this How To Sheets guide addresses with concrete steps and visuals.
Quick overview of freeze features in Google Sheets
Google Sheets offers several freezing options: Freeze 1 row, Freeze up to current row, Freeze 1 column, Freeze up to current column, and No rows/No columns to unfreeze. These options let you protect headers, identifiers, and critical labels as you scroll. The wording may vary by platform, but the effect is the same: a portion of the sheet remains stationary while the rest moves. Remember that you can combine freezes (e.g., top row and first column) for more complex layouts. This section lays the groundwork for the step-by-step instructions that follow.
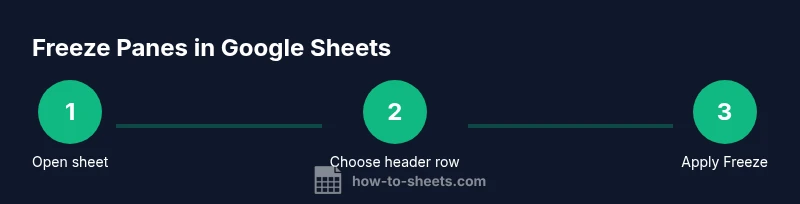
Step 1 — Open your Google Sheet and review headers
To begin, open the Google Sheet you plan to modify. Identify which row contains your headers (often row 1) and whether you want to freeze any columns in addition to the header row. Understanding the layout upfront helps ensure you select the correct freeze settings. If you’re unsure, take a quick look at how your data is organized and where scrolling would obscure important labels. This initial review is a small but crucial step in the process and sets the foundation for a clean lock.
Step 2 — Freeze the top header row(s)
Navigate to the View menu, then hover Freeze, and choose Up to current row (or Freeze 1 row, depending on your layout). This action pins the header row so it remains visible during vertical scrolling. Why do this? It keeps column titles in context, making data interpretation faster and reducing misreads. If you only need a single header row, Freeze 1 row is the simplest option; otherwise, choose Up to current row to lock multiple header rows.
Step 3 — Freeze the first column (if your data has row labels)
If your sheet includes a left-hand identifier (like names or dates) that you want to stay visible while scrolling horizontally, freeze the first column. Go to View > Freeze > 1 column (or Up to current column if you’ve selected a different column). This ensures that the row labels stay in view as you examine data across many columns. It’s especially useful in dashboards and budgets where context matters as you scroll.
Step 4 — Freeze additional rows beyond the header (for multi-row headers)
Some sheets use more than one header row (e.g., a two-row header with category labels). To freeze multiple header rows, select the row just below the bottom header row, then choose View > Freeze > Up to current row. This keeps all header rows visible. This technique is part of a practical approach to designing transparent, navigable data layouts for large spreadsheets.
Step 5 — Freeze additional columns (for wide datasets)
When your data extends far to the right, freezing extra columns helps keep key identifiers on screen. Place the cursor in the column immediately to the right of the last frozen column, then pick View > Freeze > Up to current column. This approach is especially handy for cost analyses, schedules, or inventory lists that run wide across the screen.
Step 6 — Test the freeze by scrolling
After applying freezes, scroll slowly to verify headers and any frozen columns stay visible. If headers disappear or identifiers scroll away, reassess which rows or columns were frozen. Testing is essential to confirm that the resulting layout matches your workflow and reduces the time spent searching for labels in large datasets. The test confirms the practical effect of how to lock cells in google sheets when scrolling.
Step 7 — Freeze in combination for dashboards and reports
For complex sheets, you may want both header rows and leftmost columns frozen. Use Freeze on both axes by applying the top rows first, then the first column. The combined freezes keep your most critical context visible, even when you’re navigating a dense dashboard. This strategy is popular for financial models and project trackers where you need persistent headers and identifiers as you explore data.
Step 8 — Unfreeze when you’re done or when layout changes
If your sheet’s structure changes, you’ll need to unfreeze before reconfiguring. Go to View > Freeze > No rows or No columns to remove all freezes. After that, reapply freezes as needed. Knowing how to quickly unfreeze helps avoid accidental layout mistakes and keeps your workflow nimble. This flexibility is central to maintaining usable Google Sheets workspaces.
Common pitfalls and troubleshooting
Misaligned freezes can happen if you freeze rows or columns that don’t align with your headers or labels. If you notice misalignment, unfreeze, reselect the correct target row/column, and reapply the freeze. On mobile, navigation is slightly different but the principle remains identical: keep your most-used headers and identifiers in view. If scrolling is still challenging, consider reorganizing your sheet so headers and labels are in consistent, clearly defined positions. Understanding how to lock cells in google sheets when scrolling becomes much easier with practice.
Authority sources and further reading
For deeper guidance, consult authoritative resources: https://support.google.com/docs/answer/181110?hl=en for freezing rows and columns in Google Sheets, https://www.wikipedia.org/wiki/Google_Sheets for an overview, and https://www.ed.gov/ as a general education resource. These sources help corroborate the practical steps described here and provide context for broader spreadsheet best practices.
Final remarks: making scrolling predictable with freezes
Locking cells in Google Sheets when scrolling is a foundational skill for data integrity and readability. Use the steps outlined, combine header and column freezes when needed, and always test the result. By following these practices, you ensure that essential labels stay visible, navigation remains intuitive, and your sheets support clear decision-making across students, professionals, and small businesses. The ability to control what stays put as you scroll is a simple but powerful enhancement to daily spreadsheet work.
Tools & Materials
- Device with internet access(Google Sheets access via a Google account)
- Google account(Needed to access Google Sheets)
- Web browser or Google Sheets app(Chrome, Edge, Safari, or the Google Sheets mobile app)
- Keyboard shortcuts cheat sheet (optional)(Print or save for quick reference)
- Second monitor (optional)(Easier to manage long sheets during freezes)
Steps
Estimated time: 8-12 minutes
- 1
Open the Google Sheet
Launch the Google Sheet you will modify and review the header structure. Identify which row contains headers and which columns should stay visible as you scroll. This initial setup ensures you apply freezes accurately.
Tip: Take a quick snapshot of the header row and note the exact row/column indices you’ll freeze. - 2
Select the header row(s) to freeze
Place your cursor in the row immediately below the header(s) you want to freeze, or select the header row itself. This sets the boundary for the freeze action. Freezing the correct rows ensures that the header information remains in view during vertical scrolling.
Tip: If you have multiple header rows, count them carefully before freezing. - 3
Apply Freeze to the top row
From the menu, choose View > Freeze > Up to current row (or Freeze > 1 row). This pins the top header so it stays visible while you scroll down. The exact wording may vary by device, but the outcome is the same: a fixed header.
Tip: Prefer Freeze > 1 row if you only need a single header row visible. - 4
Freeze the first column if needed
If your sheet has labels in the first column, freeze it to keep those labels in view during horizontal scrolling. Use View > Freeze > 1 column (or Up to current column if selecting a different boundary).
Tip: Combine with header freezes for dashboards that require both axes to stay fixed. - 5
Freeze additional header rows
For sheets with more than one header row, select the row below the last header and choose Freeze > Up to current row. This action ensures all header rows remain visible during vertical navigation.
Tip: Use a logical boundary between header and data when freezing multiple rows. - 6
Freeze additional columns for wide sheets
If you need left-side context while scrolling right, freeze the necessary columns by selecting beyond the last fixed column and choosing Freeze > Up to current column.
Tip: Avoid freezing too many columns; only the essential identifiers should stay pinned. - 7
Test the freezes by scrolling
Scroll through the sheet to verify headers and frozen columns stay visible. If anything moves unexpectedly, reassess which rows/columns are frozen and adjust accordingly.
Tip: Test across different data sections to ensure consistent visibility. - 8
Freeze on complex layouts
For dashboards or reports with multiple data blocks, freeze both rows and columns as needed. This provides persistent context across the entire sheet and improves readability.
Tip: Document the freeze boundaries so teammates know how to navigate the sheet. - 9
Unfreeze when finished or layout changes
If you must modify the structure, remove freezes by selecting No rows or No columns in the Freeze menu. Reapply as necessary after changes.
Tip: Unfreezing first prevents accidental misalignment during edits. - 10
Share and save your setup
After confirming freezes, save the sheet or share it with collaborators. A frozen header or column setup often improves teamwork by maintaining consistent context.
Tip: Include a brief note in the sheet about which rows/columns are frozen for new users.
FAQ
Can I lock multiple header rows at once?
Yes. Use Freeze > Up to current row, selecting the number of header rows you want to lock. You can adjust by unfreezing and re-freezing as needed.
Yes. You can lock multiple header rows by using the Freeze options and selecting the header rows you want to lock.
Can I lock columns as well as rows?
Absolutely. You can freeze both rows and columns to keep context for wide sheets. Choose Freeze > Up to current row or Freeze > 1 column as appropriate.
You can freeze both rows and columns to keep headers and labels in view.
How do I unlock all frozen panes?
Go back to the Freeze menu and select No rows or No columns to remove all freezes.
To unlock, choose No rows or No columns in the Freeze menu.
Does freezing affect performance?
Freezing itself has minimal effect on performance for typical sheets. Very large or complex sheets may render slightly slower when scrolling.
For normal sheets, freezes don't slow things noticeably; very large sheets may see minor slowdowns.
Can I freeze panes on mobile devices?
Yes, but steps differ slightly. Open the sheet, tap the menu, and choose Freeze panes or the appropriate option.
Mobile steps are similar but access through the app menu.
What if my header spans multiple rows?
Plan your header structure first. You can freeze up to rows you indicate, ensuring headers stay visible.
Plan and freeze the exact number of header rows you use.
Watch Video
The Essentials
- Freeze header rows to keep context while scrolling
- Use Freeze to pin necessary columns for horizontal navigation
- Test scrolling to verify headers stay visible
- Unfreeze and reapply as data layouts change
- Combine row and column freezes for complex sheets