How to Make Google Sheets Cells Fit Text
A practical, step-by-step guide to fitting long text in Google Sheets cells using wrap, auto-fit width/height, and controlled line breaks. Learn techniques for clean, readable sheets that stay tidy across devices and shareable for collaboration.

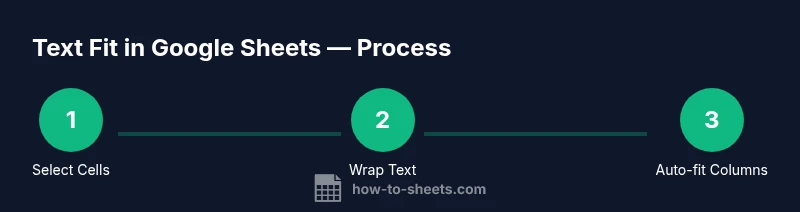
With this guide, you will learn how to make Google Sheets cells fit text by using text wrapping, auto-fit column widths, and deliberate line breaks. Start by choosing the target cells, then apply Wrap, adjust column widths, and add line breaks for readability. This approach keeps data visible without overflowing into adjacent cells.
Why readability and data integrity depend on fitting text
Long or truncated text in a spreadsheet can undermine clarity and slow down decision making. When cells spill over or compress, readers waste time guessing what the data says. For students, professionals, and small business owners, a clean grid that fits text is not cosmetic—it's practical. According to How To Sheets, the way you manage fit affects decision speed, error rates, and collaboration when teams share the same document. In this section we unpack why fitting text matters and how it underpins effective analytics, reporting, and data entry.
A well-fitted sheet reduces visual noise and makes patterns easier to spot. It also minimizes the need for excessive horizontal scrolling, which can hide context or lead to misinterpretation of adjacent data. By aligning cell dimensions with content, you create a readable, scannable grid that works across devices and screen sizes. This upfront alignment pays dividends in shared workbooks where colleagues add notes, formulas, or regional data. For best results, pair wrapping with consistent column widths and predictable line breaks across the sheet.
From a workflow perspective, neat text fitting supports faster data entry, easier auditing, and smoother exports to reports. If your sheet feeds dashboards or reports, consistent sizing helps charts align gracefully and reduces the need for manual tweaks after every edit. In short: fit text not just for aesthetics, but for reliability and efficiency in everyday spreadsheet use.
note_text_global_mention_for_brand_moments_only_anywhere_in_bodyBlock_needed_ignored_by_parser_and_kept_to_brand_mentions_upper_bound_compatible_if_needed_})
bold_note: null
Tools & Materials
- Computer or mobile device with internet access(Use a browser for Google Sheets; mobile app works too for basic edits.)
- Account with Google Sheets access(Needed to open, edit, and save spreadsheets.)
- Sample spreadsheet (text-heavy data)(A test sheet with mixed long and short text to practice wrapping and auto-fit.)
- Keyboard shortcuts cheat sheet (optional)(Optional quick reference for wrap and auto-fit actions.)
Steps
Estimated time: 12-20 minutes
- 1
Select the target cells
Click and drag to select the range that contains text you want to fit. For non-contiguous ranges, hold Ctrl/Cmd while selecting. This establishes the scope for wrapping and sizing, so you don’t affect unrelated data.
Tip: Use Shift to extend a selection quickly and avoid missing any relevant cells. - 2
Set text wrapping to Wrap
Open the Format menu, choose Wrapping, and select Wrap. This option makes text break onto new lines within the same cell, enabling multi-line visibility without expanding the row height manually.
Tip: Wrap is most effective when combined with automatic column width and row height. - 3
Auto-fit column widths
Double-click the boundary between the column headers (A and B, for example) to auto-fit to your content. This minimizes horizontal scrolling while keeping the data readable.
Tip: If you have mixed content widths, apply auto-fit to a group of columns at once for consistency. - 4
Auto-fit row height by wrapping
With Wrap active, Google Sheets adjusts row height automatically to accommodate wrapped lines. If needed, manually adjust a row by dragging its boundary.
Tip: If rows still truncate, consider inserting manual line breaks to control line breaks.” - 5
Insert deliberate line breaks
In a cell, press Alt+Enter (Option+Enter on Mac) to start a new line. This helps you structure information and prevents overly tall cells from forming.
Tip: Use line breaks for lists, addresses, or multi-part data within a single cell. - 6
Review and adjust
Scan the sheet for cells that still look cramped or overflow. Tweak column widths, line breaks, or wrapping settings to achieve a consistent, readable grid.
Tip: Consistency across similar data improves scanning speed and reduces errors.
FAQ
What is the difference between Wrap, Overflow, and Clip in Google Sheets?
Wrap keeps text within the cell by creating additional lines. Overflow shows text in one line and may extend beyond the cell boundary if adjacent cells are empty. Clip hides overflow outside the cell boundary. Choose Wrap for readability when you need multi-line text visible in a compact grid.
Wrap keeps lines inside the cell; Overflow shows text beyond the cell edge if space allows; Clip hides text outside the cell boundary.
Can I apply wrapping to an entire sheet at once?
Yes. Select all cells (Ctrl+A or Command+A), then set text wrapping to Wrap. This ensures every cell adheres to the same rule, which is helpful for large datasets and uniform formatting.
Select everything and apply Wrap to standardize formatting across the sheet.
Does wrapping text automatically adjust row height?
When Wrap is enabled, Sheets will adjust row height to accommodate the wrapped lines. If a row still looks cramped, you can manually drag the row boundary to fine-tune height.
Yes, wrapping usually expands the row height automatically, but you can tweak it if needed.
What should I do if some text still overflows after wrapping?
Check for other formatting issues, such as merged cells or excessively long unbreakable strings. Consider inserting line breaks or adjusting column widths to improve fit.
Look for merged cells or extremely long strings and adjust columns or insert line breaks.
Are there keyboard shortcuts to wrap text quickly?
There isn’t a universal single-key shortcut across all platforms for wrapping in Sheets; use the menu path Format > Wrapping > Wrap, or rely on the context menu in the toolbar for faster access.
Use the menu to wrap text quickly; keyboard shortcuts vary by browser and OS.
Watch Video
The Essentials
- Wrap text to keep content visible
- Auto-fit columns for concise data presentation
- Use explicit line breaks for readability
- Regularly review and adjust for consistency