How to Remove Smart Chips in Google Sheets
Learn how to remove smart chips in Google Sheets with clear steps, tips, and best practices. This guide covers single and bulk removal, troubleshooting, and when to keep smart chips for efficient data work.

If you need to clean up your sheet, you can remove smart chips in Google Sheets by editing the cell containing the chip and choosing Remove from the chip’s contextual menu. For a single chip, this is quick; for many chips, expect to repeat the action or paste plain text. The key requirements are access to the sheet and the chip-visible cell. This method preserves your sheet structure while eliminating the overlay.
What are Smart Chips in Google Sheets?
Smart chips are interactive references embedded within Google Sheets cells that link to people, files, calendar events, or other Google Workspace items. When a chip is present, you’ll see a rounded, clickable badge within the cell. They enable quick access to related context without jumping to another app, streamlining collaboration and data context. However, chips can clutter a sheet, obscure plain data, or complicate exports. If you’re asking how to remove smart chips in google sheets, the straight answer is: remove the chip overlay by editing the cell and selecting Remove from the chip menu. This keeps your existing data intact while clearing the interactive element. For students, professionals, and small business owners, understanding this distinction helps you manage data presentation without losing the actual values in your cells.
Why Remove Smart Chips?
There are several reasons to remove smart chips from a Google Sheet. Visual clutter reduces readability, especially in dashboards or printed reports. Some users prefer plain-text cells for simplicity, easier copy/paste, and cleaner version history. If a chip references a person or file that is no longer relevant, removing it reduces confusion. Finally, when preparing data for external sharing, chips can complicate data parsing or automation. In short, removing chips can improve clarity, reduce risk of stale references, and streamline downstream workflows while preserving the underlying cell content.
Quick Manual Removal: Remove a Single Chip
To remove a single smart chip in Google Sheets:
- Locate the cell that contains the chip.
- Click the chip to reveal its context menu.
- Select Remove from the chip’s menu.
- Confirm removal if prompted.
- Save or continue editing. If there are multiple chips, repeat these steps for each chip.
Pro tip: If you accidentally remove a chip, you can undo with Ctrl/Cmd+Z immediately. This is the fastest way to revert a mistaken removal while you review the rest of the sheet.
Removing Chips in Batches: Practical Approaches
Google Sheets does not provide a single button to remove all chips across a sheet in one go. Practical approaches include:
- Removing chips one by one by repeating the single-chip steps for each cell.
- Converting affected cells to plain text by editing the cell and removing the chip, then re-typing or pasting plain data.
- Using a version history backup to identify chips and selectively remove them in the same manner. If you routinely work with many chips, consider structuring data in a way that minimizes chip usage in bulk sections.
While these methods require manual work, they give you control over exactly which chips are removed and prevent unintended data loss.
How Smart Chips Work and What Gets Affected
Smart chips are lightweight interactive elements that live inside a cell. Removing a chip affects only the chip overlay and its interactive functionality. The underlying cell value, if you had typed or pasted plain text, generally remains accessible as plain text after chip removal. If the chip was the cell’s primary content, you may be left with the plain value or a blank cell depending on how the chip was stored in that cell. After removal, verify the cell shows the expected content and that any dependent references or formulas still behave as intended.
How to Preserve Data After Chip Removal
To minimize risk when removing chips:
- Always create a backup copy of the sheet before editing.
- Use Version history to revert if needed.
- After removing chips, scan the sheet for affected formulas or references that relied on the chip’s linkage.
- If a chip provided contextual data (like a file link), consider replacing it with a plain hyperlink or a note in an adjacent cell for continued context.
- Document the change in your project notes to assist teammates in understanding the update.
Troubleshooting Common Issues After Removal
If chips reappear unexpectedly, consider these checks:
- Paste data into cells using Paste values only to avoid reinserting chips from copied sources.
- Ensure you’re editing the correct cells; chips can exist in multiple sheets. Use the sheet tab navigation to review each tab.
- If you still see a chip after removal, press Undo to restore and re-remove with exact focus on the chip-containing cell.
- Review any Apps Script or add-ons that might recreate chips during data import or automation tasks.
These steps help you pinpoint why chips show up again and how to stabilize your sheet after removal.
When to Keep Smart Chips or Alternatives
There are scenarios where chips remain valuable: when they provide dynamic, up-to-date context (e.g., a teammate’s contact, a referenced file). If you remove chips, consider replacing them with stable, plain-text references or links in adjacent cells to retain context without the interactive burden. The choice depends on your workflow: if you rely on quick actions from chips, keep a subset; if you prioritize clean data exports, favor plain text and documented references.
Tools & Materials
- Google account with edit access(You must have permission to modify the sheet containing smart chips)
- Web browser with Google Sheets open(Chrome recommended; ensure the browser is up to date)
- Target Google Sheet (with smart chips)(Create a backup before editing)
- Backup method (local copy or version history)(Use File > Version history > See version history to revert if needed)
- Optional: Google Apps Script editor(Only if you plan to script batch removal and are comfortable with scripting)
Steps
Estimated time: 15-25 minutes (depends on the number of chips in the sheet)
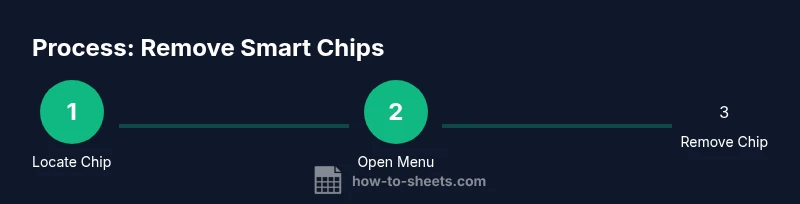
- 1
Locate a chip-containing cell
Scan your sheet to identify cells that display smart chips. Chips appear as rounded, interactive badges within a cell. Use navigation shortcuts or manual review to locate chips across all sheets in your workbook.
Tip: Tip: If you’re unsure, use the keyboard to move cell by cell and visually scan for chips. - 2
Select the chip to reveal options
Click directly on the chip to reveal the chip’s contextual menu. This menu is where you access the Remove option for that chip.
Tip: Tip: If clicking the chip doesn’t show options, try selecting the entire cell and press Backspace to clear content; chips may require a direct click. - 3
Choose Remove from the chip menu
In the chip’s menu, click Remove to detach the chip from the cell. This action preserves the cell’s plain content, if any, while removing the interactive overlay.
Tip: Tip: If you don’t see Remove, try right-clicking the chip to access more options or use the Edit > Clear menu as a fallback. - 4
Confirm removal when prompted
If Google Sheets prompts for confirmation, confirm the removal. This step prevents accidental deletions and ensures the chip is completely removed from the cell.
Tip: Tip: Use Undo (Ctrl/Cmd+Z) immediately if you change your mind. - 5
Repeat for additional chips as needed
Continue locating and removing chips in other cells following the same steps. There is no global bulk removal toggle, so repetition is required for multiple chips.
Tip: Tip: Work in sections (e.g., by sheet) to stay organized and minimize errors. - 6
Verify the sheet content after removals
Go through the sheet to ensure all chips have been removed and that the remaining data displays correctly. Check formulas and references for unintended changes.
Tip: Tip: Use the sheet’s filter or search to scan for remnants of chip-like formatting.
FAQ
What are smart chips in Google Sheets?
Smart chips are interactive references within cells that link to people, files, calendars, or other Google Workspace items. They provide quick access to contextual data without leaving the sheet.
Smart chips are interactive references in a cell that link to people or files, giving quick access to context.
Can I remove all smart chips at once?
There is no built-in bulk delete option for all chips in Google Sheets. Chips are removed individually by editing the cell and selecting Remove from the chip menu.
There’s no single bulk delete for chips; you remove them one by one from each cell.
Will removing chips affect the data behind them?
Removing a chip clears the interactive overlay, and the cell content may become plain text. The visual chip is gone, but any non-chip data in the cell remains as entered.
Removing the chip removes the interactive overlay, leaving the plain cell content if present.
Why do chips sometimes reappear after removal?
Chips can reappear if data from another source with chips is pasted, or if an automation/script recreates chips during data import. Use Paste values only and review scripts if you have them.
Chips might reappear after pasting or automation; use paste values only to avoid re-adding them.
Is there a setting to disable smart chips globally?
There isn’t a universal switch to turn off smart chips. Removal is manual, and you can avoid inserting them in new data if you prefer plain text.
There’s no global disable switch; you remove chips manually or avoid adding them.
How can I preserve context after removing chips?
Replace important chips with plain-text references or adjacent notes, so teammates retain context without the interactive features.
Replace chips with plain text notes or links to keep context after removal.
Watch Video
The Essentials
- Identify chips before removal to target the right cells
- Remove chips individually to maintain data integrity
- Always back up the sheet before editing
- Verify results and use version history if needed