Import CSV to Google Sheets: A Practical Step-by-Step Guide
Learn how to import CSV to Google Sheets with a step-by-step approach, including upload, URL imports, locale settings, and post-import cleanup for students and professionals.

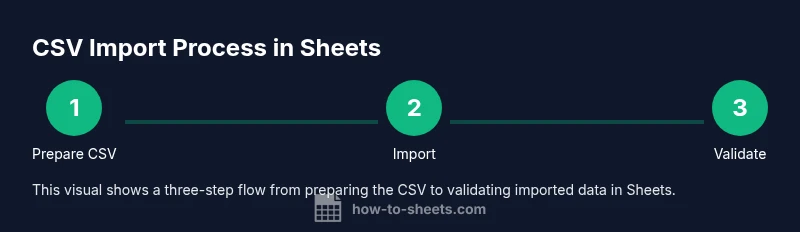
You will learn to import a CSV file into Google Sheets, preserving headers, data types, and formatting. You’ll need a CSV file and a Google account. We cover manual uploads, imports from URLs or Drive, and basic data-cleaning steps so large datasets are ready for analysis. This quick method supports big data, with options to tailor delimiters and import location.
Why import csv to google sheets matters
Importing CSV data into Google Sheets is a foundational skill for students, professionals, and small business owners who rely on quick data analysis and collaboration. A CSV is a simple, portable table of values; Google Sheets acts as a flexible workspace for cleaning, transforming, and sharing that data. According to How To Sheets, mastering CSV imports unlocks faster reporting, smoother collaboration, and a repeatable workflow for recurring datasets. In this guide, you’ll see how to import csv to google sheets efficiently, helping you move from raw data to actionable insights with confidence.
Prepare your CSV for import: encoding, delimiters, and cleanliness
Before you import, ensure the CSV is well-formed. Check that the file uses UTF-8 encoding to preserve special characters and avoid garbling non-English text. Confirm the delimiter (comma by default, but semicolons or tabs are common in European datasets). Make sure the first row contains headers and that there are no stray line breaks in the data. Simple data-cleaning steps—such as removing trailing spaces and standardizing date formats—save time during the import and subsequent analysis.
Import paths in Google Sheets: upload, URL, or Drive
Google Sheets supports multiple import paths to fit your workflow. You can upload a local CSV file directly or pull one from a URL; you can also import from Google Drive by selecting a file stored there. Each path creates a new sheet or replaces existing content depending on your settings. Understanding these options helps you minimize disruption to current workbooks while keeping historical data intact.
Import from URL or Drive: practical steps
If your CSV is hosted online, paste its URL in the Import dialog and let Sheets fetch the data. For Drive, locate the CSV, choose Import, and decide whether to insert a new sheet, replace current data, or append to existing content. This flexibility is handy when collaborating with teammates who share links or folders. Expect a brief processing moment as Sheets reads the file.
Import options and how they shape the result
The Import dialog offers several settings that affect how data lands in Sheets. Choose the delimiter to match your CSV; pick the locale to ensure date, number, and decimal formats render correctly; and decide whether to convert text to numbers or keep all data as text. These options prevent misinterpreted values and maintain your dataset’s integrity. If headers exist, Sheets can use them as column names automatically.
After import: headers, formatting, and data types
Once the data appears in Sheets, check that headers align with columns and that numeric values are recognized as numbers rather than text. Apply number formatting as needed, and adjust column widths for readability. If dates or times look off, you may need to reformat cells or re-import with adjusted settings. A quick pass to validate a sample of rows helps catch errors early.
Cleaning data post-import: trimming, splitting, and normalizing
Real-world CSVs often require post-import cleanup. Use built-in Sheets features to trim spaces, split combined fields, and normalize inconsistent values. Functions like TRIM, SPLIT, and VALUE can standardize text to numbers and dates. Create a small, repeatable workflow for common cleanup tasks, so future CSV imports take less time and produce more reliable results.
Automate future CSV imports: schedules, scripts, and templates
If you regularly receive CSV data, automate the process to save time. Use Apps Script to schedule imports or set up a reusable import template that preconfigures delimiters, locale, and target sheets. You can trigger scripts from a time-based trigger or a custom menu. Automations reduce manual steps and ensure consistency across updates, which is especially valuable for dashboards and reporting.
Troubleshooting and best practices for CSV imports
Expect occasional issues—special characters, mixed data types, or mismatched headers can throw off an import. Keep a small sample CSV for testing, and validate results in a separate sheet before integrating into reports. Always maintain a clean origin file, and document the import steps so teammates can reproduce results. With a disciplined approach, importing CSV files becomes a reliable, repeatable process.
Quick tips to master CSV imports in Sheets
- Always back up data before replacing contents in your target sheet.
- Use a dedicated sheet for imports to isolate raw data from calculations.
- Verify locale settings if you work with dates and numbers from different regions.
- Save as a template for recurring datasets to speed up future imports.
- Keep an eye on hidden characters, such as zero-width spaces, that can sneak into CSVs.
Tools & Materials
- CSV file(Source data in CSV format (.csv))
- Google account(Access Google Sheets and Drive)
- Web browser(Chrome recommended; keep updated)
- Stable internet connection(Needed for online editing)
- Optional: text editor or data-cleaning tool(Prepare or sanitize data before import)
Steps
Estimated time: 15-30 minutes
- 1
Open a new Google Sheet
Navigate to Google Sheets and create a new blank spreadsheet for your import. This creates a clean workspace where the CSV will land. Naming the file clearly helps you distinguish it from other datasets.
Tip: Tip: Use a descriptive sheet name like “Project_X_Inventory_2026” to stay organized. - 2
Choose the Import option
In the Google Sheets menu, select File > Import to open the Import dialog. This is the central hub for all import methods, including CSV uploads and external sources.
Tip: Tip: If you plan to reuse this workflow, note the chosen import settings for future templates. - 3
Select your CSV source
Choose Upload to bring in a local CSV file or paste a URL to import from online sources. You can also pick Drive to import a file stored in Google Drive. The source choice determines available options and the subsequent layout.
Tip: Tip: Drag and drop a large file to speed up the upload process. - 4
Configure import settings
Set the import destination (Create new sheet, Replace current sheet, or Append to existing data) and confirm the delimiter and locale. These choices directly affect how data types and formatting appear after the import.
Tip: Tip: Use correct locale if your data contains dates or decimal formats from different regions. - 5
Preview and place data
Review the preview to ensure headers align and values appear correctly. If something looks off, cancel and adjust delimiter/locale before re-import. This prevents wild data misplacement.
Tip: Tip: Check a few sample rows for numeric, date, and text fields. - 6
Validate, format, and adjust
After import, verify headers, number formats, and date representations. Apply necessary number formatting and widen columns for readability. Correct any misinterpretations before proceeding with analysis.
Tip: Tip: Use conditional formatting to quickly spot anomalies in the first dozen rows. - 7
Save and reuse the workflow
Document the steps you followed or turn the flow into a template. Automate repetitive imports with Apps Script or data import templates for consistency.
Tip: Tip: Create a dedicated template sheet with preconfigured headers and formats.
FAQ
Can I import multiple CSV files into a single Google Sheets document?
Yes. Import each file into its own sheet or concatenate data using scripts, then manage the combined dataset with filters or query functions. Plan your sheet structure in advance to avoid clutter.
Yes. You can import each file into separate sheets or merge them with scripts, then organize with filters.
What if the CSV uses a different delimiter than a comma?
Use the Import dialog to select the correct delimiter (semicolon, tab, etc.). Mismatched delimiters are a common cause of broken columns, so adjust before finalizing the import.
Choose the right delimiter in the Import dialog to fix column alignment.
How can I preserve date formats and numbers during import?
Set the appropriate locale in the Import dialog and review date and number formatting after import. If needed, reformat cells or adjust settings and re-import a small sample to confirm.
Set the locale and adjust formatting after import to keep dates and numbers correct.
Can I import CSV data directly from a URL?
Yes. Use Import > URL and provide the link. Sheets will fetch and populate data, provided the URL is accessible and the content is in a compatible CSV format.
Yes, you can import from a URL by using the Import from URL option.
Why are some numbers treated as text after import?
This often happens due to leading zeros, long numeric strings, or locale settings. Use VALUE to convert text to numbers or re-import with correct formatting.
Numbers may appear as text due to locale or formatting; convert if needed.
Is there a size limit for CSV imports in Sheets?
Google Sheets handles large datasets, but performance depends on browser and file size. For very large files, split the CSV or import in chunks and verify results incrementally.
Large CSVs can slow down Sheets; consider chunking the import.
Should I always back up before importing?
Yes. Backing up helps you recover quickly if the import overwrites data. Maintain a copy of the original CSV and a versioned sheet.
Always back up before making bulk data changes.
Watch Video
The Essentials
- Import CSV to Google Sheets via File > Import.
- Choose the correct delimiter and locale to preserve data integrity.
- Validate headers and formatting after import.
- Use templates or Apps Script to automate recurring imports.