Google Sheets Lock Cell: Step-by-Step Protection Guide
Master how to lock cells in Google Sheets, protect ranges, and manage permissions for safe collaboration with practical steps, examples, and best practices.

You will learn how to lock cells in Google Sheets by protecting ranges, setting who can edit, and testing protections. This guide covers when to lock, how to apply protections, and best practices for collaborative work. We’ll highlight common pitfalls and show how to verify locks both inside the editor and for external viewers. According to How To Sheets, protecting a range is the core tool for safe collaboration, and it aligns with broader sheet protection strategies.
Understanding the concept of google sheets lock cell and protections
In Google Sheets, locking a cell means securing the content against edits by unauthorized users. The practical mechanism is protecting a range or an entire sheet. When you protect a range, you decide exactly which cells are locked and who may modify them. The phrase google sheets lock cell is common in tutorials because the term captures the outcome: edits to those cells are restricted while others can still view the data. According to How To Sheets, protecting a range is the core building block of safe collaboration, and it directly ties to the broader feature called sheet protection. How To Sheets Analysis, 2026 notes that teams that implement range protections experience fewer accidental edits and clearer ownership of data. The key is to distinguish between lock status (read-only for unauthorized users) and visibility (data remains visible to all allowed viewers). For most projects, you’ll lock only the cells that hold formulas, essential parameters, or sensitive values, while leaving input cells unlocked for teammates. This approach minimizes friction while preserving data integrity.
Why locking cells matters in collaborative projects
Locking cells is not about hiding information; it’s about controlling who can change what. In shared workbooks, locked cells help preserve formulas, critical references, and baseline data from accidental edits. When you apply protection thoughtfully, you reduce the risk of data corruption and keep collaborators focused on their specific tasks. The benefits go beyond protection: clear ownership trails, easier auditability, and more predictable workflow. How To Sheets emphasizes that well-planned protections reduce back-and-forth edits and confusion, especially on larger sheets with multiple editors. In practice, you’ll balance accessibility with guardrails, ensuring essential fields stay stable while allowing teammates to input where appropriate.
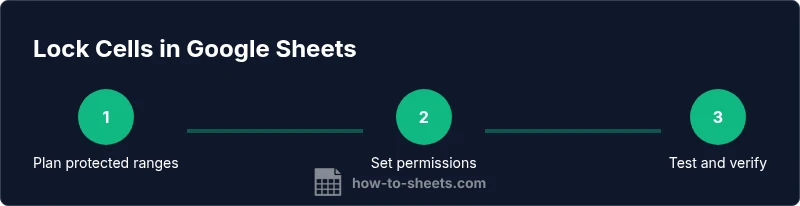
Planning protected ranges: what to lock
Begin with a simple map of your sheet. Identify cells that contain formulas, constants, or reference data that should not drift. Consider separating inputs from calculations by placing input fields in clearly designated zones that are left unlocked. Create a short checklist: which rows or columns require protection, who should have edit rights, and how you’ll communicate edits to the team. Planning ahead prevents over-locking, which can slow down collaboration. For teams using How To Sheets guidance, a lightweight planning phase can save hours of post hoc fixes and reduce support requests later in the project.
How to apply protection to a single cell or small range
The quickest way to lock a single cell is to protect the range that contains it. Start by selecting the cell or range, open the Protect Range panel, and assign the desired permissions. You can also name the range for easier reference in large sheets. When you save the protection, only users with explicit permission can edit that area. This method is ideal for keeping key constants or formulas intact while allowing colleagues to update other areas. If you manage many small ranges, grouping related cells into a named range helps you manage permissions more efficiently.
Managing permissions for protected ranges
Permissions are the core of sheet protection. In Google Sheets, you can designate specific people who can edit protected ranges, or you can restrict edits to only you as the owner. You can also switch the range to “Only you” temporarily during a critical update. Always verify permissions by asking a teammate who should be restricted to attempt an edit. Clear communication about who can edit which ranges minimizes friction and confusion.
Locking multiple cells efficiently
For multiple cells or larger blocks, protect a broader range instead of many tiny protections. You can protect a column, a block of rows, or a complete range, then tailor permissions so only certain users can modify that area. If your sheet uses formulas across ranges, be mindful that protecting a range containing a formula will prevent edits to that formula in all impacted cells. In some cases, split complex logic into separate sheets to simplify protection management.
Best practices for teams and collaboration
Adopt a consistent convention: mark protected areas with visible labels, use named ranges, and document the protection rules in a shared readme. Regularly audit protections after major edits or onboarding new collaborators. Limit the number of protected ranges to what’s truly necessary to maintain performance and reduce accidental locks. Encourage contributors to request access when they need to make changes, instead of bypassing protections. How To Sheets’s guidance suggests periodic reviews of permissions and ranges to adapt to evolving project needs.
Troubleshooting common issues with locked cells
If edits fail for expected users, recheck the protection scope and permission list. Ensure you’re editing the correct range and that the user accounts are properly included. If you still can’t change a cell, verify that you’re not viewing a protected copy (e.g., a duplicated sheet). Sometimes changes are blocked by an entire sheet protection rather than a specific range. Finally, confirm you’re using the latest browser version and that the sheet is not in view-only mode due to sharing settings.
Alternatives and caveats: protecting vs hiding formulas
Protection locks edits but does not hide content; users can still view protected data if they have view access. If you must hide sensitive formulas, consider moving them to a separate sheet with protective access, or use script-based solutions with caution, as they may complicate maintenance. Always balance protection with usability to avoid impeding legitimate work.
Quick checks to verify locks are working
After setting protections, simulate edits from a non-privileged account and from an invited collaborator with restricted access. Verify that only allowed areas remain editable and that locked cells remain intact. Keep an eye on accidental unlocks during sheet duplication or copy-paste actions. Regularly confirm that the edit permissions align with project roles and current team members.
Tools & Materials
- Google account with edit access(You must have edit rights to set protections on the sheet.)
- Device with internet and a modern browser(Chrome is recommended for optimal performance with Google Sheets.)
- The target Google Sheet(Ensure you own the sheet or have the necessary permissions to modify protections.)
- Optional: a simple protection plan doc(Jot down which cells are locked and who can edit for onboarding.)
Steps
Estimated time: 15-25 minutes
- 1
Open the sheet and select the target range
Open the Google Sheet you want to protect. Use your mouse to select the exact cells or range you want to lock, including a single cell if needed. If you’re protecting a large block, consider using the name box to help manage the range.
Tip: Use Shift+Click to quickly select a continuous range. - 2
Open the Protect range dialog
From the menu, go to Data > Protected sheets and ranges. This opens the panel where you can define the protected area and set permissions.
Tip: If you’re protecting a whole column, select the column header before opening the panel. - 3
Define the range and choose protection type
Enter the range you selected or confirm it. Choose whether to protect the range only or the entire sheet. You can assign a custom description to remind you why this protection exists.
Tip: Naming the range helps you locate it later when editing permissions. - 4
Set who can edit the range
Click 'Set permissions' and pick who can edit. You can restrict to specific people or to “Only you.” For shared projects, consider enabling a few trusted editors.
Tip: Avoid giving edit access to everyone; start with a narrow list and expand if needed. - 5
Save and apply the protection
Click Done to save the protection. The protected cells will show a shield icon, indicating they’re locked from edits by non-privileged users.
Tip: Document this in your team notes so others understand the shield indicators. - 6
Test the protection
Log in with an account that should be restricted and attempt to edit the protected range. If edits fail, the protection is working as intended. If you can edit, revisit the permissions.
Tip: If testing with external collaborators, use a test account to avoid interrupting real work.
FAQ
What does locking a cell do in Google Sheets?
Locking a cell uses a protected range to prevent edits by non-authorized users. View access remains, but changes are blocked unless permissions are granted. This helps maintain data integrity in collaborative work.
Locking a cell means it can’t be edited by people who aren’t allowed to change it, while they can still view it.
How do I lock a single cell in Google Sheets?
Select the cell, choose Data > Protected sheets and ranges, specify the cell as the protected range, and set who can edit. Save to apply the lock. You’ll see a shield icon indicating protection.
You lock a single cell by protecting that range and granting edit access only to approved people.
Can I lock multiple cells but allow some users to edit?
Yes. Protect a larger range or multiple ranges and customize permissions for specific users. This lets you lock the core data while enabling others to modify designated input areas.
Yes, you can lock a block and give edit rights to certain users for that area.
Will protection lock formulas?
Protecting a range that includes formulas prevents edits to those formulas unless you grant permission. It doesn’t hide the formulas or data from view unless you restrict the sheet more broadly.
Protection stops edits but doesn’t hide formulas unless you restrict access further.
What if I forget who can edit a protected range?
Open the Protected ranges panel again to review and adjust permissions. If you’re the owner, you can reassign access or remove protection as needed.
You can review and adjust permissions by reopening the protection settings.
How can I test that a protected range is effective?
Try editing the protected cells from a non-privileged account or use a collaborator account with restricted access. If edits fail, the protection is working as intended.
Test edits with a user who should be restricted to confirm locks are effective.
Watch Video
The Essentials
- Lock only what needs protection
- Assign precise edit permissions
- Test protections with different accounts
- Prefer named protected ranges for clarity
- Regularly audit permissions and ranges