How to Block a Google Sheet: A Practical Guide
Learn how to block a Google Sheet by applying Protect Sheet and Protect Ranges, manage editors, and test protections with a practical, step-by-step guide.

Blocking edits in Google Sheets is possible with Protect Sheet and Protect Ranges. Start by deciding whether you want to lock an entire sheet or a specific range, then specify who may edit. This approach preserves data integrity while enabling safe collaboration. As the owner, you can revert permissions later and grant exception editors for essential changes. In Google Sheets, protection is enforced in real-time across devices, with caveats for linked data or scripts.
Why block a Google Sheet
In collaborative environments like classrooms, offices, or small businesses, preventing accidental edits protects data accuracy and workflow. A misplaced change to a formula, a mis-typed value, or an unintended deletion can ripple through a project and create confusion. Blocking edits lets you lock critical sections while still allowing teammates to view or contribute in approved areas. The best practice combines clear ownership, documented permissions, and a plan for updating protections when processes change. According to How To Sheets, this discipline is a cornerstone of reliable spreadsheets and collaborative work. By outlining who can edit what, you reduce risk and shorten the path from data entry to trusted outputs.
Protection levels explained
Google Sheets offers several layers of protection, and choosing the right one is essential for balancing safety with collaboration. Sheet protection locks an entire tab, protecting every cell unless exceptions are granted. Range protection targets a specific block of cells, leaving unrelated areas editable. Protecting the entire workbook is more restrictive and can complicate sharing unless you regularly adjust permissions. The trade-off is clarity versus flexibility: broader protections reduce the chance of accidental edits but require more coordination with editors. How To Sheets Analysis, 2026 notes that teams frequently use a mix of sheet and range protections to cover both sensitive formulas and routine data entry. Understanding these options helps you tailor protections to your workflow.
When to block vs when to share
Not every sheet needs the same level of protection. If a sheet contains finalized budgets or graded assessments, blocking edits for most users while allowing a few trusted editors makes sense. Conversely, dynamic collaboration sheets—where multiple people update entries in real time—benefit from lighter protection or clearly defined protected areas. Establish a policy for who can edit critical sections and who can only comment or view. The goal is to minimize error potential without slowing down productive teamwork. In practice, many teams combine protected ranges for formulas with a protected sheet for sensitive tabs, then rely on sharing settings to manage broad access. This approach is aligned with best practices discussed by How To Sheets.
Step-by-step overview of the protection workflow
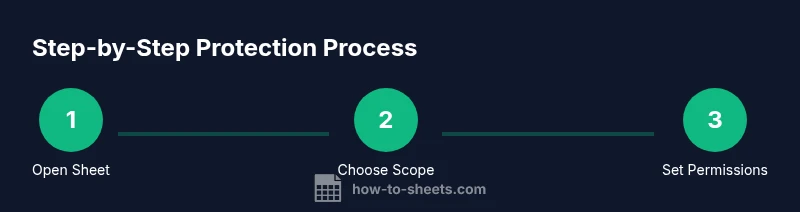
Applying protection in Google Sheets follows a logical sequence: decide what to protect, open the protection tool, select the scope, assign editors, and verify the outcome. Start by identifying the cells or tab that need to be locked. Then access the protection feature, choose either a sheet or a range, and confirm the exact area. After that, specify the editors who can bypass the lock, and finally save your settings. A quick test with a non-editor account confirms the protection works as intended. The How To Sheets team emphasizes documenting each protection rule so future changes are easy to track and audit.
Common pitfalls and how to avoid them
- Locking yourself out: If you remove your own editing rights, you may not be able to revert changes. Always leave at least one trusted editor as a backup.
- Over-restrictive rules: Too many protected ranges can hinder legitimate work; start with essential sections and expand later.
- Ignoring data sources: If your sheet pulls data from external sources or scripts, protections may not apply to every update; test with linked actions.
- Inconsistent naming: Name protections descriptively (e.g., "Budget Sheet - Formulas Locked") to avoid confusion when you revisit permissions.
- Poor testing: Always validate protections by signing in as a different user to confirm access levels.
Testing protections and validating access
Testing is the final quality check before releasing a protected sheet to a team. Create at least one test user account or use an incognito window to simulate an editor’s access. Attempt edits in protected areas and verify that only allowed editors can modify them. If you encounter unexpected behavior, revisit the protected range or sheet settings and correct the scope or editors. Document the test results and keep a changelog for future adjustments. This practice aligns with the How To Sheets guidance on reliable collaboration.
Advanced options: protecting with conditional access and sharing settings
Beyond basic protection, you can layer in conditional sharing to accommodate different project phases. For example, you might restrict editing during a budget review while enabling read-only access for stakeholders. Combine protection with Google Drive sharing controls to ensure only invited collaborators can open or edit the file. If your organization relies on a Google Workspace environment, consider domain-based restrictions and admin-managed access lists to maintain governance. The How To Sheets team notes that combining protection with disciplined sharing policies yields the strongest defense against accidental or unauthorized changes.
Tools & Materials
- Google account with edit access to the Sheet(You must be able to modify protections in the Sheet.)
- Supported web browser(Chrome recommended for best experience.)
- Target Google Sheet URL or file in Drive(Have the file open or ready to select.)
- Backup copy of the sheet(Optional but recommended before making changes.)
Steps
Estimated time: 10-15 minutes
- 1
Open the target Google Sheet
Open the Google Sheet you want to protect and confirm you have edit access. Make sure you’re logged in with the correct account and that the data you plan to lock is visible.
Tip: Verify you can access the sheet from another device in case you’re locked out later. - 2
Decide the protection scope
Decide whether you will protect the entire sheet or only a defined range. This choice determines how broad or granular the lock will be.
Tip: Start with a single protected area to minimize disruption, then expand if needed. - 3
Open the protection panel
Go to Data > Protected sheets and ranges to open the protection panel where you can configure protections.
Tip: If you don’t see the option, confirm you have editing rights and the sheet isn’t locked by an admin. - 4
Choose Sheet or Range and select the area
In the panel, pick Sheet to lock the entire tab or Range to lock a specific region, then select the cells or sheet.
Tip: Double-check the exact range before applying protection to avoid unintended blocks. - 5
Set editors and permissions
Click 'Set permissions' and specify who can edit. You can allow specific people or restrict to only you.
Tip: Keep a small, accountable list of editors to avoid frequent changes. - 6
Save, name, and test
Save the protection, give it a descriptive name, and test the setup with a non-editor account to ensure the rules apply correctly.
Tip: Document the protection for future audits and updates.
FAQ
What does protecting a sheet do exactly in Google Sheets?
Protecting a sheet prevents edits in the protected area by non-editors. You can specify editors who can bypass the lock, balancing security with collaboration.
Protecting a sheet stops edits in the protected parts unless the user is on the approved editors list.
Can I block a single formula by protecting a specific range?
Yes, you can protect a single range that includes the formula; this prevents edits to that formula while letting others modify other cells.
Yes, you can block a formula by protecting its range.
Do I need a Google Workspace account to use these protections?
No, Protect Sheet and Ranges work with consumer Google accounts; some advanced restrictions may require Google Workspace.
Not necessarily; protection works with personal accounts, though some advanced controls may require Workspace.
What should I do if I forget who has access to protected cells?
Open the Protected sheets and ranges pane again to review and adjust the list of editors.
Open the protection pane to review editors and permissions.
How do I remove protection later?
Open the protections pane, select the protected item, and choose delete or modify permissions.
Open protections, select the protection, and remove or update permissions.
Watch Video
The Essentials
- Identify what to block before applying protection.
- Use sheet-level and range-level protections together when appropriate.
- Test access with non-editor accounts before sharing.
- Document protections and update logs for future changes.
- Coordinate protections with sharing settings to avoid conflicts.