How to Hide Rows in Google Sheets: A Practical Guide
Learn safe, practical methods to hide rows in Google Sheets. Manual hides, filter views, and printing considerations with step-by-step guidance for students, professionals, and small business owners.

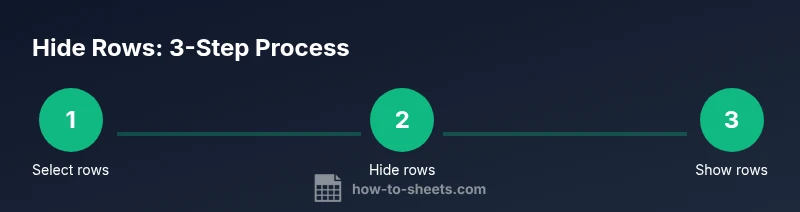
You can hide rows in Google Sheets to keep data out of view without removing it. Start by selecting the rows, then right-click and choose Hide rows, or use Data > Create a filter to hide by criteria. You can unhide later with Show rows. This guide covers manual hides, filter-based hiding, and printing notes.
What hiding rows accomplishes in Google Sheets
Hiding rows is a lightweight way to declutter a spreadsheet without deleting data. It helps when you’re preparing a presentation, collaborating on a large dataset, or focusing on a subset of records. According to How To Sheets, hiding is best used when you want to temporarily exclude irrelevant rows while preserving the underlying data for calculations, references, or historical records. This approach keeps formulas intact and makes it easy to restore the original view later. Remember that hidden rows are still part of the sheet; they are simply not visible, which means charts, totals, and conditional formatting rules can still consider their values unless you specifically exclude them. In practice, you’ll often combine hides with filters to create different views for different stakeholders, such as teammates who only need recent transactions or students reviewing assignment submissions. Always document your view changes in a shared sheet so collaborators understand which rows are hidden and why. This section covers manual hides, filter-based hiding, and printing considerations so you can choose the method that best fits your workflow.
Manual hide: quick actions
Manual hiding is the quickest way to conceal rows for a momentary need. To do this, click the row headers of the rows you want to conceal. You can choose multiple non-adjacent rows by holding Ctrl (Cmd on Mac) while clicking headers. Then right-click a selected header and choose Hide rows from the context menu. Alternatively, go to the Data menu and select Hide rows. The effect is immediate: the rows disappear from view, but their data remains in the sheet for formulas and references. If you hide a range that contains a chart’s data source, the chart will update to reflect the visible rows. If you change the rows later, you can unhide by selecting the surrounding rows and choosing Show rows. For a quick toggle, you can also use the right-click hover option to unhide a hidden block. This method works well for ad-hoc cleanups or when you only need a handful of rows hidden for a presentation.
Hiding with filters and filter views
Filters provide dynamic hiding without altering the underlying sheet structure. Create a filter by selecting a header range and choosing Data > Create a filter. Then click the filter icon in a column header and set a condition (e.g., date after a certain point, category equals X) to hide rows that don’t meet the condition. A filter view is a separate, shareable view that hides rows without changing others’ view. You can save multiple filter views for different roles: sales, engineering, or instructor perspectives. The advantage is that everyone sees the same sheet but only data that matters to them; turning off the filter returns the sheet to its full state. When you sort or filter, keep in mind that hidden rows may still affect ranges used in charts or pivot tables if the sheet references the entire range rather than just the visible data. Always test critical calculations after applying a filter to ensure accuracy and adjust chart data ranges if necessary.
Printing and exporting considerations when rows are hidden
Hidden rows typically do not print, but printing behavior can vary based on how you set up your print area and what the view shows at print time. Before sending a document to print, open Print Preview and verify that hidden rows are actually omitted from the output. If you’ve used filters, confirm whether the print will reflect the current visible view or the full data range. For consistent results, rely on Filter Views or a dedicated print-friendly view that excludes unnecessary rows. If your sheet includes headers or frozen panes, ensure they appear on every printed page by adjusting print settings. Remember that any formulas or charts based on ranges that straddle hidden and visible sections may print differently, so double-check totals and labels in the printout.
Working with formulas and charts when rows are hidden
Hiding rows can affect formulas that reference entire ranges, or charts that use the same sources. If a formula uses a range that includes both hidden and visible rows, the calculation typically continues to work, but the hidden data will not contribute to visible results or totals. Consider using dynamic ranges, such as named ranges or functions that reference only the visible data, when you expect to hide rows frequently. For charts, ensure the data range includes only visible rows or that you rely on filters/views to control what is displayed. In many practical sheets, teams use hidden rows for archiving while keeping the structure intact so formulas and charts stay valid during the transition.
Troubleshooting common issues with hidden rows
If hidden rows reappear after sorting or editing, check whether a new sort range includes them or if a pivot/table connection pulls them back into view. If you use filter views, ensure you selected the correct view before sharing with others. When a hidden row seems to affect totals unexpectedly, review the calculation logic and consider using functions that explicitly exclude hidden rows or use the GETVALUE method with a visible range. Finally, remember that hiding rows should be part of a clear workflow; sudden changes can confuse collaborators, so communicate when rows are hidden and why.
Real-world scenarios: budgets, lists, and schedules
In a simple budget tracker, you might hide rows for months that are not yet planned, while keeping the data for future updates. In a class roster, you can hide students who have completed the course or are on leave so instructors focus on current participants. For project timelines, apply a filter view to hide completed tasks and keep the current critical path visible. Each scenario benefits from a consistent convention: explain why rows are hidden, who can view them, and how to restore visibility when needed. By adopting a standard approach, teams avoid confusion and maintain a clean, usable sheet for decision-making.
Best practices and quick checklist
- Use filter views for persistent, shareable hiding without altering the base sheet.
- Document why rows are hidden and maintain a simple changelog for collaborators.
- Always verify charts and totals after hiding rows to avoid misinterpretation.
- Prefer manual hides for temporary work; reserve filter-based methods for longer-term views.
- Test in Print Preview to confirm what will appear on paper or export. By following these practices, you’ll maintain clarity while preserving data integrity.
Tools & Materials
- Computer or mobile device with internet access(Google account with access to Google Sheets)
- Google Sheets app or web access(Ensure you are signed in to the correct account)
Steps
Estimated time: Total time: 10-15 minutes
- 1
Select the rows to hide
Click the row headers for the first row to hide, then drag to include a block of adjacent rows. Use Ctrl (Cmd on Mac) to add non-adjacent rows to the selection. This targets exactly the rows you need to conceal.
Tip: Tip: Use the Shift key to select a consecutive block quickly. - 2
Hide the selected rows
Right-click the selected row headers and choose Hide rows from the context menu, or use Data > Hide rows. The rows disappear from view while their data remains in the sheet.
Tip: Tip: If you need to revert, use Show rows from the same header area. - 3
Show hidden rows when needed
To reveal hidden rows, select the surrounding visible headers, then choose Show rows. You can also right-click the strip and pick Show rows. This returns the sheet to its original state without data loss.
Tip: Tip: If multiple hidden blocks exist, you may need to unhide each group separately. - 4
Hide using a filter view for persistent views
Create a filter view (Data > Filter views > Create new) and set criteria to hide rows that don’t meet your view. This keeps hiding tied to a view rather than the global sheet.
Tip: Tip: Save multiple filter views for different teams and purposes. - 5
Unhide all rows after changes
If you need to revert broadly, remove all active hides by clearing filter criteria or disabling the filter. Then use Show rows to reveal any inadvertently hidden data.
Tip: Tip: Document when and why you unhide to avoid confusion later. - 6
Test formulas and charts after hiding
Review formulas that reference ranges and verify charts reflect the intended data view. Adjust ranges or switch to visible data ranges if necessary.
Tip: Tip: Always run a quick calculation check after hiding rows.
FAQ
How do I hide multiple non-adjacent rows?
Select the first row, hold Ctrl (Cmd on Mac) and click additional headers, then right-click and choose Hide rows. The hidden rows remain in the sheet, but are not visible. You can unhide them later with Show rows.
To hide non-adjacent rows, hold Ctrl (Cmd on Mac) and select the rows, then choose Hide rows. You can unhide them later with Show rows.
Can hidden rows affect charts and formulas?
Hidden rows still exist in the sheet. Some charts and formulas may be influenced if ranges include hidden data; consider using filter views or dynamic ranges to control what’s calculated and displayed.
Hidden rows still exist, and charts or formulas can be affected if the range includes them. Use filters or dynamic ranges to control visibility.
How do I unhide rows quickly?
Select the area around the hidden rows and choose Show rows from the right-click menu, or use Data > Show rows. If there are multiple hidden sections, unhide each block separately.
Select around the hidden area and choose Show rows from the menu. Repeat for other hidden blocks if needed.
Is hiding rows the same as applying a filter?
No. Hiding rows removes them from view, while filters apply criteria to hide rows. Filters can be saved as views for consistent sharing without altering the base sheet.
Hiding rows hides them visually; filters apply criteria and can be saved as views.
Will hidden rows print?
In most cases, hidden rows do not print, but verify by using Print Preview. If you need precise control, create a print-friendly view that hides unwanted rows.
Hidden rows usually don’t print, but always check the print preview to be sure.
Watch Video
The Essentials
- Hide rows to declutter without deleting data.
- Use manual hides for quick, temporary changes.
- Filter views enable dynamic hiding without altering the sheet.
- Check charts and formulas after hiding rows.
- Document hiding decisions and restore visibility when needed.