Unhide Rows in Google Sheets: A Practical Guide
Learn how to unhide rows in Google Sheets with clear, step-by-step methods, troubleshooting tips, and best practices for students, professionals, and small business owners.

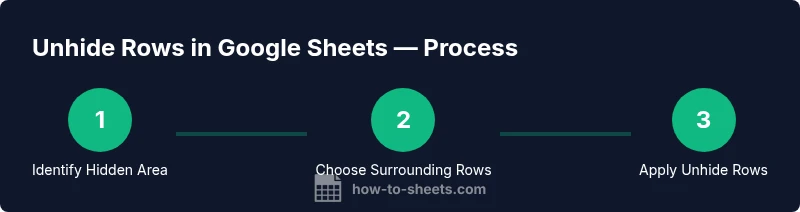
To unhide rows in Google Sheets, identify the hidden area by gaps in row numbers or collapsed groups. Right-click the surrounding rows and choose Unhide rows, or use the Data menu to unhide. If a filter or protection is hiding data, remove the filter or adjust permissions. This guide walks you through the steps with practical tips.
Understanding hidden rows in Google Sheets
Hidden rows in Google Sheets are not removed from the sheet; they’re simply not visible. This happens for several reasons: you may have manually hidden a row or a range of rows, you might have grouped rows that can be collapsed, or an active filter may be hiding rows that don’t meet your criteria. Importantly, unhide rows in google sheets is usually a quick action once you identify the cause. According to How To Sheets, many users encounter hidden rows during outlining or filtering, and the fix is typically a couple of clicks. Recognizing the difference between hidden rows, filtered data, and collapsed groups is essential because each requires a slightly different approach. When you solve the visibility issue, you’ll restore full access to your data and avoid duplicative editing or misinterpretation of totals and summaries. This section sets the foundation for the practical steps that follow.
Quick checks: is it really hidden or just collapsed?
Before diving into steps, take a moment to confirm what you’re seeing. A hidden row usually leaves a visible gap in the numbering sequence, sometimes with a subtle line or spacer where the data should appear. A collapsed group shows a small minus icon next to the row numbers; clicking it expands the hidden content. If you’re not sure whether a filter is involved, look for filter icons in the header row. If a filter is active, some rows will disappear based on the filter criteria rather than being hidden. Knowing which situation you’re dealing with saves time and helps you apply the correct method to unhide.
Unhide by right-click: reveal hidden rows
The most common method to unhide rows is to use the context menu. First, select the rows immediately above and below the hidden section to ensure the option applies to the correct range. Then right-click the selection and choose Unhide rows. If Unhide rows is not visible, you may be viewing a protected sheet or a non-contiguous range; in that case, try selecting larger blocks or check permissions. This approach works well for single or small groups of hidden rows, and it’s usually the fastest way to restore visibility without altering data.
Unhide using the Data menu and format options
If right-click isn’t convenient or available, you can use the menu bar. Go to the Data menu and choose Unhide rows. If you have multiple hidden sections, repeat the action for each set. In some cases, you may need to unhide all at once by selecting a broad region surrounding the hidden areas and applying Unhide rows. This method is particularly helpful when you’re working with larger datasets or when you want to ensure consistency across multiple blocks of hidden rows.
Unhiding multiple non-adjacent sections
Non-adjacent hidden sections require repeating the unhide process for each block. Start by identifying each gap in the row numbering and selecting the rows around that gap. Apply Unhide rows for each block. If you’re managing a large sheet, consider temporarily grouping related blocks to prevent accidental re-hide. Documenting the blocks you’ve unhidden helps teammates understand the sheet’s current visibility state and reduces confusion during collaboration.
Filters and hidden rows: what to check
Filters can be a major source of confusion. If some rows disappear after applying a filter, you won’t be able to unhide them by simple row selection. Check the filter controls in the header row: clear all filters or toggle the filter off to reveal all rows. After clearing, you can use Unhide rows if there were truly hidden rows rather than filtered data. This distinction is critical for maintaining accurate data views, especially when preparing reports or sharing sheets with others.
Keyboard and accessibility tips
If you rely on keyboard navigation, use the Tab key to reach the row numbers and use contextual menus via your device’s accessibility features. While Google Sheets supports many keyboard interactions, there isn’t a universal shortcut for unhiding rows across all platforms, so the mouse-driven context menu and the Data menu remain reliable. For accessibility, enable screen reader-friendly labels and ensure that the unhide action remains available within the normal sheet interaction flow. Consistency across devices helps reduce mistakes when collaborating.
Common mistakes and how to avoid them
A frequent error is assuming a small gap means hidden data when the rows are simply part of a grouped outline. Another mistake is forgetting to clear filters, which can leave rows invisible even after unhide actions. Be careful when working in protected sheets; if you don’t have editing rights, you may not be able to unhide rows at all. Always verify permissions and, when possible, coordinate with other editors or owners to ensure you have the necessary access before making visibility changes.
Advanced troubleshooting when unhiding fails
If unhide actions don’t reveal data, there may be more complex issues at play, such as script-based hiding, conditional formatting rendering, or hidden data due to sheet protection. Start by checking for protected sheets and ranges in the Review or Protect sections. Review any scripts or add-ons that could automatically re-hide rows after you unhide them. If the problem persists, try duplicating the sheet or creating a new test sheet to isolate whether the issue is file-specific or workbook-wide. In persistent cases, consult the sheet’s owner or the organization’s Google Workspace administrator for deeper access checks.
Practical tips for teams and projects
For teams, establish a simple protocol for visibility changes: document the rows that were hidden and the reason for unhiding, so collaborators understand what changed. Use consistent naming and grouping conventions to minimize future confusion. When sharing sheets, consider enabling viewing permissions first and granting edit rights only to needed teammates. Regularly review filters, groups, and protections to prevent accidental hiding, especially in project dashboards and reporting sheets.
Tools & Materials
- Device with internet access (computer, tablet, or phone)(Any modern browser works with Google Sheets.)
- Google account with access to the target Sheets file(You may need editor permissions to unhide rows.)
- Google Sheets document containing hidden rows(Have the sheet open and ready before starting.)
- Mouse or trackpad for right-click actions(Context menu options may vary by device.)
- Keyboard (optional)(Helpful for navigation; shortcuts vary by OS.)
Steps
Estimated time: 12-20 minutes
- 1
Identify the hidden rows
Scan the row numbers to locate gaps that indicate hidden content. On grouped sections, look for the collapse indicators and the faint triangle markers. Confirm whether the data is missing due to hiding, grouping, or filtering.
Tip: If you see a large jump in numbers, you’ve found the hidden region. - 2
Select the surrounding rows
Click the row number of the row above the gap, hold Shift, and click the row number below the gap to select the block that includes the hidden rows. This ensures the Unhide action applies to the correct range.
Tip: Selecting a wider range around the hidden area can help when multiple rows are hidden. - 3
Unhide using the right-click menu
With the surrounding rows selected, right-click and choose Unhide rows from the context menu. If Unhide rows is grayed out, you may be in a protected sheet or not selecting the exact hidden block.
Tip: If the option is unavailable, try expanding any collapsed groups first. - 4
Unhide via the Data menu
If the context menu isn’t helpful, go to the Data menu and select Unhide rows. Repeat for any other hidden blocks you’ve identified.
Tip: This method is reliable when you’re working without a visible right-click context menu. - 5
Unhide multiple non-adjacent sections
Repeat steps 2–4 for each non-adjacent hidden block. Consider temporarily saving a quick note mapping hidden areas to avoid missing sections later.
Tip: For large sheets, use a macro or script to automate repetitive unhide actions. - 6
Check and clear filters if needed
If filters hide rows, clear all filters or temporarily disable them to reveal all data. After unhide actions, reapply filters as needed to maintain the intended view.
Tip: Always verify whether the visibility issue was due to filtering rather than actual hidden rows. - 7
Confirm changes and save
Review the sheet to ensure all intended rows are visible. If you’re in a shared document, communicate the changes to collaborators and consider leaving a brief note.
Tip: Use Undo if you realize an unintended unhide occurred.
FAQ
What is the difference between hiding and filtering rows in Google Sheets?
Hiding rows removes them from view without changing the data, while filtering hides rows that don’t meet criteria. Unhide actions reveal rows that were manually hidden, but filters require clearing or adjusting criteria to show all data again.
Hiding is about visibility, while filtering is about data criteria. To reveal all data, distinguish between the two and clear filters or unhide rows as appropriate.
How do I quickly tell if a row is hidden?
Look for gaps in the row numbers and a collapsed group indicator. A hidden row leaves a visible jump in numbering; a collapsed group shows a minus icon you can expand.
Watch the row numbers for gaps and look for collapse indicators to confirm hidden rows.
Can I unhide rows in a protected sheet?
Unhiding rows in a protected sheet requires editing rights or removal of protection by the owner. If you don’t have access, contact the sheet administrator.
You’ll need editor rights or the owner to remove protection before unhiding.
Is there a universal shortcut to unhide all rows?
There isn’t a universal shortcut across all platforms. Use the right-click context menu or the Data menu to unhide rows.
No universal shortcut; use the menus to unhide.
Why is Unhide grayed out or unavailable?
The option can be unavailable if the sheet is protected, or if you haven’t selected the correct surrounding rows. Check permissions and try selecting a broader range.
Unhide can be blocked by protection or improper selection; adjust accordingly.
Can I unhide rows across multiple sheets at once?
Google Sheets does not support unhide actions across multiple sheets in a single operation. You must perform unhiding separately on each affected sheet.
You must unhide on each sheet individually.
Watch Video
The Essentials
- Identify why rows are hidden (manual hide, grouping, or filtering).
- Use the correct method (context menu or Data menu) to unhide.
- Clear filters before unhide if they are the cause of invisibility.
- Repeat steps for non-adjacent blocks and document changes.
- Verify accessibility and permissions when working on shared sheets.