How to Remove Blank Rows in Google Sheets: A Practical Guide
Learn practical, step-by-step techniques to remove blank rows in Google Sheets. This guide covers filtering, formulas, and Apps Script automation to keep data tidy and reliable.

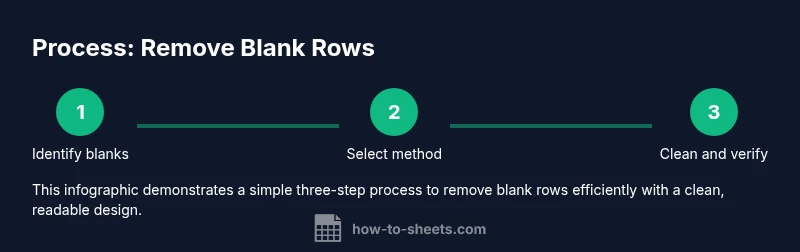
You will remove all blank rows in Google Sheets using built‑in filtering, a formula approach, or an Apps Script for automation. Start by identifying blank row patterns, then pick a method based on data size and risk of losing data. This guide covers three reliable methods and practical tips to improve accuracy while preserving important information.
Identifying blank rows and why cleanup matters
Blank rows in Google Sheets can appear after imports, copy-paste operations, or filters that leave gaps in your data. Left unchecked, these gaps disrupt sorting, filtering, charting, and reporting. According to How To Sheets, a structured cleanup workflow saves time and reduces errors when cleaning data in Google Sheets. A clean dataset improves readability and ensures formulas reference the intended rows. Start by scanning a few representative columns to determine if blanks are isolated or spread across rows, then plan your approach based on data size and critical columns.
Choosing the right cleanup method for your data
Purposes and data layouts vary, so picking the method matters. If blanks are scattered across many rows but only in a few columns, a simple filter or a helper column often suffices. For large datasets or recurring cleanups, automation with Apps Script can be faster and less error–prone. Consider whether you need to preserve row structure for charts or for formulas that reference entire rows. In general, plan to keep a backup, test one method on a copy, and then apply it to the full dataset.
Method 1: Filter to remove blank rows
This method is quick and non-destructive for small to medium datasets. Select the data range, enable a filter, and filter by blanks in the column that determines row validity. Select the resulting blank rows and delete them. Clear the filter to review the remaining data. Pro tip: filter by blanks using the Data menu, then sort by the same column to visually confirm that blanks are removed before deletion.
Method 2: Use a helper column with a formula
Add a helper column that flags blank rows using a formula such as =COUNTA(A2:Z2)=0. Filter or sort by this helper column to identify and delete blank rows safely. After deletion, remove the helper column to restore the sheet layout. This approach preserves a traceable audit trail, making it easier to review what was removed.
Method 3: Automate with Google Apps Script
For recurring cleanup tasks or large datasets, Apps Script offers a repeatable, fast solution. A short script can scan each row, determine if all cells are blank, and delete those rows from bottom to top to avoid shifting indexes. Start with a test sheet, grant the necessary permissions, and run the script on the target range. This method scales well and reduces manual effort over time.
Special considerations: merged cells, formatting, and safeguards
Merged cells can complicate deletion because they can span multiple rows. If you encounter merged areas, unmerge before performing cleanup or adjust the script logic to skip merged blocks. Always perform a backup and verify that formulas or charts do not rely on deleted rows. If you are unsure, test on a copy and compare key metrics before and after cleanup.
Best practices to prevent future blank rows
Adopt data entry conventions that minimize accidental blanks, such as using required fields, data validation, and consistent templates. When importing data, run a small preflight check to identify blanks in critical columns. Consider setting up a lightweight automation (macro or Apps Script) that detects and removes blanks on a scheduled basis, keeping your sheets tidy without manual effort.
Tools & Materials
- Google Sheets account with edit access(Ensure you are logged into the correct Google account and have permission to modify the target sheet.)
- Original data backup (copy of the sheet)(Create a duplicate before performing deletions to preserve a rollback point.)
- Internet connection and up-to-date browser(Stable connection plus the latest browser improves performance.)
- Optional: Apps Script editor access(Needed for Method C automation.)
Steps
Estimated time: 15-30 minutes
- 1
Identify blank rows and back up your data
Review your sheet to locate where blanks occur. Create a duplicate tab or copy of the sheet to serve as a rollback point. This reduces the risk of accidental data loss during cleanup.
Tip: Always keep a backup copy before deleting rows. - 2
Choose a cleanup method based on data layout
If blanks are concentrated in a single column, filtering or a helper column is often enough. For large datasets or frequent cleanups, automation saves time.
Tip: Assess data size and column dependencies before choosing a method. - 3
Method A: Filter and delete blank rows
Apply a filter to your data range, filter by blanks in the key column, select the blank rows, and delete them. Clear the filter afterward.
Tip: Filter by blanks using the data menu and verify the selection before deletion. - 4
Method B: Helper column with a formula
Add a helper column that marks blank rows (eg. =COUNTA(A2:Z2)=0). Filter or sort by this helper to delete blanks, then remove the helper column.
Tip: Using a non-destructive helper column makes audits easier. - 5
Method C: Apps Script automation
Record or write a short script to remove rows where all cells in the row are blank. Run it on the target range and review results.
Tip: Run on a test sheet first and grant script permissions as needed. - 6
Verify results and tidy up
Check that all intended rows are removed and no important data was deleted. Re-run a quick sort to confirm continuity in your dataset.
Tip: Do a final check on key columns and totals.
FAQ
What counts as a blank row in Google Sheets?
A blank row is a row where the cells of interest are empty. If you rely on specific columns, consider a row blank only when those columns are empty. Partial blanks may still affect analyses.
A blank row is one where the data in your key columns is empty. If you only care about certain columns, treat a row as blank based on those columns.
Will removing blank rows affect formulas?
If your sheet uses ranges that shift when rows are deleted, references can change. Use relative references or adjust the ranges after cleanup.
Deleting rows can shift references. Update formulas after cleanup.
Can I undo deletions if I make a mistake?
Yes. Use Undo immediately after deletion, or rely on Google Sheets version history to restore a previous state.
You can undo or restore from version history if needed.
Is there a faster way for large datasets?
Yes. For large datasets, Apps Script automation or macros are faster and repeatable, reducing manual steps.
For big datasets, automation is the way to go.
Should I remove blank rows in all columns?
Target the data columns that matter for your analysis. Deleting based on all columns can remove rows with partial but important data.
Only remove blanks in the data columns you care about.
Watch Video
The Essentials
- Identify blanks early to plan cleanup
- Choose a method based on data layout and size
- Back up data before deletion
- Verify results with a quick data check
- Consider automation for recurring cleanups