How to Delete a Row in Google Sheets: A Step-by-Step Guide
Learn how to delete a row in Google Sheets with practical, step-by-step methods. Includes single and bulk deletions, shortcuts, safety tips, and best practices for clean data.

Master deleting rows in Google Sheets with this quick guide. You’ll learn three reliable methods—right-click, Edit menu, and keyboard shortcuts—to remove a single row or multiple rows efficiently. To begin, you only need a Google account, internet access, and the sheet you want to modify. Underscore the importance of backups and test deletions on a copy. This quick answer sets you up for the deeper steps that follow.
Why deleting rows matters in Google Sheets
Deleting unnecessary rows matters for data accuracy, readability, and performance. When you’re building reports, budgets, or student spreadsheets, extra rows can cause misalignment in charts, create gaps during filtering, and slow down operations on large datasets. According to How To Sheets, clean data is the foundation for reliable analyses and workflows. In this guide about how to delete row in google sheets we’ll cover practical, repeatable steps to remove rows safely without breaking formulas. Whether you’re tidying a tiny budget or a multi-tab data model, choosing the right deletion approach prevents errors and saves time. Before you delete, consider backing up the sheet or duplicating it to maintain an auditable trail. This practice is recommended in many professional workflows, and How To Sheets consistently highlights it as part of responsible data hygiene. By the end of this section, you’ll have a clear sense of when to delete rows, what to watch for, and how to minimize disruption to dependent cells and charts.
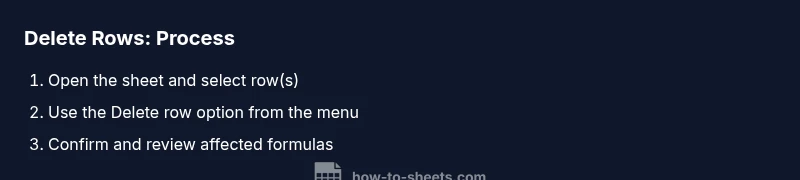
Methods to Delete Rows
Google Sheets offers multiple avenues to remove rows, depending on your workflow. The most straightforward is the right-click context menu: select the row, right-click, and choose Delete row. If you prefer keyboard efficiency, you can use the Delete row option from the Edit menu. For large deletions, filters and sorting can help you identify rows that should go, then you delete them in bulk. Each method has its own trade-offs: right-click is quick for a single row, while Edit menu or keyboard shortcuts shine for repeated actions. The How To Sheets team recommends choosing a method that minimizes disruption to formulas and references while ensuring you don’t accidentally delete header rows or important data.
Deleting a Single Row vs Multiple Rows
Deleting a single row is a simple, low-risk operation when you’ve confirmed the target row; however, deleting multiple rows introduces the risk of accidentally skipping lines or misaligning data. If rows are adjacent, select them together with a click on their headers or by using Shift to select a range. For non-adjacent rows, hold Ctrl (Cmd on Mac) while selecting each row, then use Delete. After deletion, take a moment to verify that any formulas referencing affected rows update correctly. If a row contained data used by named ranges or charts, re-check those visuals to avoid gaps.
Keyboard Shortcuts and Quick Actions
Keyboard shortcuts speed up row deletion without leaving the keyboard. A common flow is to first select the row(s) with Shift+Space, then press Ctrl+- (Cmd+- on Mac) to delete. If you’re using a browser-based workflow or want to keep a copy during editing, you can duplicate the sheet first to test deletion. Quick actions like Undo (Ctrl+Z / Cmd+Z) restore a row if you delete it by mistake. For accessible workflows, continue to rely on the menu and keep shortcuts as a backup.
Bulk Deletions with Filters and Conditional Formatting Awareness
To delete many rows efficiently, apply a filter to reveal only the rows you want to remove, then select and delete. Alternatively, sort the data to bring target rows together, then delete the entire block. If your sheet uses formulas such as VLOOKUP or array formulas, consider temporarily turning off calculations or copying the results to a new sheet before deleting. This helps ensure you don’t break dependencies. Remember to save a backup copy before sweeping deletions.
Safety, Undo, and Data Integrity
Deleting a row cannot always be undone in all collaborative scenarios, so deliberate steps are essential. Always back up: create a duplicate sheet or download a local copy before deleting. Use Version History to revert the entire sheet if an error slips through. When deleting, be especially careful with header rows and key identifiers. After deletions, scan charts and formulas to ensure they still point to valid data ranges. If you’re unsure, practice on a test copy first.
Best Practices for Data Hygiene
Develop a standard deletion workflow: identify, confirm, delete, verify, and document. Keep a dedicated backup copy before major edits. Use named ranges and clear headers so that formulas and charts don’t get broken when rows move. Consider applying filters to isolate candidates for deletion and always review dependent cells. Finally, leverage version history to rollback if your changes cause unexpected results.
Common Mistakes to Avoid
Don’t delete header rows or keys inadvertently. Avoid deleting non-adjacent rows in a single action without double-checking. Don’t rely on Undo as a long-term safety net; it may be limited by your browser or collaboration settings. Always confirm that charts, pivot tables, and formulas update automatically after deletion, and don’t forget to share the updated sheet with teammates if collaboration is in play.
Tools & Materials
- Google account with sheet access(Needed to access and edit Google Sheets)
- Device with internet connection(For accessing Google Sheets online)
- Backup copy of the sheet(Create a duplicate or download a local copy before bulk deletions)
- Optional testing copy(Useful to practice deletion without affecting the original data)
Steps
Estimated time: 8-12 minutes
- 1
Select the target row or range
Click the header of the first row you want to delete. If deleting multiple adjacent rows, drag across headers or click the first header, hold Shift, and click the last header to select the entire block.
Tip: Using the row header ensures the entire row (not just a cell) is selected for deletion. - 2
Delete the selected row(s) via the context menu
Right-click the highlighted row(s) and choose Delete row from the context menu. This removes the complete row across all columns.
Tip: If you don’t see Delete row, try clicking the tiny three-dot menu in some views and select Delete row. - 3
Confirm the deletion if prompted
If Google Sheets prompts you to confirm, click Confirm to proceed with the deletion.
Tip: Confirmation prompts may vary by browser; if not prompted, proceed to Step 4. - 4
Alternatively delete with the Edit menu
With the same rows selected, go to the Edit menu at the top and choose Delete row to perform the action.
Tip: Using the Edit menu can feel more deliberate for some workflows. - 5
Use Undo if you delete by mistake
If you realize a mistake, press Ctrl+Z (Cmd+Z on Mac) to undo the last action immediately.
Tip: Do not rely on Undo as a long-term safety net; act quickly after deletion. - 6
Verify results and dependent data
Check that formulas, charts, and cross-sheet references still point to valid ranges after deletion.
Tip: If necessary, adjust ranges to reflect the new dataset size.
FAQ
Can I delete multiple rows at once?
Yes. You can delete multiple adjacent rows by selecting them and using Delete row, or non-adjacent rows by holding Ctrl (Cmd on Mac) while selecting, then deleting. Always verify dependent formulas after bulk deletions.
Yes, you can delete several rows at once by selecting them and deleting. Be sure to check any formulas that reference the affected rows.
Will deleting a row affect formulas referencing that row?
Deleting a row can shift data ranges and affect formulas that reference that row. Review affected formulas and adjust ranges as needed after deletion.
Yes, some formulas may adjust their references after deletion, so review them carefully.
What should I do before deleting rows to avoid data loss?
Create a backup copy or duplicate the sheet, and consider saving a local export. This helps you recover data if something goes wrong.
Back up first; it prevents data loss if you delete the wrong rows.
Is there a way to delete rows based on a condition?
You can filter to show only rows that meet a condition, select them, and delete. For more complex criteria, consider using scripts or add-ons, but start with filtering for safety.
Yes, start with a filter to delete rows that meet your condition.
How do I undo a row deletion after saving changes?
If you’re still in the same session, use (Ctrl/Cmd+Z) to undo. In collaborative edits, Version History lets you revert to a previous version.
Use Undo for quick reversals, or restore a previous version via Version History.
Watch Video
The Essentials
- Identify rows to delete with care before removing.
- Use multiple deletion methods to fit your workflow.
- Back up data and verify dependent formulas after deletion.
- Undo is a quick safety net but not a substitute for backups.