How to Add a Row in Google Sheets: A Clear Step-by-Step Guide
Learn how to add a row in Google Sheets with a clear, step-by-step approach. This guide covers manual insertion, keyboard shortcuts, and tips to preserve data integrity for students, professionals, and small business owners.

To add a row in Google Sheets, you can right-click a row header and choose Insert row above or Insert row below. Alternatively, use the Insert menu to select Row above or Row below, or press keyboard shortcuts: Windows = Ctrl+Shift++, Mac = Cmd+Shift++. For multiple rows, select the number of rows you want to add before inserting so Sheets expands the dataset correctly.
Overview: why adding a row matters when organizing data in Google Sheets
In data-entry workflows, rows act as individual records in a dataset. The ability to insert a new row without disturbing existing data is a fundamental skill for students, professionals, and small business owners who rely on Google Sheets to track inventories, schedules, or surveys. When you learn how to add a row in Google Sheets, you gain flexibility to accommodate new information, maintain consistent formatting, and preserve the integrity of formulas and data relationships. This section explores practical scenarios where inserting rows is essential, from updating a contact list to expanding a project timeline. By understanding when and why to insert rows, you’ll keep datasets tidy and easy to analyze, even as data grows.
Key ideas: insert location matters for headers, formulas should adjust automatically, and consistency across sheets helps collaboration and reporting.
Methods to insert a row in Google Sheets
Google Sheets offers multiple reliable methods to insert rows, so you can pick the one that fits your workflow. The quickest is the right-click method: right-click on a row number to open the context menu and choose Insert row above or Insert row below. If you prefer menu navigation, go to Insert in the top menu, then select Row above or Row below. For consistency across large sheets, you can also use keyboard shortcuts: Windows users press Ctrl+Shift+Plus, Mac users press Cmd+Shift+Plus. If you need to insert several rows, select the same number of existing rows first, then apply the insertion; Sheets will push down the adjacent data to make room. In scenarios where you’re working with a filtered view, be mindful that inserting rows affects the underlying data, not just the visible subset. Each method is reliable, but keyboard shortcuts save the most time in repetitive tasks. Remember to verify data alignment after insertion to avoid misplacing headers or formulas.
Step-by-step concept: inserting above or below in a dataset
Think of inserting a row as editing the dataset structure. You decide where the new row belongs in relation to an existing row, then Google Sheets reallocates the grid to include the new space. The concept translates whether you add a single row or several: designate the position, then perform the insertion. This understanding lays the groundwork for the hands-on steps that follow and helps you anticipate how formulas and references will adjust as the spreadsheet grows.
Inserting with the menu: Insert > Row above / Row below
Follow these practical steps to insert a row using the Google Sheets menu. First, click the row header where you want the new row to appear (the new row will be inserted relative to this row). Second, open the Insert menu at the top and select Row above or Row below, depending on where you want the new space. Third, review the new row to ensure headers align and any merged cells or formatting remain intact. If you’re inserting into a protected sheet, confirm you have editing rights before proceeding. This method is intuitive and works well when you’re not memorizing keyboard shortcuts.
Keyboard shortcuts to speed up row insertion
Speed is often important in data work. Keyboard shortcuts can dramatically cut the time needed to insert rows. Windows users can press Ctrl+Shift++ (hold Ctrl and Shift, then press +). Mac users should use Cmd+Shift++ for the same action. If you frequently insert multiple rows, you can select several existing rows first, then perform the shortcut to insert the same number of new rows in one go. Practicing shortcuts helps keep your focus on data rather than navigation and reduces the risk of misplacing data when updating large sheets.
Working with data integrity when adding rows
Inserting rows can affect formulas, ranges, and conditional formatting. Relative references in formulas typically shift automatically when a new row is added, but be aware of complex formulas with explicit ranges. After inserting, review key calculations to confirm they still reference the correct cells. If you rely on dynamic ranges, consider using functions like INDIRECT or OFFSET or the ARRAYFORMULA pattern to maintain correct results as rows are added. For datasets with headers, ensure new rows inherit the correct formatting by using the paint format tool or by applying the header style to the new row if needed.
Automating row insertion with scripts and templates
If you routinely insert rows as part of a workflow, automation can save time and reduce errors. Google Apps Script lets you write a small function to insert rows at a given index across one or more sheets. A basic example is: function insertRowAbove(sheetName, index, n) { var sh = SpreadsheetApp.getActive().getSheetByName(sheetName); sh.insertRows(index, n); } You can trigger this via custom menu items, time-based triggers, or responses to form submissions. Templates and add-ons also provide pre-built templates to insert rows in bulk without writing code.
Formatting, validation, and conditional formatting in new rows
New rows should automatically inherit formatting for consistency, but it’s worth double-checking. Use format painter to ensure newly inserted rows receive the correct number formatting, borders, and fill colors. If you use data validation, extend the rule to the new rows to prevent invalid entries. Conditional formatting rules can also be extended to cover the newly inserted range so color cues and indicators remain meaningful. Regularly validate that the new data aligns with existing validation rules and conditional logic for reliable spreadsheets.
Authority sources and further reading
For authoritative guidance on inserting rows and general Google Sheets usage, consult the official Google Docs Editors Help resources. You can also explore university-level tutorials on spreadsheet structures and data integrity from reputable educational domains. Finally, community-driven guides from recognized tech education sites offer practical tips and common pitfalls to avoid when expanding datasets. - Official Google Docs Editors Help (docs.google.com) - Google Support Documentation (support.google.com/docs) - Educational technology resources from reputable universities (edu domains)
Tools & Materials
- Google account(You must be signed in to Google Sheets to edit and insert rows.)
- Device with internet access(Desktop or tablet works; some features may differ on mobile.)
- Spreadsheet ready for editing(Open the sheet where you want to insert rows.)
- Backup copy (optional)(Create a snapshot before large insertions to prevent data loss.)
Steps
Estimated time: 5-10 minutes
- 1
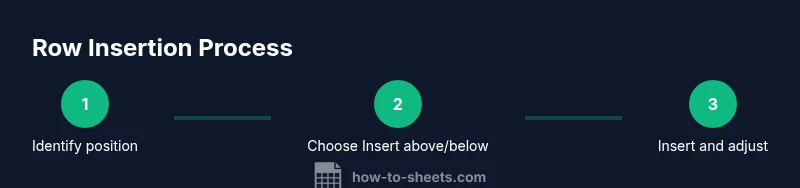
Identify insertion point
Review your data to determine where the new row should go. This helps ensure headers, formulas, and data context remain accurate after the insert.
Tip: If adding to a dataset with headers, include the header row in your reference to avoid misalignment. - 2
Select the target row
Click the row header on the left to select the row adjacent to where the new row will appear. This defines the insertion position (above or below).
Tip: Ensure the entire row is selected if you plan to insert multiple rows. - 3
Choose the insertion command
Right-click to open the context menu and pick Insert row above or Insert row below, or use the Insert menu at the top.
Tip: If you’re inserting multiple rows, select multiple existing rows first. - 4
Insert the row(s)
Google Sheets creates the new row(s) and shifts existing data downward to accommodate. Review the immediate vicinity for alignment.
Tip: Check that headers, formulas, and data formatting remain correct after insertion. - 5
Validate affected formulas
Inspect formulas that reference rows above or below the insertion point to ensure ranges update correctly.
Tip: If necessary, adjust ranges or convert to relative references to maintain integrity. - 6
Format and finalize
Apply or adjust formatting, data validation, or conditional rules to the new row as needed.
Tip: Use the paint format tool to quickly copy styles from adjacent rows.
FAQ
Can I insert rows in multiple sheets at once?
No, you must insert rows in each sheet individually. You can speed this up by duplicating a template sheet or using Apps Script to apply the same insertion logic across all sheets in a spreadsheet.
Rows must be added per sheet; you can automate across sheets with a script if needed.
What happens to formulas when inserting a row?
Most formulas adjust automatically when a row is inserted either above or within their referenced ranges. However, explicit references to fixed ranges may require updating. Check key calculations after inserting.
Formulas usually shift with the new row, but verify critical calculations afterward.
Is there a difference between inserting above vs below a row?
Inserting above places the new row before the selected row, shifting the original row downward. Inserting below adds space after the selected row and can affect dependent formulas differently depending on the structure.
Above inserts before; below inserts after—both adjust the dataset structure.
How can I insert a row quickly using the keyboard?
Use Ctrl+Shift+Plus on Windows or Cmd+Shift+Plus on Mac to insert a row at the selected position. For multiple rows, select multiple rows first before using the shortcut.
Quick shortcut: Ctrl+Shift+Plus or Cmd+Shift+Plus after selecting where to insert.
Can I insert rows at the end of a sheet?
Yes. Select the last row and use the Insert row below option or the appropriate shortcut to add a new row at the bottom, then fill in data.
Yes, you can add a row at the bottom using the same commands.
Watch Video
The Essentials
- Insert rows precisely where data belongs
- Use keyboard shortcuts to speed up insertion
- Always verify affected formulas and references
- Format new rows for consistent appearance
- Automation can streamline repetitive insertions