How to Move a Row in Google Sheets: A Step-by-Step Guide
Learn how to move a row in Google Sheets with drag-and-drop, cut-and-paste, keyboard shortcuts, and Apps Script. Practical, beginner-friendly steps for students, professionals, and small businesses.

You can move a row in Google Sheets using several reliable methods: drag-and-drop for quick repositioning, cut-and-paste to ensure precise placement, or Apps Script for automation on larger datasets. This quick guide outlines each method, the exact actions, and common pitfalls so you can move rows confidently while preserving formatting and references.
Why moving a row matters in Google Sheets
Moving a row is a fundamental editing task that keeps data organized as projects evolve, imports occur, or reports update. A correct row position ensures that related data—dates, IDs, and formulas—retains its meaning. According to How To Sheets, mastering row movement is a core efficiency skill for students, professionals, and small business owners who rely on clean, up-to-date sheets. When you move a row, you’re not just changing a line; you’re aligning data relationships, preserving formulas, and preventing misinterpretations that can cascade into incorrect insights.
In practice, it’s about workflow fluency: you should be able to move a row when a priority shifts, a new entry arrives, or a record needs reordering for readability. The goal is to maintain data integrity while making the sheet easier to scan and analyze. The How To Sheets team has found that users who move rows carefully save time and avoid rework later in a project lifecycle.
This section will explore concrete methods, from quick drag-and-drop to automated scripts, so you can choose the approach that best fits your sheet size, sensitivity of formulas, and personal preference.
Core concepts you should know before moving rows
In Google Sheets, a row is the horizontal group of cells identified by a row number on the left. When you move a row, you relocate every cell in that row, including cell formatting and any data validation rules. If the sheet contains formulas that reference the moved row by relative positions, those references may shift and require adjustment. If a row has multiple merged cells or complex formatting, moving it can affect alignment with adjacent rows.
There are a few reliable ways to move rows without breaking structure:
- Select the entire row to include all cells and formatting
- Move to the target position by inserting above or below the destination row
- Re-check formulas that reference ranges spanning the moved row
Understanding these basics helps you avoid common pitfalls and ensures your data remains accurate after a move.
Preparing your sheet: what to check before moving a row
Before you move any row, prepare by creating a backup copy of the sheet, especially for large datasets or sheets with critical formulas. Check for filters or sorts that could misrepresent the row order and temporarily disable them if needed. Verify that any dependent formulas (like VLOOKUP, INDEX-MMATCH, or SUMIF) still reference the intended ranges after the move.
If your sheet uses conditional formatting, data validation, or named ranges tied to that row, note how those rules apply after the move. Inexperienced users frequently forget that moving a row can affect references and conditional logic. Planning ahead reduces rework and ensures consistent results across the sheet.
Method 1: Drag-and-drop to move a row
Drag-and-drop is the fastest way to reposition a single row. First, click the row number on the far left to select the entire row. Hover the cursor over the selected row border until it changes to a hand or move icon. Press and hold the mouse button, then drag the row to the new position between two row numbers. Release to drop the row into place.
This method preserves formatting and data types automatically, which makes it ideal for quick reorderings. If you want to move more than one row at a time, you can select multiple rows first, then drag the entire block to the new location. Keep in mind that very large sheets may feel slightly laggy during drag operations.
Pro tip: If you’re unsure about the final position, drag the row to a nearby temporary spot, verify the data alignment, and then drop it into the exact target position to avoid mistakes.
Method 2: Cut and insert for precise placement
Cut-and-insert gives you precise control over the destination. Start by selecting the entire row and choosing Cut (Ctrl+X or Cmd+X). Then right-click the row number where you want to insert the moved row and choose Insert cut cells (or use Edit > Paste special > Paste cut cells). This ensures the row is moved with its formatting intact.
If you’re moving a row to the very top or bottom, insert above the top row or below the bottom row as needed. This method is particularly useful when you need to reposition a row within a fixed set of headers or when you want to keep surrounding rows aligned.
Pro tip: After inserting, double-check any formulas that reference ranges near the moved row to ensure they still point to the correct data.
Moving multiple rows: keep grouping intact
When several rows belong together (e.g., a group of tasks or a batch of records), move them as a block rather than one-by-one. Select the first row, hold Shift, and click the last row to capture a contiguous block, or hold Ctrl/Cmd to pick non-adjacent rows. Then drag the block to the new location or use Cut and Insert as described above. This helps preserve relative order and grouping within the batch.
Be mindful that moving multiple rows can affect inter-row references in formulas that rely on the original contiguous block. After the move, review key calculations to confirm they still reflect the intended data ranges.
Pro tip: For large batches, consider moving in smaller chunks to minimize the chance of accidentally misplacing a row and to simplify error checking.
Keyboard shortcuts: speed up the process
Keyboard shortcuts can dramatically improve speed. To move a row, select the row, then use Cut (Ctrl+X / Cmd+X) followed by Navigate to the target position and Paste (Ctrl+V / Cmd+V). If you want to insert without overwriting, use Insert cut cells (via right-click context menu or Edit menu) instead of a standard paste.
On a Mac, Cmd+X and Cmd+V work equivalently to Windows shortcuts. If you’re working on a dense sheet, enabling keyboard navigation (Arrow keys) to place the cursor accurately can reduce misplacement. Practice these shortcuts on a test copy first to build muscle memory without risking real data.
Pro tip: Combine shortcuts with the mouse for fast, precise moves; you’ll soon execute row movements in seconds rather than minutes.
Working with filters and sorts: what changes when rows move
If your sheet uses filters, moving a row may appear to misplace entries because only visible rows are shown. In such cases, move the row while filters are temporarily disabled, then reapply the filter to confirm that the data remains consistent. When sorting is active, moving a row can shift its position relative to the sort order, which can affect grouping and totals.
To avoid confusion, make a quick check after moving: reapply any active filters, confirm that sorted columns still align with headers, and verify key totals or pivot references. This helps prevent subtle errors that can undermine analysis later.
Pro tip: If you rely on a specific sort order, perform a final sort again after moving rows to restore the intended sequence.
Advanced option: automate with Google Apps Script
For repetitive movements or large datasets, Apps Script can automate row relocation. A typical approach is to write a function that identifies the current row index, determines the destination index, and uses the sheet methods to move or copy the row contents while preserving formatting and formulas. Always test scripts on a copy of the sheet before applying to production data.
High-efficiency workflows emerge when automation handles bulk moves, conditional moves (e.g., move rows that meet a criterion), or scheduled data realignment. If you’re new to Apps Script, start with small, explicit scenarios and gradually expand as you gain confidence.
Pro tip: Include error handling in your script to catch cases where a row index is out of range or the destination is blocked by protected ranges.
Common mistakes and quick fixes
Moving a row seems simple, but small missteps cause big consequences. Common mistakes include forgetting to select the entire row, dropping in the wrong location, or leaving hidden references behind. Also, when formulas rely on relative references, moving rows can shift those references unexpectedly. Quick fixes include: always select the full row, use Insert cut cells for clean insertion, and re-check formulas and named ranges after the move.
Another pitfall is moving rows when filters are active; re-enable filters afterward to confirm nothing is hidden or misordered. Finally, always keep a backup copy before major reorganizations, especially in high-stakes sheets such as budgets, timelines, or inventory lists.
Pro tip: If a move doesn’t look right, immediately undo (Ctrl+Z / Cmd+Z) and try the alternative method (drag-and-drop vs. cut-and-insert) to confirm which approach preserves your data structure best.
Quick checklist: best practices for moving rows
- Always back up your sheet before major moves
- Select the entire row to preserve structure and formatting
- Use the Insert cut cells command for precise placement
- Double-check dependent formulas and named ranges
- Disable filters temporarily if they obscure the data
- Verify after moving with a quick data sanity check
- Use keyboard shortcuts to speed up routine moves
- Consider Apps Script for large or repetitive rearrangements
Tools & Materials
- Google account with edit access(Ensure you have permission to modify the sheet.)
- Computer or device with internet(A reliable browser (Chrome recommended) works best.)
- Open Google Sheets(Load the specific sheet you’ll modify.)
- Mouse or trackpad(Required for drag-and-drop methods.)
- Keyboard shortcuts(Familiarize with Ctrl/Cmd X and Ctrl/Cmd V.)
- Backup copy of the sheet(Create a duplicate if making significant moves.)
- Apps Script editor (optional)(For automation and bulk moves.)
- Paste special options awareness(Helps preserve or control formatting during moves.)
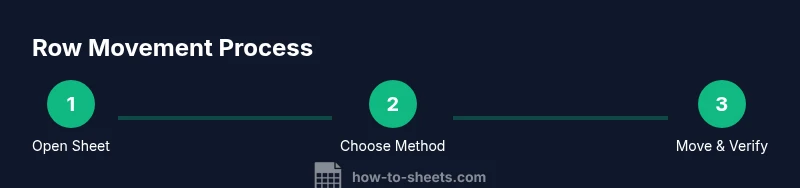
Steps
Estimated time: 15-25 minutes
- 1
Open the sheet
Launch Google Sheets and open the document containing the row you need to move. Confirm you’re editing the correct sheet and that the data is up to date before proceeding.
Tip: Always start with a quick backup if you’re moving critical data. - 2
Select the entire row
Click the row number on the left to highlight the full row, ensuring every cell in that row is included in the move.
Tip: Double-check that you’ve captured merged cells or special formatting. - 3
Move by dragging
Hover over the row border until the cursor becomes a hand, then drag the row to the desired position between two row numbers.
Tip: Drop between the target rows for exact placement. - 4
Or use Cut and Insert
Right-click the selected row and choose Cut, then right-click the destination row and pick Insert cut cells to place it.
Tip: This preserves formatting and reduces misplacement risk. - 5
Move multiple rows
Select a block of contiguous rows or non-adjacent rows, then use drag-and-drop or cut-and-insert for the entire group.
Tip: Moving in a block maintains internal order. - 6
Keyboard speed
Use Ctrl/Cmd X to cut and Ctrl/Cmd V to paste at the target location; for insertion, prefer Insert cut cells.
Tip: Practice the shortcuts to improve speed without mistakes. - 7
Handle filters and sorts
If filters or sorts are active, move rows with filters temporarily disabled and reapply them after the move to verify results.
Tip: Filters can hide rows you intend to move. - 8
Validate post-move integrity
Check formulas referencing the moved row and update ranges if needed; confirm totals and data validation still align.
Tip: A quick recalculation helps catch issues early. - 9
Optional automation
If this is a recurring task, write or adapt a simple Apps Script to relocate rows based on conditions or indices.
Tip: Test on a copy first to avoid data loss.
FAQ
Can I move a row in Google Sheets while a filter is active?
Yes, but it’s safer to temporarily disable filters, move the row, and then reapply the filter to verify correct data placement.
Yes—temporarily disable filters, move the row, and reapply the filter to confirm everything lines up.
Will moving a row affect formulas that reference it?
Moving a row can shift references in formulas. After the move, review dependent formulas and adjust ranges if necessary.
Yes, formulas might shift. Check dependent formulas and adjust references if needed.
Is there a way to automate moving rows in Google Sheets?
Yes, you can use Google Apps Script to relocate rows based on conditions or index positions. Start with a small test script on a copy of the sheet.
You can automate with Apps Script. Test on a copy first and expand gradually.
How do I move multiple rows to the top or bottom?
Select the rows, cut, and insert them at the top (above row 1) or at the bottom of the data range.
Select, cut, and insert at the top or bottom as needed.
What should I do to preserve formatting when moving rows?
Use the Insert cut cells command to move rows so their formatting and data validation stay intact.
Insert cut cells to keep formatting and validation intact.
What are common mistakes to avoid when moving rows?
Mistakes include selecting only part of a row, dropping in the wrong location, and overlooking formulas tied to the moved data.
Common mistakes include partial selection and dropping in the wrong spot.
Watch Video
The Essentials
- Move rows with full-row selection to preserve data and formatting
- Drag-and-drop is fastest for single moves; cut-and-insert offers precision
- Keyboard shortcuts speed up routine moves; use them to save time
- Disable filters when moving to avoid hidden rows
- Always back up before major rearrangements