Shortcut to Insert Row in Google Sheets Mac: Quick Guide
Learn a reliable shortcut workflow to insert a row in Google Sheets on Mac, including menu-based methods, multi-row inserts, and practical tips for smoother data editing.

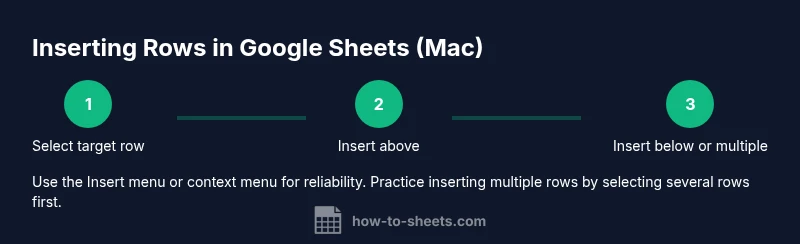
This guide helps you insert a row in Google Sheets on Mac quickly and reliably. You can use the built-in menu option Insert > Row above, or select a row and use the browser shortcut if available. For multiple rows, select the same number of rows and choose Row above to insert that many rows at once. Keyboard shortcuts can vary by browser, so use the menu path if unsure.
Why Mac users benefit from shortcuts in Google Sheets
According to How To Sheets, keyboard shortcuts are a quiet productivity boost for data work. When you routinely need to insert rows while building a dataset, a reliable shortcut reduces context switching and keeps your flow uninterrupted. On a Mac, you’ll often rely on a mix of menu commands and browser keyboard mappings, which means knowing the exact steps is more important than a vague memory of a key combo. This section explains why shortcuts matter, what counts as a shortcut in Google Sheets, and how macOS users can take advantage of both menu-driven and keyboard-driven approaches to insert rows efficiently.
From personal budgeting to project planning, inserting rows quickly lets you expand datasets on the fly without losing your place. The How To Sheets team has observed that users who master a couple of core actions—like inserting rows above or below a current row—spend less time dealing with misalignment and formatting gaps. If you’re managing large Sheets, these habits compound into meaningful time savings over weeks and months.
Keyboard shortcut basics for inserting rows
Google Sheets on Mac supports two common pathways to insert a row: the menu and a keyboard shortcut that varies by browser and system settings. The menu route is stable across devices: go to Insert > Row above or Insert > Row below. Keyboard shortcuts can speed things up, but you should verify in your browser because some shortcuts overlap with other browser actions (for example, zoom or find). A reliable pattern is to use the menu when you’re uncertain about a shortcut mapping on your Mac. This approach minimizes mistakes while you’re learning.
If your browser respects a global shortcut for inserting rows, you may encounter variations like Cmd/Control plus a modifier. When in doubt, rely on the menu path first, then gradually adopt a shortcut as you gain confidence. Consistency matters; sticking to the same method across sheets helps prevent accidental inserts that can disrupt formulas and data alignment.
Inserting a single row above: a quick, dependable method
Inserting a single row above a chosen row is a common daily task. Start by selecting the row (click the row number to highlight it). Use the menu path Insert > Row above. If you prefer the keyboard, try a browser shortcut provided by your setup, but don’t assume it’s universal—verify by pressing the shortcut with a test row first. After insertion, you may need to adjust the row height or formatting to match neighboring rows.
For users who frequently insert rows, creating a habit of selecting the target row first and then applying Insert above ensures predictable results. It also minimizes accidental shifts in formulas that reference ranges below the insertion point.
Inserting multiple rows at once: efficient bulk inserts
When you need several new rows, selecting multiple existing rows before inserting makes it faster to expand your dataset by the right amount. For example, select three rows, then choose Insert > Row above. The same number of new rows appears above the first selected row. If you’re using a shortcut, ensure your browser maps the shortcut to row insertion for three rows at once.
After inserting, review nearby formulas and borders to ensure the new rows integrate cleanly with existing data. This practice reduces post-insertion cleanup and formatting work.
Right-click context and quick actions for speed
Context menus provide a fast alternative to the top menu. Right-click (or control-click on Mac) the selected row, and choose Insert row above or below. This method often feels quicker than navigating menus, especially on smaller screens or when you’re building a quick prototype. If you routinely insert rows, familiarizing yourself with both right-click and the Insert menu keeps you flexible across devices and browsers.
Remember: context actions depend on what you’ve selected. If no row is selected, the options won’t appear, so always start with a precise selection.
Troubleshooting: what to do when shortcuts don’t work on Mac
If a shortcut doesn’t work, it’s usually due to browser-specific mappings or conflicts with other shortcuts. First, try the menu route to confirm the operation itself is functioning. Next, check your browser’s shortcut preferences and adjust any conflicting bindings. If you’re working in a corporate environment, IT restrictions might override global shortcuts. In those cases, rely on Insert > Row above for reliability and consistency across sheets.
A practical habit is to test a new shortcut on a small sheet before applying it to an active, large dataset. This practice helps prevent unintended inserts or formatting changes that can ripple through your workbook.
Best practices and efficiency tips for row insertion
Consistency beats clever shortcuts. Always insert above or below at the same relative point so formulas referencing ranges stay stable. Use bulk selection for multiple rows, and after insertion, apply quick formatting (like borders and alignment) to visually separate new rows from existing data. If you work with recurring templates, consider creating a small template sheet with predefined row structures to minimize repetitive setup each time you need a new section.
Additionally, keep a mental map of where you insert rows most often (e.g., above headers or before quarterly totals) so you can quickly navigate to the right location without losing track of the data flow.
Authority sources and practical references
For readers who want a broader context about Google Sheets usability and keyboard efficiency, consult reputable sources. The How To Sheets team references standard UX practices in productivity software and emphasizes practicing until a few core shortcuts become second nature. For in-depth documentation and official guidance, you can explore general resources on keyboard accessibility and spreadsheet best practices from established universities and government-backed research projects. These sources provide foundational insights into how users interact with data tools and how to structure workflows for reliability.
Tools & Materials
- Mac computer with internet access(Any modern Mac with macOS and an up-to-date browser.)
- Google Sheets access(A Google account to open Sheets in your browser.)
- Web browser(Chromium-based or Safari; ensure JavaScript is enabled.)
- Keyboard and mouse/trackpad(Reliable input devices; some shortcuts may conflict with browser shortcuts.)
- Test sheet with data(Helpful for practicing inserts without risking real data.)
- Backup plan(Create a copy of important sheets before experimenting with bulk inserts.)
Steps
Estimated time: 3-5 minutes
- 1
Choose the target location
Open your sheet and click the row number to select the entire row where you want the new row to appear above. This ensures the insertion happens at the correct place and preserves the surrounding data alignment.
Tip: Selecting the row first reduces misalignment when formulas reference ranges. - 2
Insert a single row above
From the menu, choose Insert > Row above. Alternatively, use a browser shortcut if available. This creates one new row directly above the selected row.
Tip: Verify the new row appears in the expected position before continuing. - 3
Insert a row below
If you need a row below the current position, use Insert > Row below. This is helpful when you're extending data without reordering existing rows.
Tip: Insert below only when the data structure requires a lower block of rows. - 4
Insert multiple rows at once
Select multiple adjacent rows, then choose Insert > Row above to insert the same number of new rows above the first selected row.
Tip: Bulk inserts are faster and reduce the risk of missing gaps in templates. - 5
Undo if something goes wrong
If the result isn’t what you expected, press Cmd+Z (or use Edit > Undo) to revert the action quickly.
Tip: Use undo before making further changes to avoid cascading edits. - 6
Format and verify
After insertion, adjust row height, borders, and alignment to maintain visual consistency with adjacent rows. Check formulas that reference ranges around the new rows.
Tip: A quick format check saves time during data analysis.
FAQ
Can I insert a row with a keyboard shortcut on Mac?
Yes. You can insert a row using a browser shortcut if configured, or by using the Insert > Row above option from the menu. Shortcuts vary by browser, so start with the menu to confirm the action.
You can insert a row on Mac either with the Insert menu or a browser shortcut. If the shortcut doesn’t work, use the menu option to ensure the row is inserted correctly.
What if the shortcut doesn’t work in my browser?
Switch to Insert > Row above (or below) from the menu to perform the action. Verify your browser’s shortcut mappings and disable any conflicting extensions if needed.
If shortcuts don’t work, use the menu path Insert Row above or below and check your browser settings.
How do I insert multiple rows quickly on Mac?
Select the number of rows you want to insert, then choose Insert > Row above. The same number of new rows appears above the selection. You can also use bulk insert by selecting a range of rows first.
Select several rows, then insert above to add multiple rows at once. It’s faster than adding them individually.
Does inserting rows affect formulas that reference ranges?
Inserting rows shifts relative references. If necessary, adjust formulas that reference the affected range to ensure correct results after the insert.
Inserting rows can shift references, so review formulas that include the inserted area.
Can I customize keyboard shortcuts for inserting rows in Sheets?
Shortcuts can vary by browser and system settings. You can rely on the menu path and only customize shortcuts if your browser allows it, ensuring consistency across devices.
You can customize some shortcuts depending on your browser, but use the menu path to stay consistent.
Watch Video
The Essentials
- Choose exact insertion point before inserting.
- Use Insert > Row above/below for reliability.
- Select multiple rows to insert several at once.
- Rely on menu options when shortcuts fail.
- Use undo to quickly correct mistakes.