IF Statements in Google Sheets: A Practical Guide
Learn how to use IF statements in Google Sheets with clear syntax, nested logic, and real-world examples. This How To Sheets guide covers syntax, patterns, and tips for reliable formulas.

An if google sheets statement lets you return different results based on a condition, using IF and related functions. You’ll learn the exact syntax, how to nest tests, and practical patterns you can apply immediately in everyday sheets tasks. This quick guide also previews common pitfalls and how to fix them before you build complex dashboards.
What is an IF statement in Google Sheets?
An if google sheets statement is a conditional formula that evaluates a test and returns one value if the test is true and another if it is false. In practical terms, it lets you automate decisions in your spreadsheets. According to How To Sheets, mastering conditional logic like the IF statement saves time and reduces manual errors for students, professionals, and small business owners. The How To Sheets team has seen countless templates rely on a simple IF to drive dashboards, budgets, and checklists. The goal here is to give you a clear mental model of how the IF family of functions works, so you can build reliable, repeatable results without guessing. You will learn when to use IF, how to nest tests, and how to spot pitfalls early, so your Google Sheets projects stay scalable and maintainable.
Core syntax and functions
The core of any if google sheets statement is the IF function: IF(logical_expression, value_if_true, value_if_false). Depending on your locale, you may see commas or semicolons as separators. Always ensure the logical_expression evaluates to TRUE or FALSE. You can mix comparisons, text checks, and ISBLANK checks inside the logical_expression. For more complex logic, combine IF with AND, OR, or NOT to sculpt precise outcomes. The acronym IFS (for multiple conditions) and SWITCH (for exact matches) extend the IF family and often simplify nested logic. Remember to test formulas on small data samples before expanding, to avoid cascading errors across large datasets.
Practical patterns: simple IF, nested IF
A simple example: =IF(A2>100, "High", "Low"). This checks a numeric value and returns text labels. Nested IFs let you handle more than two outcomes: =IF(A2>100, "Very High", IF(A2>50, "High", "Low"))). Use AND and OR to combine conditions, e.g., =IF(AND(A2>0, B2="Yes"), "Approved", "Pending"). When using strings in the true/false branches, ensure the quotes match and that you’re consistent with data types in the rest of the sheet.
Using IFS, SWITCH, and IFERROR for advanced logic
For many conditions, IFS simplifies nested IFs: =IFS(A2>100, "Very High", A2>50, "High", TRUE, "Low"). SWITCH is ideal for exact matches: =SWITCH(D2, "A", 1, "B", 2, 3). IFERROR helps catch errors from divisions or missing data: =IFERROR(IF(A2>0, A2, 0), 0). These patterns reduce complexity and improve readability, making your sheets easier to audit.
Common pitfalls and how to avoid them
Common mistakes include mismatched parentheses, incorrect argument order, or mixing data types (text vs. numbers). Always close every IF with a corresponding false value, and test with edge cases (e.g., empty cells). Remember that relative references shift when copied; use absolute references ($A$2) when you need a constant test across rows. If your formula returns an array or spills unexpectedly, re-check your use of IF within array formulas or functions like FILTER.
Real-world templates you can adapt
Templates are the fastest way to start. Try a grade calculator: =IF(B2>=90, "A", IF(B2>=80, "B", IF(B2>=70, "C", "D"))). An attendance tracker could use =IF(C2="Present", 1, 0) and then sum across students. For budgeting, combine IF with SUM and SUMIF to conditionally aggregate expenses: =SUMIF(CategoryRange, "Rent", AmountRange). These examples illustrate how a single IF statement grows into practical business dashboards.
Performance considerations and best practices
IF statements are efficient for small datasets, but many nested IFs can slow down large spreadsheets. Prefer IFS or SWITCH when you have multiple conditions. Use named ranges to keep formulas readable and reduce errors from moving references. Avoid repeatedly evaluating the same condition in multiple cells; instead, compute the condition once in a helper column. Finally, document your logic with comments or a companion sheet so future editors understand the intent.
Testing and debugging your Google Sheets formulas
Debugging starts with isolating parts of the formula. Break complex statements into smaller pieces in separate cells to verify each condition. Enable Show Formulas (Ctrl + `) to compare results with the raw expressions. Use VALUE or N to coerce data types predictably, and consider adding a fallback value for unexpected inputs. When sharing sheets, protect sensitive logic by simplifying inputs and avoiding hard-coded data in IF branches.
Building a small decision dashboard with IF-based logic
Create a compact dashboard by combining IF with FILTER, SUMIF, and conditional formatting. Use IF to drive a status column, then summarize with SUMIF to show totals for each status. Add 1-2 visual cues (green for approved, red for rejected) using conditional formatting to make the outcomes instantly legible. This approach demonstrates how IF-driven logic can underlie a clean, actionable dashboard.
Tools & Materials
- Google account with access to Google Sheets(Needed to create and edit sheets online)
- Test dataset or sample sheet(A small dataset with numeric and text columns for experimentation)
- Web browser or mobile app(For accessing Google Sheets and reference material)
- Optional: Google Apps Script editor(For automating checks or creating custom functions)
- Reference templates or example formulas(Useful to adapt patterns quickly)
Steps
Estimated time: 20-40 minutes
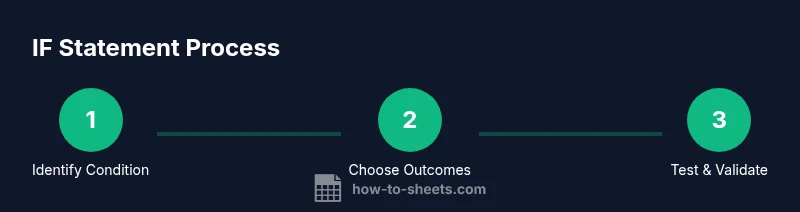
- 1
Identify the condition to test
Scan your data to determine what should trigger a specific outcome. Write down the condition in plain language before translating it into a formula.
Tip: Keep the condition as simple as possible and avoid mixing too many operators in one test. - 2
Choose true/false results
Decide what should be returned when the condition is true and what should appear otherwise. Use concise, consistent labels.
Tip: If you plan to reuse results, reference them with named ranges for clarity. - 3
Write the IF syntax
Enter IF(logical_expression, value_if_true, value_if_false). Test step by step with sample data.
Tip: Watch for missing commas/semicolons and ensure the comma/semicolon matches your locale. - 4
Test with edge cases
Place empty cells, text where numbers are expected, and maximum/minimum values to verify behavior.
Tip: Use IFERROR around the formula to capture unexpected errors gracefully. - 5
Iterate with nesting when needed
If more than two outcomes are required, nest IFs or switch to IFS for readability.
Tip: Aim for readability; long nests reduce maintainability. - 6
Validate across the dataset
Copy the formula to other rows and confirm results align with expectations for different inputs.
Tip: Lock references (with $) where a test should stay constant.
FAQ
What is the syntax for IF in Google Sheets?
The syntax is IF(logical_expression, value_if_true, value_if_false). Ensure proper separators and matching parentheses. Use quotes for text results and numbers for numeric outputs.
The IF function uses a test, then returns true or false results. It’s written as IF(test, value-if-true, value-if-false).
How do I nest IF statements effectively?
Nest IF functions to handle multiple outcomes, e.g., IF(score>90, 'A', IF(score>80, 'B', 'C')). For many conditions, consider using IFS or SWITCH for readability.
Nest IF calls by putting another IF inside the false or true result to handle more cases.
When should I use IFS or SWITCH instead of IF?
IFS and SWITCH reduce complexity when you have several conditions. IFS checks conditions in order; SWITCH matches a single value to multiple results.
Use IFS for multiple conditions or SWITCH for exact value matching to keep formulas tidy.
How can I handle errors in IF formulas?
Wrap formulas with IFERROR to provide a fallback when inputs are missing or invalid, e.g., IFERROR(formula, 0).
Wrap with IFERROR to avoid ugly error messages and provide defaults.
What are common IF formula pitfalls to avoid?
Missing commas, misordered arguments, or mixing data types can break IF statements. Always verify with sample data and consider text vs. numbers.
Double-check syntax and data types; test with edge cases to catch mistakes early.
Watch Video
The Essentials
- Master the IF syntax for reliable basics
- Use nested IFs or IFS for multiple outcomes
- Test with edge cases to prevent surprises
- Combine IF with SUMIF/FILTER for dashboards
- Document your logic to ensure maintainability