Duration formats in Google Sheets: master time formatting
Learn how to format and display duration values in Google Sheets, including hours, minutes, and multi-day spans. Practical formulas, custom formats, and real-world examples help you build reliable time-tracking dashboards without scripts.

You will learn how to display and format duration values in Google Sheets, including hours that exceed a day, minutes, and seconds. This quick guide covers built-in formats, custom [h] formats, and practical TEXT-based displays for clean dashboards. No advanced scripting needed—just reliable, human-readable durations. We’ll show concrete formulas and step-by-step checks so you can verify results at a glance.
Why duration formatting matters in Google Sheets
In Google Sheets, a duration is stored as a fraction of a day. For example, 1 hour equals 1/24, and 24 hours equals 1.0. Understanding this helps avoid subtle mistakes when calculating elapsed time, tracking hours on a project, or building dashboards. If you format a duration incorrectly, you risk showing meaningless values like 0:00:00 or misinterpreting late-night hours as separate days. According to How To Sheets, consistent duration formatting reduces data-entry errors and makes time-tracking sheets more reliable across teams. In this guide we’ll focus on duration formatting specifically for the keyword duration format google sheets and show practical steps to display, calculate, and verify durations in real-world scenarios. You’ll see how to display hours, minutes, and seconds, handle spans longer than a day, and build dependable time trackers without resorting to scripts. The strategies below apply whether you’re budgeting hours for a class project, tracking billable time in a consulting gig, or logging employee shifts. Across these use cases, the core idea is to treat duration values as numeric days internally while choosing display formats that communicate the exact length of time at a glance.
Displaying simple durations (hh:mm:ss) and converting to text
When your data represents hours, minutes, and seconds, you usually display it with a standard time format like hh:mm:ss. Enter a value such as 2:15:00 in a cell and apply a time format to show 2:15:00. If you need to show durations that go beyond 24 hours, switch to a custom format like [h]:mm:ss. The square-bracket form tells Sheets to accumulate hours without rolling over each day. To display the same value as text while preserving the underlying number, use =TEXT(B2, "hh:mm:ss") or =TEXT(B2, "[h]:mm:ss"). Remember that formatting is separate from the underlying value: you can change the display without altering the data. This separation is especially helpful when you import durations from other systems that treat time as a decimal fraction of a day. In those cases, a quick check with =A2*24 will reveal the numeric hours, confirming whether your display formula is showing the right amount of time. If you anticipate frequent cross-sheet sharing, keep a small legend near the data explaining which format is used in each column to prevent misinterpretation by teammates or automated reports.
Handling durations longer than 24 hours
Durations longer than a day require a display that adds up hours across days instead of restarting at 0 every 24 hours. In Google Sheets you can achieve this with a bracketed hour format, such as [h]:mm:ss or [hh]:mm:ss. If a cell contains 1.5 (days) representing 36 hours, formatting with [h]:mm:ss will show 36:00:00 rather than 1:12:00. If your data are stored as decimal days (for example from a software export), convert them to hours first by multiplying by 24, then apply the [h] or [h]:mm:ss format. You can also use =TEXT(A2, "[h]:mm:ss") to create a textual display for dashboards. Remember to verify unusual cases like leap seconds or daylight-saving time adjustments if your workflow hinges on precise event timing. With these formats you’ll be able to present long-running processes or multi-day schedules clearly in reports and charts. The key is choosing a format that consistently communicates the total duration rather than segmented clock times.
Calculating durations with end-start and negative values
Calculating durations usually starts with subtracting a start time from an end time (End − Start). In Sheets, this yields a numeric value representing days. To visualize the elapsed time, format the result as [h]:mm:ss. If End is earlier than Start (for example, overnight shifts), adopt a controlled approach so your result does not look like an error. Use a formula like =IF(C2>=B2, C2-B2, -(B2-C2)) and format the cell with [h]:mm:ss to show negative durations as a prefixed minus sign. Alternatively, compute the absolute duration and store a separate sign column for reporting. For dashboards, consider a rule to display “−” for negative durations rather than raw negative times, to maintain readability. Testing with sample rows helps catch locale-specific quirks—for instance, some locales automatically reflow times when time values cross midnight. The goal is a consistent, unambiguous duration value that users can interpret quickly in spreadsheets, reports, and invoices.
Custom formats and locale considerations
Custom duration formats let you tailor displays to your audience, but locale settings can influence how numbers and times appear. If your sheets use a locale that uses a comma as a decimal separator, the same formula may render differently when embedded in charts or exported to CSV. A robust approach is to keep the underlying duration as a numeric value and reserve a separate display column with a fixed format such as [h]:mm:ss. If you need to show decimal hours, convert to a standard duration by dividing by 24 and applying your preferred format: =TEXT(A2/24, "[h]:mm:ss"). When sharing with teammates, document the chosen formats and ensure consistent interpretation across devices and regional settings. Keep in mind that Google Sheets stores durations as fractions of a day, so any formatting should be viewed as a display layer rather than a data layer. This separation reduces confusion when aggregating hours across projects or exporting data for billing systems. Following these practices makes duration handling predictable across your projects and dashboards.
Real-world use cases: time tracking and dashboards
Time-tracking scenarios illustrate how duration formatting pays off in daily work. Build a simple hours-tracking sheet with columns for Employee, Start, End, and Duration. Start and End should be formatted as time values, and Duration as a [h]:mm:ss display. Create a summary row that totals hours for a week using =SUM(C2:C10) and show the total with a separate display column using =TEXT(D2, "[h]:mm:ss"). For dashboards, combine duration data with status indicators, project codes, and color rules. The goal is a compact, accurate view of time spent on tasks, not a maze of mismatched formats. As part of our approach at How To Sheets, we emphasize using a single source of truth for durations and exposing only the display layer to end users, reducing confusion and errors across teams.
Troubleshooting common issues
Common issues include misinterpreted inputs, drift across daylight changes, and confusion between dates and durations. If a value looks wrong, first check whether Sheets is treating it as a date rather than a pure duration. Use VALUE or TIMEVALUE to convert text to a duration, and reapply the desired format. If durations appear cut off after midnight, confirm you are using a bracketed format like [h]:mm:ss. For long-running projects, remember to verify that the workbook’s locale matches the intended format and that exported data preserves the same interpretation. Finally, always validate a few representative rows with a quick sanity check: add up a few durations and ensure the result matches the expected total in hours and minutes.
Verdict
The How To Sheets team recommends adopting a consistent duration strategy: store durations as numeric days, display them with bracketed hour formats for long spans, and use TEXT for readable outputs in dashboards. This approach minimizes errors, supports cross‑sheet sharing, and scales with larger datasets. If you follow the steps above and maintain documentation for formats, you’ll have reliable duration handling in Google Sheets. According to How To Sheets, the best practice is to separate the data layer and the display layer, using formulas to compute durations while reserving formatting for presentation. The How To Sheets analysis shows that teams adopting these conventions see fewer questions from teammates and smoother data exports in 2026.
Tools & Materials
- Google Sheets access (web or mobile)(Use any modern browser or the mobile app.)
- Sample time data (start and end times)(Include cases that cross midnight and durations over 24 hours.)
- Locale awareness (optional)(Check decimal separator and time format settings.)
- Test sheet for validation(Create a small dataset to verify formulas and formats.)
Steps
Estimated time: 30-45 minutes
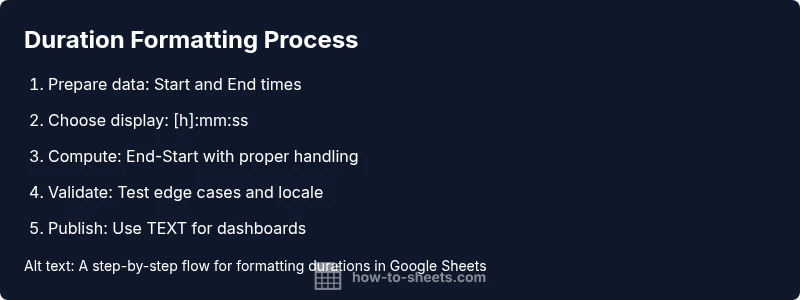
- 1
Prepare your dataset
Create a sheet with at least two columns: Start time and End time. Use real-world times, including entries that cross midnight and durations longer than 24 hours. Ensure cells are typed as time or datetime, not plain text.
Tip: Label columns clearly (Start, End, Duration) to avoid confusion. - 2
Normalize inputs to duration values
If any inputs are dates, convert them to durations by subtracting Start from End. Ensure the result remains a numeric value representing days.
Tip: If you see text, convert with VALUE or TIMEVALUE before subtracting. - 3
Set display to show hours
Apply a duration-friendly display format such as [h]:mm:ss to the Duration column so values over 24 hours are shown correctly.
Tip: Use Format > Number > More formats > Custom number format to set [h]:mm:ss. - 4
Compute elapsed time
Calculate End − Start in a dedicated column and format the result as [h]:mm:ss to visualize total duration.
Tip: If End is earlier than Start, consider using a negative duration rule with IF. - 5
Display results for dashboards
Use TEXT to present durations in reports without altering the underlying numeric value, e.g., =TEXT(D2, "[h]:mm:ss").
Tip: Keep underlying data numeric; reserve TEXT for presentation. - 6
Validate and troubleshoot
Test edge cases: 0 duration, exactly 24 hours, and very long durations. Check locale implications when exporting.
Tip: Document the chosen formats to ensure consistency across teams. - 7
Handle overnight and negatives
If End < Start, decide whether to show a negative duration or its absolute value with an explicit sign in reports.
Tip: A robust approach uses IF to display a signed duration while preserving a clear display format.
FAQ
What is duration format in Google Sheets?
Duration format defines how Sheets stores and displays time lengths. Durations are numeric fractions of a day; you display them with bracketed hours (e.g., [h]:mm:ss) for long spans. Use TEXT to customize displays without changing the underlying value.
Durations are stored as fractions of a day; use bracketed hours to display long times and TEXT for readable reports.
How do I display durations longer than 24 hours?
Use a custom format like [h]:mm:ss or [hh]:mm:ss. If data are decimal days, convert by multiplying by 24, then apply the bracketed format.
Apply the [h] format to show hours beyond a day; convert decimals to durations if needed.
Can I convert text to a duration?
Yes. Parse or convert text with TIMEVALUE or VALUE, then format as a duration. For example, convert '2:30:00' to a duration and display as [h]:mm:ss.
You can convert text to a duration using TIMEVALUE or parsing components.
What are common mistakes to avoid when formatting durations?
Avoid treating durations as dates, don’t forget to format as duration when needed, and handle spanning across midnight with bracketed formats.
Don’t mix date formats with duration; use bracketed hours for long times.
Do locale settings affect duration formatting?
Locale can affect decimal separators and export behavior. Durations stay numeric, but display and exports may vary; test across locales.
Locale can affect how numbers export; test your setup if sharing internationally.
How can I sum durations across a week?
Sum durations with SUM on the duration column and display the total with a bracketed format like [h]:mm:ss to show total hours.
Add up the durations and display the total with bracketed hours.
Watch Video
The Essentials
- Treat durations as numeric days internally
- Use [h]:mm:ss to show long spans
- Use TEXT for dashboard-friendly displays
- Test edge cases like crossing midnight