Google Coloring Sheets for Kids: A Practical Guide in Google Sheets
Learn to create, customize, and share google coloring sheets for kids using Google Sheets. This practical guide covers design, printing, templates, and collaboration for classrooms, families, and small teams.

google coloring sheets for kids are editable, printable pages built with Google Sheets or connected via Drawings. This guide shows how to design, customize, and share coloring sheets for classrooms or home use, using Sheets, Drawings, and images. You’ll learn step-by-step methods to create templates, track progress, and reuse designs across projects.
What are google coloring sheets for kids?
google coloring sheets for kids represent printable or digital coloring pages created within Google Sheets (often augmented with Google Drawings or inserted images). By combining grid-based coloring areas with outlines, kids can color, trace, or practice fine motor skills in a familiar, cloud-based environment. This approach makes it easy for teachers and parents to distribute, customize, and reuse coloring pages without special software. For families, it also means a single, accessible library of activities that travels with your Google account.
Why use Google Sheets for coloring pages?
Using google coloring sheets for kids in Sheets offers several advantages: instant access from any device with internet, straightforward collaboration, and simple sharing controls. Sheets’ grid structure lets you create uniform color areas, while borders and shading help define lines. You can export finished designs as PDFs for printing, or share live templates for ongoing classroom activities. Additionally, templates can be reused for different themes without rebuilding from scratch, saving time and effort.
Getting started: prerequisites and setup
Before you begin, ensure you have a Google account and access to Google Sheets. A computer or tablet with internet is ideal, but Sheets also works on mobile devices. Decide whether you want to produce printable sheets (PDF via Print) or interactive digital pages (shareable links). Optional tools like Google Drawings can be used to add custom icons or shapes. Remember to organize your coloring sheets into a dedicated folder for easy access and version control, which aligns with How To Sheets’ recommended practices.
Designing colorable templates in Sheets
Start with a clean grid where each cell represents a color block. Adjust column widths and row heights to create nearly square cells (for ease of coloring). Plan a consistent layout: a title area, a central coloring grid, and a legend or color key. Use a light background and clear borders to delineate each sketch area. If you’re creating multiple sheets, design a reusable template with placeholders for the image or outline and a consistent margin around the edges.
Adding outlines and shading with borders
Borders define the boundaries kids will color inside. Use thick borders for the outer edge and thinner borders for internal lines. You can apply borders to a range of cells to form a connected drawing. To keep files neat, lock the main outline logic so kids don’t accidentally alter the grid. If you want darker lines, pair borders with cell fill color choices to simulate shading while keeping printing crisp.
Embedding images and shapes
Enhance coloring pages by inserting clipart, silhouettes, or traced shapes. Insert images from your device or use Google Drawings for scalable shapes. For printable sheets, ensure images have transparent backgrounds where appropriate to avoid heavy printing. Keeping image size consistent helps maintain a uniform look across pages, which is especially important when you create a library of sheets for multiple kids or classes.
Color-by-number and tracing activities with Sheets
Color-by-number can be implemented by assigning color values to specific cell ranges and using conditional formatting to guide shading. Tracing activities can be produced by placing bold outlines in the central grid and providing a blank area around the boundaries for practice. Create a simple color palette legend to help kids know which color corresponds to each number. This approach keeps activities organized while leveraging Sheets’ native capabilities.
Sharing and collaboration
Google Sheets makes it easy to share coloring sheet templates with teachers, parents, or students. Set links to view or edit as appropriate and use comments to request feedback. Version history lets you revert changes if someone edits the template accidentally. When distributing to a classroom, consider creating a shared drive folder with access permissions suitable for your audience. Always save a master template to maintain a clean base for future activities.
Printing tips: quality and margins
Printing google coloring sheets for kids requires attention to margins, scale, and paper size. Use the print setup to fit the sheet to the page, select landscape orientation when necessary, and enable gridlines if they help maintain alignment. To ensure sharp lines, print a test page and adjust border thickness and cell sizes if needed. For multiple pages, consider exporting to PDF first, then printing in a batch to preserve layout across pages.
Reusing templates and creating a library
A well-organized template library makes it easy to swap themes (animals, shapes, letters) without starting from scratch. Duplicate templates, rename the copies clearly, and store them in a clearly named Google Drive folder. Create a master color palette and outline set that works across themes to preserve a consistent look and feel. This approach aligns with efficient skill-building, enabling students or family members to complete multiple activities quickly.
Common pitfalls and troubleshooting
Common issues include misaligned borders after printing, inconsistent cell sizes, or color bleed due to printer settings. To minimize problems, always preview in print view, use a consistent margin template, and adjust page scaling. If images look pixelated, replace them with higher-resolution assets or vector shapes via Drawings. Remember that templates should be tested by a sample child to ensure usability and accessibility.
Tools & Materials
- Google account(Essential to access Google Sheets and Drive)
- Device with internet(Laptop, tablet, or Chromebook)
- Google Sheets access(Create, edit, and share sheets)
- Images or clipart (optional)(Transparent PNGs work well for sheets)
- Google Drawings (optional)(For scalable shapes and icons)
- Printer (optional)(If you plan to produce physical coloring sheets)
Steps
Estimated time: 60-90 minutes
- 1
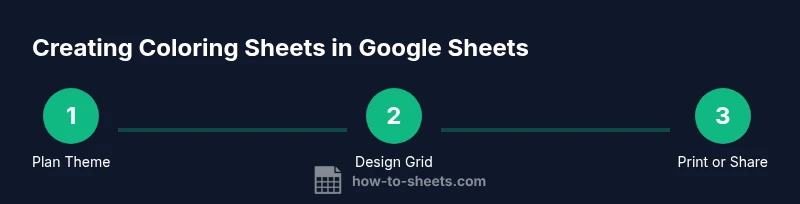
Plan the theme and layout
Define the intended age range and select a theme (animals, letters, shapes). Sketch a rough layout including title, coloring grid, and a color-key area. This planning stage ensures a consistent, reusable template.
Tip: Map out the grid dimensions before you start building in Sheets. - 2
Create the coloring grid
Set up a square-ish grid by adjusting column widths and row heights. Aim for consistent cell sizes to simplify coloring. Leave a margin around the grid for printing.
Tip: Use a standard cell size (e.g., 20x20 px) to keep pages uniform. - 3
Add outlines with borders
Apply borders to define the coloring areas and the outer edge. Use thicker borders for the outer frame and thinner ones inside. This improves print clarity.
Tip: Test print a single page to verify line thickness. - 4
Incorporate images or shapes
Insert compatible images or use Drawings to add scalable shapes. Ensure transparency where needed and size consistency across pages.
Tip: Prefer vector-like shapes from Drawings for crisp prints. - 5
Create color keys and palettes
Add a small legend explaining which color corresponds to each number or area. Keeping a fixed palette helps kids stay organized across pages.
Tip: Limit color options to 6-8 to reduce printing complexity. - 6
Save as a reusable template
Rename the file to include a template tag and store in a master templates folder. Create a copy for each new theme.
Tip: Lock primary layout cells to prevent accidental edits. - 7
Test and print a page
Preview in print view and adjust margins, scale, and orientation as needed. Print a test page to confirm alignment and line quality.
Tip: Check output on both color and black-and-white printers.
FAQ
Can I convert coloring sheets created in Google Sheets to PDFs for printing?
Yes. You can export Google Sheets as PDF files to print or share offline. This preserves the grid, borders, and any inserted images, making it easy to distribute printable coloring pages.
Yes, you can export your Sheets coloring pages as PDFs for easy printing and sharing.
Is Google Drawings necessary for coloring sheets in Sheets?
Not strictly. Drawings are optional but helpful for adding scalable icons and shapes. You can also insert PNGs or SVGs directly into Sheets if they fit your layout.
Drawings are optional but useful for adding scalable shapes; you can also import images directly.
How can I share coloring sheet templates with others?
Use Google Drive sharing settings to grant view or edit access. Organize templates in a dedicated folder and enable commenting for feedback.
Share via Google Drive permissions; put templates in a dedicated folder and use comments for feedback.
What are best practices for printing quality?
Preview in print view, set proper margins, and choose landscape or portrait based on grid orientation. Print test pages to ensure clean lines.
Preview, set margins, choose orientation, and print a test page to ensure clean lines.
Can I reuse templates for different themes?
Absolutely. Duplicate master templates, swap images or outlines, and maintain consistent color keys. This accelerates new coloring pages.
Yes. Duplicate templates and swap elements to quickly create new coloring pages.
Watch Video
The Essentials
- Plan themes before building templates
- Design square-ish grids for easier coloring
- Use borders and outlines for print clarity
- Leverage templates for quick reuse
- Test print to ensure quality