Google Sheets Border: A Practical How-To Guide
Learn how to apply, style, and manage borders in Google Sheets to clarify data tables, headers, and dashboards. This practical guide covers basic borders, colors, thickness, and advanced tips for large datasets.

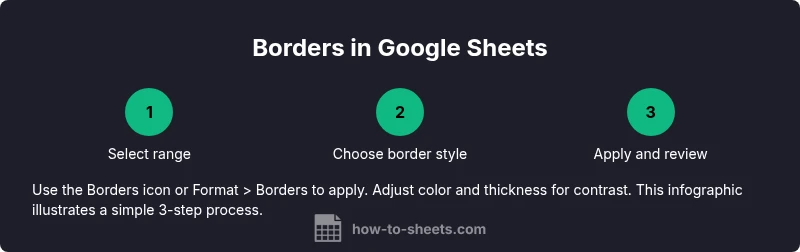
Borders frame data in Google Sheets, improving readability and organization. This ultra-compact answer outlines how to apply borders, choose line styles, and color. For a complete step-by-step guide, see our detailed How-To.
Understanding google sheets border
A border is a visible line that you can apply to one or more cells to define boundaries, separate sections, or emphasize totals. In contrast to the default gridlines that appear on every sheet, borders are intentional formatting choices you control. By using borders strategically, you can guide readers through a data table, highlight headers, and create printable layouts that look polished. According to How To Sheets, borders are one of the simplest yet most effective tools for improving data legibility without changing content. Understanding when and where to place borders is the first step toward clean, navigable spreadsheets. The term google sheets border refers to the set of lines you apply to cell edges—top, bottom, left, and right—individually or as a group. In practice, you’ll combine borders with shading, font weight, and alignment to achieve consistent, professional results.
Basic Borders: the essentials
Start by selecting a range of cells you want to frame. In Google Sheets, locate the Borders icon on the toolbar (it looks like a square with edges). Click it to reveal a grid of border options: no borders, all borders, inner borders, outer borders, and borders for individual sides. For most tables, you’ll apply a bottom border to the header row and a light outer border to the data area. Borders are dynamic; you can remove them at any time by choosing 'Clear borders'. How To Sheets emphasizes testing on a sample region before applying borders to large blocks, to ensure the look matches your intended design.
Border Styles: solid, dashed, dotted, double
Borders can be solid, dashed, dotted, or double lines, each conveying a different emphasis. A solid line is the most commonly used and works well for general separation. Dashed or dotted borders can be effective for secondary divisions or print-friendly layouts. Double borders are useful for highlighting totals or headers without overpowering the data. In practice, combine borders with cell shading to create a clean, newspaper-like grid that is easy to scan. If you’re preparing a dashboard, keep the styles consistent: one weight for headers, another for data cells, and a third for totals.
Border color and thickness
Color and thickness enhance contrast and readability. The color picker lets you pick a border color that stands out against your fill colors; for light backgrounds, consider darker borders and vice versa. Thicker borders can frame sections more prominently, but overuse reduces readability. When you apply color, test in both normal view and print preview if you’ll export the sheet to PDF or print. A practical approach is to reserve color for headers and totals, leaving data cells with a neutral black or gray border for consistency. How To Sheets notes that consistent border colors reinforce a professional look across multiple sheets.
Applying borders to multiple ranges and entire sheets
To apply borders to several non-contiguous ranges, hold Ctrl (or Command on Mac) while selecting each range, then apply the border from the toolbar. For whole sheets, click the top-left corner to select all cells, then click Borders to apply a universal frame. If your sheet contains merged cells, apply borders to the surrounding area rather than each merged cell to avoid awkward gaps. When formatting large datasets, consider applying borders in stages: first frame headers, then separate data blocks, then finalize totals. If you’re sharing the file with others, ensure your border scheme is documented in a legend or a brief note within a comment.
Working with merged cells and borders
Merged cells complicate border placement because Google Sheets treats the merged region as a single cell. To maintain clean borders, apply the border around the merged area rather than on interior edges. It’s often preferable to unmerge cells temporarily if you need precise lines, then re-merge after borders are added. If you must preserve merging, test border options on a copy of your sheet to avoid misalignment in reports or prints. If you’re unsure, apply borders around the entire merged area to maintain a cohesive look without jagged gaps.
Borders and conditional formatting
Conditional formatting and borders can work in tandem to highlight important data. Use borders to delineate sections; apply conditional formatting to draw attention to specific values, then add a border around those cells to emphasize the region. If you’re using conditional formats, ensure the borders don’t obscure the color scale or data readability. How To Sheets analysis shows that borders tied to data-driven conditions can improve scanning efficiency in large dashboards.
Keyboard shortcuts and time-savers
Learn quick actions to speed up your workflow. The Borders button is the simplest route, but you can also access borders from Format > Borders to apply multi-side lines. For bulk work, select a large range and apply borders once, then tweak individual sections as needed. Pro tip: use cell shading consistently in tandem with borders to create a professional, print-ready layout.
Common pitfalls and troubleshooting
Avoid overusing borders. Too many lines create visual noise and can obscure data. Keep a single border style for headers and a lighter one for data cells. When printing, check that borders print correctly in the PDF preview, since screen appearance can differ from print results. If borders appear misaligned after merging cells, review your merge choices and reapply borders to the final layout. The How To Sheets team notes that consistency is more important than complexity; keep a simple, repeatable border pattern across sheets.
AUTHORITY SOURCES
- https://edu.gcfglobal.org/en/googlesheets/ — GCFLearnFree Google Sheets basics and formatting guides
- https://www.techrepublic.com/article/how-to-use-google-sheets/ — TechRepublic practical guide to Google Sheets
- https://www.nist.gov/ — National Institute of Standards and Technology (example authoritative domain for data formatting best practices)
Tools & Materials
- Computer or device with internet access(Access to Google Sheets via a web browser (Chrome/Edge recommended))
- Active Google account(Needed to open and edit Sheets in the cloud)
- Sample dataset to practice borders(Include headers, a data region, and a totals row for realism)
- Border color picker or swatches(Optional but helpful for visual contrast)
- Optional: keyboard shortcuts cheat sheet(Great for speed, not required)
Steps
Estimated time: 15-25 minutes
- 1
Select target range
Click and drag to highlight the cells you want to border. If you need multiple areas, hold Ctrl (Cmd on Mac) and click each range. This ensures consistency when you apply the border later.
Tip: Use the top-left corner to select the entire data area before narrowing to subranges. - 2
Open the Borders menu
Click the Borders icon on the toolbar to reveal border options, or use the menu path Format > Borders. This places a dynamic border grid on screen to guide your next choice.
Tip: Hover over options to preview borders before applying them. - 3
Choose a border style
Pick from options like all borders, outer borders, inner borders, or individual sides. Start with a simple bottom border for headers and add outer borders for the data block.
Tip: Keep it simple at first—reduce complexity if the sheet becomes hard to read. - 4
Select color and thickness
Use the color picker to choose a border color with enough contrast for your background. Adjust thickness to emphasize headers or totals without overpowering data.
Tip: Test in both screen view and print preview. - 5
Apply to multiple ranges or entire sheet
If needed, apply borders to all selected ranges by re-opening the Borders tool. For whole-sheet borders, select all cells (Ctrl+A) before applying borders.
Tip: Document the style in a legend for collaborators. - 6
Review and adjust
Check alignment, ensure headers and totals are clearly separated, and adjust as necessary. If you encounter misalignment after merging cells, re-apply borders to the affected area.
Tip: Aim for consistency across similar sheets.
FAQ
What is the difference between borders and gridlines in Google Sheets?
Borders are user-defined lines you apply to cell edges to emphasize sections, while gridlines are the default sheet lines. Borders persist when printing and can be customized, whereas gridlines are part of the sheet’s base formatting and are often hidden in prints.
Borders are user-selected lines; gridlines are the sheet’s default background lines.
Can I apply borders to the entire sheet quickly?
Yes. Select the entire sheet (click the corner button) and apply a border from the Borders tool. This adds lines around every cell, creating a uniform frame.
Yes—just select all cells and apply borders.
How do I remove borders from a range?
Select the range, open the Borders menu, and choose the option to clear borders. Borders are easily removed without affecting data.
Select the range and clear borders.
Are variant border colors supported beyond the palette?
You can pick any color from the palette; for advanced color control you can use hex values in custom color options when available.
Colors can be chosen from the palette and customized.
Can I mix borders across headers and data sections?
Yes. Apply a stronger border to headers and lighter borders to data cells. This creates a clear hierarchy without overwhelming the sheet.
Yes, you can mix borders across sections.
What are common mistakes when using borders in Google Sheets?
Overusing borders, misaligning borders with merged cells, and not testing print previews can degrade readability. Aim for a simple, consistent border scheme.
Avoid clutter; keep borders clean and purposeful.
Watch Video
The Essentials
- Apply borders to define data regions clearly
- Use consistent border styles for headers and totals
- Test borders in print preview before exporting
- Combine borders with shading for legible, professional sheets