Google Sheets Checklist with Conditional Formatting: A Practical Guide
Learn to build a reusable Google Sheets checklist using conditional formatting and data validation to track tasks, color-code status, flag overdue items, and keep projects organized.

Goal: create a color-coded Google Sheets checklist that highlights completed tasks and flags overdue items using conditional formatting. According to How To Sheets, you’ll also add data validation to ensure consistent entries and build a reusable template for any project. This quick guide covers setup, rules, and best practices for an accurate, scalable checklist.
Why Google Sheets is Ideal for Checklists
A checklist in Google Sheets offers accessibility, collaboration, and automation capabilities that fit daily workflows for students, professionals, and small business owners. With a familiar interface, you can create a simple task list or a comprehensive project tracker without learning new software. Conditional formatting helps you see status at a glance, while data validation minimizes entry errors. According to How To Sheets, starting with a clean template and consistent data structures makes your checklist scalable across teams and projects. You can share links, track changes in real time, and revert mistakes with version history, all within a single spreadsheet. This setup supports the keyword google sheets checklist conditional formatting by ensuring that formatting and validation work together to create a reliable, visually intuitive tracker for any project.
Core features that empower a checklist
A robust google sheets checklist conditional formatting workflow relies on three core capabilities: data validation, checkboxes, and conditional formatting. Data validation constrains entries to predefined lists, reducing typos and inconsistent statuses. Checkboxes provide a quick, intuitive way to mark items as done, while conditional formatting visually emphasizes priority, overdue items, and completed tasks. When combined, these features create a scalable, human-friendly system. You can also extend the template with filters, pivot views, or a summary dashboard to monitor progress at a glance. For teams, the real-time collaboration and version history in Google Sheets ensure everyone stays aligned on the same checklist state.
Building a reusable template: blueprint for long-term use
To make the google sheets checklist conditional formatting truly reusable, design your template with clean structure and labeled sections. Start with a Tasks tab containing columns for Task, Due Date, Priority, Status, and Completed. Use data validation to standardize Status and Priority values, and place a dedicated column for a checkbox to reflect completion. Implement conditional formatting rules that color-code Status or Due Date; set green for Completed, amber for In Progress, red for Overdue, and blue for Upcoming. Save the sheet as a template so future projects can clone the same structure without rebuilding the rules from scratch. Keeping a compact, well-organized layout helps anyone apply the same logic to any project, which is the essence of the google sheets checklist conditional formatting approach.
Common pitfalls and how to avoid them
Common mistakes include inconsistent status labels, mixed date formats, and overcomplicated sheets that hinder readability. To avoid these issues, enforce a standard set of status values (e.g., Not Started, In Progress, Completed) and validate date formats. Use the same date system (MM/DD/YYYY or DD/MM/YYYY) consistently across the sheet. Limit the number of columns to preserve clarity, and document each rule in a hidden notes tab or a README sheet within the workbook. Regular audits of the data ensure the checklist remains reliable as projects evolve. Adhering to these practices will keep your google sheets checklist conditional formatting effective and easy to maintain.
Practical starter template example: a concrete walkthrough
Imagine a 10-row starter checklist for a small project. The sheet includes Task, Due Date, Priority, Status, and Completed columns. The Status column uses a drop-down with Not Started, In Progress, and Completed. A simple checkbox in the Completed column reflects the final state and can drive a summary calculation. Conditional formatting highlights overdue tasks in red, in-progress items in amber, and completed tasks in green. This concrete scenario demonstrates how the google sheets checklist conditional formatting setup translates into a practical, real-world tool you can customize quickly.
Tools & Materials
- Google account with Sheets access(Necessary to create and edit the checklist)
- Starter dataset or project scope(Provides structure for the template)
- Color palette (HEX codes)(For consistent conditional formatting colors)
- Data validation lists(Predefined Status and Priority values)
- Template spreadsheet(Clone for new projects)
Steps
Estimated time: 30-45 minutes
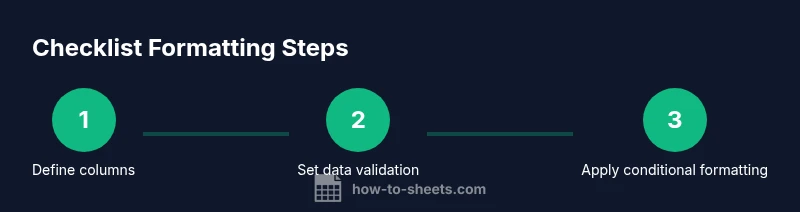
- 1
Define your checklist columns
Create columns for Task, Due Date, Priority, Status, and a Completed checkbox column. This structure keeps data organized and makes it easy to apply rules consistently.
Tip: Name columns clearly and keep a single row header for easy referencing in formulas. - 2
Set up data validation for Status and Priority
Add drop-down lists with predefined values (e.g., Not Started, In Progress, Completed) and High/Medium/Low priority to ensure consistency across entries.
Tip: Use a separate sheet for lists and reference them in validation to simplify updates. - 3
Insert checkboxes for Completed
Add checkboxes in the Completed column so users can mark items as done with a single click, enabling dynamic counts and visuals.
Tip: Link checkbox state to the Status column with a simple formula if you want auto-updates. - 4
Apply conditional formatting for status
Create rules that color-code Status (e.g., red for Not Started, amber for In Progress, green for Completed) to provide at-a-glance status.
Tip: Use absolute references in rules to ensure formatting applies consistently down the column. - 5
Highlight overdue tasks automatically
Add a rule that flags overdue tasks by comparing Due Date to today and ensuring the task is not completed.
Tip: If your project uses custom calendars, adjust the date calculation to exclude non-working days if needed. - 6
Create a reusable template
Save the sheet as a template and provide documented rules in a Notes tab so future projects can clone the same setup.
Tip: Include a short guide in the template about how to adjust lists and colors for new projects.
FAQ
What is conditional formatting in Google Sheets?
Conditional formatting automatically changes cell appearance based on rules you set, helping you highlight important data such as overdue tasks or completed items.
Conditional formatting automatically changes how cells look based on your rules, making overdue tasks stand out.
How do I set up a checklist with checkboxes in Sheets?
Insert checkboxes in a column and optionally link them to a status field using a simple formula to reflect progress.
Add checkboxes in a column and connect them to status to show progress.
Can I share my checklist with collaborators?
Yes. Google Sheets supports real-time collaboration with sharing settings, comments, and version history.
Yes, you can share and collaborate in real time.
How can I flag overdue tasks automatically?
Use a formula that compares the due date to today and apply a conditional formatting rule to highlight overdue items.
Use a formula to detect overdue dates and highlight them automatically.
Is data validation enough to prevent mistakes?
Data validation reduces errors by restricting input to predefined lists, but clear labeling and instructions are still important.
Validation helps, but clear labeling is essential as well.
Watch Video
The Essentials
- Define clear columns for consistency and clarity
- Use data validation to prevent typos and errors
- Color-code with conditional formatting for quick signals
- Save as a reusable template for scalability
- Document rules to simplify future updates