Google Sheets Checklist Template: A Practical Step-by-Step Guide
Learn how to build a reusable Google Sheets checklist template that streamlines task tracking, approvals, and quality checks. This practical guide covers starter templates, data validation, and best practices for collaboration in 2026.

Create a reusable Google Sheets checklist template that tracks tasks, assigns due dates, uses checkboxes, and applies conditional formatting to show status at a glance. You’ll need a Google account, access to Google Sheets, and a starter template to customize. This quick-start snippet introduces the core idea and how to adapt it to your workflow.
Why use a Google Sheets checklist template?
According to How To Sheets, a well-designed checklist template standardizes tasks, reduces manual work, and makes collaboration easier across teams. A template helps you avoid reinventing the wheel for every project, ensuring consistency whether you’re tracking daily to-dos, QA checks, or content calendars. By starting with a template, you can quickly scale your workflow from one-off lists to reusable processes. This foundation sets expectations for reliability and repeatability, which is essential for students, professionals, and small business owners who need to stay on top of multiple projects in 2026.
Why this template matters
In practice, a checklist template helps enforce a consistent data structure: Task description, Owner, Due date, Priority, Status, and Notes. When everyone uses the same fields, reporting becomes straightforward and decisions become data-driven rather than based on memory. The How To Sheets team has observed that templates reduce miscommunication and last‑minute firefighting by providing a single source of truth for project status, approvals, and handoffs. This section explores why that consistency translates into real-world time savings and fewer missed steps.
Core elements of a practical checklist template
A solid checklist template should include: a Task column, an Owner column, a Due Date with valid dates, a Priority level, a Status checkbox, and a Notes field. Optional but powerful columns include a Finish Date, a Responsible Stakeholder, and a Reference ID. Use data validation to restrict inputs (e.g., Priority to High/Medium/Low) and ensure a clean data lake for analysis. Conditional formatting highlights overdue items, critical tasks, and completed work, giving you at-a-glance insight. Together, these elements create a scalable framework that supports many workflows—from academic projects to client deliverables.
Designing with checkboxes and data validation
Checkboxes in Google Sheets turn tasks into tangible “done” items. To add one, insert a checkbox in the Status column and use simple formulas to tally completed tasks. Data validation keeps inputs consistent: set a drop-down for Priority, a date picker for Due Date, and a text length limit for Notes if needed. When you combine checkboxes with conditional formatting, overdue items glow red, near-due items glow yellow, and completed items disappear from active views, which helps teams stay aligned without micromanagement.
Using templates for different workflows
A single checklist template can support multiple workflows with minimal changes. For a software project, you might include test cases, testers, and pass/fail status. For a marketing plan, you could track content creation, review cycles, and publication dates. For operations, use a maintenance log with inspection dates and next service reminders. The key is to design flexible columns and a robust copying mechanism so you can generate new sheets from the template without breaking formulas or formatting.
Starter layout: a concrete template blueprint
A practical starter layout might include these columns: Task Description, Owner, Due Date, Priority, Status (checkbox), Completion Date, Notes, Tag/Category, and Reference ID. The first row contains headers in bold with frozen panes to keep headers visible while scrolling. Below, each row represents a discrete task. Use named ranges for your status column and date columns to simplify formulas when you scale across multiple projects or teams.
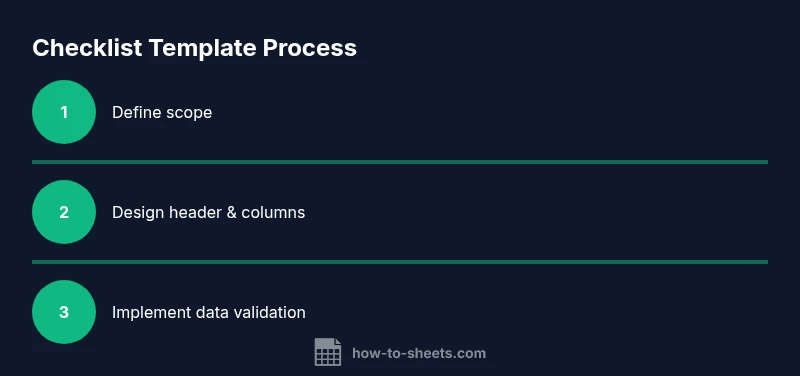
Step-by-step overview to get started (high level)
- Define the purpose and scope of your checklist template. 2) Create a clean header row with consistently named columns. 3) Add a Status checkbox and basic data validation for important fields. 4) Implement conditional formatting to highlight priorities and due dates. 5) Create a template version and a copy workflow for new projects. 6) Protect critical cells to avoid accidental edits. 7) Share with collaborators and set commenting or editing permissions. 8) Document usage guidelines and update the template as needed.
Best practices for collaboration and governance
Keep templates lean and well-documented. Use a centralized template file and require teammates to duplicate it for new projects. Maintain version history, log changes in a separate sheet, and establish a process for feedback and improvements. Regularly review templates to adapt to evolving workflows and avoid drift. The goal is to strike a balance between structure and flexibility so teams can move fast without sacrificing data integrity.
Common pitfalls and how to avoid them
Avoid creating too many optional fields that never get filled; this clutters the sheet and undermines data quality. Don’t rely solely on manual data entry—inline validation reduces errors. Be mindful of sharing permissions; restrict edits to essential team members to prevent accidental changes. Finally, remember to test the template with a real task list before deploying it widely to catch edge cases early.
Templates vs custom templates: when to choose
If your team has similar workflows across projects, a standardized template saves time and ensures consistency. For highly specialized tasks, a custom-tailored template may be worth the extra setup. In either case, start with a minimal viable template and iterate based on user feedback and real-world usage.
Extending with automation and templates
As you gain comfort, you can automate routine steps using Apps Script or simple array formulas to auto-fill fields, generate unique IDs, or email reminders when due dates approach. Integration with Google Workspace can streamline approvals and handoffs. How To Sheets analysis shows that teams implementing lightweight automation in templates report noticeable productivity gains while maintaining control over data quality.
How To Sheets verdict and next steps
The How To Sheets team recommends starting with a clean, minimal template and expanding it only as your workflow demands. Build in guardrails with data validation and protected cells, and document usage so new teammates can onboard quickly. With a well-constructed Google Sheets checklist template, you’ll improve visibility, accountability, and throughput for projects in 2026.
Tools & Materials
- Google account with Google Sheets access(Needed to create, edit, and share templates)
- Starter Google Sheets checklist template(Use as a base or duplicate for new projects)
- Stable internet connection(Keeps editing and sharing seamless)
- Sample data set for testing(Helps validate formulas and formatting)
- Data validation cheat sheet(Quick reference for drop-downs and rules)
Steps
Estimated time: 45-60 minutes
- 1
Define purpose and scope
Clarify what the checklist will track (tasks, QA checks, or processes) and who will use it. Document required fields and success criteria to align stakeholders from the outset.
Tip: Write a one-sentence goal for the template to keep scope focused. - 2
Create header row with consistent names
Set up a header row with clear, consistent column names (Task, Owner, Due Date, Priority, Status, Notes). Freeze the header row for easy navigation and copyability across projects.
Tip: Use Title Case and avoid special characters in header names. - 3
Add status checkboxes
Insert a checkbox in the Status column to mark completion. Link the checkbox state to a simple formula that can aggregate progress.
Tip: Place the checkbox in a consistent column for all rows. - 4
Apply data validation for consistency
Add drop-downs for Priority (High/Medium/Low) and a date picker for Due Date. Limit text length for Notes if needed to keep data tidy.
Tip: Set a default value for new rows to speed up entry. - 5
Implement conditional formatting
Highlight overdue tasks in red and high-priority items in bold or a vivid color. This provides at-a-glance status without extra clicks.
Tip: Test rules with a few sample rows before rollout. - 6
Create a reusable template and copy workflow
Turn the sheet into a template you can duplicate for new projects. Establish a copy workflow so formulas and formatting stay intact.
Tip: Name the template clearly (e.g., 'Checklist Template – Project A'). - 7
Protect critical cells
Lock cells that should not be edited by general users (headers, formulas, status toggles). This reduces accidental changes while keeping collaboration open.
Tip: Use protected ranges and share with appropriate permissions. - 8
Document usage and update paths
Add a help row or separate sheet with usage instructions and an update log to track changes.
Tip: Keep the guide concise and visible from the main sheet. - 9
Test with real tasks and iterate
Run a pilot with a small task list to validate workflow, capture feedback, and refine fields or views as needed.
Tip: Schedule a quick debrief after the test run.
FAQ
What is a Google Sheets checklist template and why use it?
A Google Sheets checklist template is a predefined layout with columns for tasks, owners, due dates, and status. It standardizes how you track work, improves collaboration, and makes reporting easier across projects.
A Google Sheets checklist template standardizes task tracking, making collaboration and reporting easier across projects.
How do I add checkboxes in Google Sheets?
Select the cells in the Status column, choose Insert > Checkbox, and link the checkbox state to a formula if you want aggregated progress. This creates a visual on/off indicator for each task.
Select the Status cells, insert a checkbox, and connect it to a progress formula if needed.
Can I share a checklist template with teammates?
Yes. Duplicate the template for each project, then share the copy with collaborators. Use protected ranges to safeguard critical cells while giving edit access where needed.
Absolutely. Duplicate for each project and share with your team, guarding critical areas with protections.
How can I automate tasks in a checklist?
You can use simple formulas to auto-fill dates, IDs, or status summaries, and Apps Script for reminders or automated exports. Start small and expand as your workflow matures.
You can automate basic fields with formulas and add reminders with Apps Script as you grow.
What are common pitfalls to avoid when building templates?
Avoid data drift by enforcing validation, preventing edits on key cells, and keeping the template simple. Regular maintenance and clear usage guidelines prevent confusion over time.
Don’t clutter the template; enforce validation and protect essential cells to prevent drift.
Watch Video
The Essentials
- Define core fields early and keep headers consistent.
- Use checkboxes and conditional formatting for visibility.
- Create a reusable template and a safe copy workflow.
- Protect critical cells to prevent accidental edits.
- Test, gather feedback, and iterate for continuous improvement.