How to Set Column Width in Google Sheets
Learn how to set column width in Google Sheets with drag, precise pixel widths, and autofit. This step-by-step guide covers single and multiple columns, shortcuts, pitfalls, and real-world templates to keep your data clear and formatted.

You're about to master google sheets set column width. This guide explains how to resize a single column or many columns, using drag, precise pixel values, or autofit. You'll learn practical steps, common pitfalls, and quick shortcuts to keep your data clean and aligned across your sheet. Whether you're cleaning a budget, evaluating a dataset, or preparing a report, this method scales from a one-off adjustment to a global formatting rule.
Why adjusting column width matters in Google Sheets
A clean, readable spreadsheet is easier to scan and interpret. When columns are too narrow, numbers get truncated or wrap awkwardly; when they are too wide, you waste horizontal space and create unnecessary scrolling. The simple action of setting an appropriate column width can dramatically improve readability, printing layouts, and data comparison across rows. The How To Sheets team has found that consistent column widths support quick scanning of key metrics and help maintain professional formatting in reports. In practice, you’ll often adjust widths to reflect the typical content in a column—text fields need more space than short codes, while numeric columns should align on the right. You’ll also want to consider how your sheet will be viewed: on laptop screens, large monitors, or printed on paper; each scenario benefits from deliberate width choices. In short, setting the right column width is not cosmetic; it’s a data-clarity decision that underpins effective communication in spreadsheets.
Methods to resize width: drag, menu, autofit, and exact measurements
Google Sheets offers several reliable ways to set column width, depending on your precision needs and workflow preference. The fastest method is to drag the column boundary in the header: place the cursor on the right edge of the header, click and drag to your desired width. This method is ideal when you’re performing quick formatting on a single column. For precise widths, you can use the menu: Format > Column width, enter a specific value in pixels, and confirm. This is the best choice when you need consistent sizing across several columns and want to replicate the exact look in other sheets or templates. If you’re dealing with varying content, Autofit can adapt width to fit the longest entry in the column. In Sheets, Autofit is applied by double-clicking the boundary or by selecting Resize and choosing “Fit to data.” Finally, you can specify a width in characters by estimating the average character width for your font; this is useful when you’re aiming for consistent text wrapping and alignment. Each method has trade-offs between speed, precision, and consistency.
Scenarios: single column vs multiple columns
When you’re working with a single column, resizing is straightforward: select the column header and apply your preferred width. However, real-world sheets often require uniform widths across several columns for readability and a balanced layout. To resize multiple columns, first select the headers of the adjacent columns by clicking and dragging across the headers, or click the first header, hold Shift, and click the last header. Then apply a single resize operation; Sheets will apply the same width to all selected columns. If some columns already have different content widths, you may want to center on a common width that accommodates the widest content without wrapping extraneously. For travelers in budgeting, project tracking, or inventory lists, that approach leads to a tidy, professional worksheet that prints consistently. In professional contexts, it’s common to set a base column width for all numeric columns and a slightly wider width for text fields; this enhances legibility without causing horizontal scrolling. The important principle is consistency: uniform widths feel intentional and reduce cognitive load for readers.
Practical step-by-step for a typical sheet (one column)
In this section, we translate the approach into a repeatable workflow. First, click the header of the column you want to resize to select it. Next, decide whether you’ll drag or set a precise width. If you’re just aligning by eye, grab the right edge of the header and drag until the content looks right on your screen. If you need exact metrics, choose Format > Column width, input a number, and press OK. The width you specify will determine how many characters can appear on a single line before wrapping, given the font and zoom level. A careful choice prevents data from truncating in print layouts or exporting to PDFs. If you’re adjusting several adjacent columns, select them all before resizing. Tip: To ensure consistency across a large sheet, set a baseline width for all data columns and then adjust any outliers. Time estimate for this step: about 5-10 minutes for a typical sheet with 6-8 columns.
Keyboard shortcuts and quick tips
While Google Sheets doesn’t expose a universal keyboard shortcut to resize a column in all cases, you can speed up the process with a few tricks. Double-click the boundary between two column headers to auto-fit the column to its content; this works best for clean data and prevents manual measurement. If you need uniform widths quickly, select a group of adjacent columns, then right-click any selected header and choose Resize columns. Enter a width in pixels and press Enter. For precise control, rely on the Format > Column width option; you’ll type in the exact pixel value you want. Pro tip: turn on gridlines and zoom to 100% during formatting to avoid misjudging widths on different screens. If your sheet uses wrapped text, consider increasing width slightly to improve readability, but keep an eye on printing constraints. Finally, using the “Fit to data” option after inserting new records can keep your layout tidy without rework. By combining drag, menu entry, and Autofit effectively, you can optimize many columns without sacrificing speed.
Common pitfalls and how to avoid
Resizing columns can trigger a few pitfalls if you’re not careful. Merged cells can prevent width changes from affecting adjacent columns, creating misalignment. If you resize while multiple columns are selected and some contain merged cells, you may see unexpected results; break merged cells or apply the width to unmerged blocks first. Avoid applying a single fixed width to a wide range of data that includes headers, notes, or wrapped text, as this can waste space or truncate information. When sharing sheets with collaborators, a uniform column width helps team members view data consistently; communicate your width decisions and consider locking sheet sections to prevent accidental changes. Printing introduces another constraint: your chosen width must fit on the page without excessive wrap, so preview prints and adjust as needed. If you’re using conditional formatting or charts, remember that extremely narrow columns can impair readability of axis labels or legend text. Finally, always verify the final width on multiple devices; what looks good on a desktop may be cramped on a laptop or smaller screen.
Use cases: budgeting templates and data dashboards
A well-designed sheet uses column width to guide readers through complex information. In budgeting templates, numeric columns typically benefit from compact widths, while description fields require more room for clarity. When you present a dashboard, wider date or category columns can prevent label truncation and make charts easier to interpret. For example, a small business might maintain a monthly budget with categories in one column and amounts in another; setting consistent widths helps auditors and stakeholders review the numbers quickly without scrolling. For students, a lab inventory sheet benefits from even text column widths so item names, quantities, and status lines line up neatly. The same principles apply to lists of assignments, project plans, and contact directories. Establish a baseline width for numeric data, then allocate extra space for long text entries. If your sheet expands with new rows, consider using the Autofit approach for dynamic data; combined with a template, this can reduce manual maintenance over time.
Authority sources
- https://www.nist.gov
- https://www.harvard.edu
- https://www.nature.com
Next steps and practice templates
Now that you know how to set column width, practice on a blank sheet by creating a mini budget or a contact list. Try resizing a group of adjacent columns to the same width, then compare how the data looks when you print. Save a customized template with your baseline widths for future projects and share it with teammates. Revisit your formatting after adding data to maintain readability over time.
Tools & Materials
- Google Sheets access (Google account)(Open Google Sheets in a web browser and sign in.)
- Sheet with data to format(The columns to resize should be visible and ready.)
- Mouse or trackpad(For drag-to-resize actions.)
- Ruler or reference width (optional)(Helpful if you need precise, repeatable measurements.)
Steps
Estimated time: 5-12 minutes
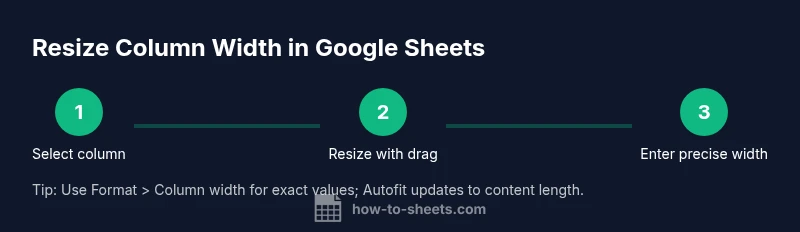
- 1
Select the target column(s)
Click the column header to select a single column. To resize multiple adjacent columns, click and drag across headers or click the first header, hold Shift, and click the last header.
Tip: Use Ctrl/Cmd to select non-adjacent columns. - 2
Choose a resize method
Decide whether to drag, use the precise width option, or autofit. Dragging is fast for quick tweaks; precise width is best for consistency; autofit adapts to content length.
Tip: Autofit works best for data with varying lengths. - 3
Apply an exact width (pixels)
If you need a fixed, repeatable width, go to Format > Column width, enter the pixel value, and press OK. The width applies to all selected columns.
Tip: Use a baseline width for numeric columns for consistency. - 4
Apply to additional columns
If you resized one column and want others to match, select multiple headers and perform a single resize action so all share the same width.
Tip: Check headers align visually after resizing. - 5
Verify content wrapping
Review how text wraps in the resized columns. If content wraps awkwardly, slightly adjust width or font size to improve readability.
Tip: Preview on screen at 100% zoom before printing. - 6
Finalize and review
Save your sheet and review the final layout on different devices or print previews. Share with teammates and consider locking widths if collaboration is active.
Tip: Document your baseline widths for future sheets.
FAQ
How do I set a specific width for a Google Sheets column?
Select the column, go to Format > Column width, enter a pixel value, and press OK. The column will resize to that width.
Select the column, choose Format, then Column width, and enter the exact pixel value you want.
Can I auto-fit all columns at once?
Yes. Double-click the boundary between any two column headers to auto-fit that column, or select multiple columns and choose Resize > Fit to data.
Double-click the boundary between headers to auto-fit, or select several columns and resize to fit.
Will resizing affect merged cells?
Resizing across columns with merged cells can lead to misalignment. Resize unmerged segments first, or temporarily unmerge to apply widths.
Merged cells can complicate width changes; handle unmerged areas before resizing.
How do I resize multiple non-adjacent columns at once?
Hold Ctrl (Windows) or Cmd (Mac) while clicking headers to select non-adjacent columns, then resize a single column width to apply to all selected.
Select non-adjacent columns with Ctrl/Cmd, then resize once for all selected columns.
Is there a keyboard shortcut to resize columns?
There isn’t a universal keyboard shortcut for every case; use the drag, Format menu, or double-click autofit for speed.
There isn’t a single shortcut for every scenario, but you can quickly resize with drag or autofit by double-clicking.
Does changing column width affect printing?
Yes, column width affects how data fits on the page. Always preview print layouts and adjust widths to avoid unwanted wrapping.
Column width changes printing layout; preview and adjust before printing.
Watch Video
The Essentials
- Set a baseline width for numeric columns
- Use autofit for dynamic datasets
- Apply uniform widths for multi-column readability
- Preview before printing to ensure layout consistency