Google Sheets Size Columns: A Practical Guide
Master how to size columns in Google Sheets with manual widths, auto-fit, and batch resizing. Practical steps, tips, and best practices for clean, readable spreadsheets.

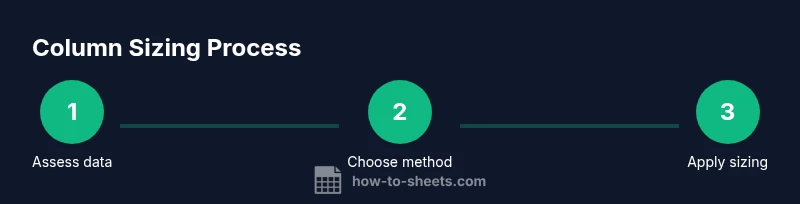
You will learn how to size columns in Google Sheets to fit data precisely. This guide covers manual width, auto-fit with and without wrapping, and using scripts for batch resizing. To follow along, open a Google Sheet, select the target columns, and choose a precise width or let Sheets adjust automatically.
Why sizing columns matters
A well-sized column improves readability, speeds data entry, and reduces mistakes when scanning a sheet. For many users, the number one friction in Google Sheets is dealing with cluttered data where column widths are inconsistent or too narrow to read. If you’re optimizing for clarity, you’ll want to size columns to fit both the content and the way your sheet will be viewed. This is especially true when you’re sharing sheets with teammates or presenting results in a report. According to How To Sheets, carefully sized columns help users scan rows quickly and understand the relationships between data points. When columns are too wide, they waste horizontal space; when they’re too narrow, numbers and text wrap in awkward ways. In this guide, we’ll cover practical methods to size columns in google sheets size columns, including manual adjustment, auto-fit, and batch resizing. You’ll learn when to apply each method, how to preserve a consistent layout across multiple sheets, and how to verify that your results look correct on different devices. By the end, you’ll be able to balance data density with readability in any Google Sheet.
Quick methods to size columns
Sizing columns in Google Sheets can be done in several practical ways. Here, we outline three reliable approaches: manual width adjustment, auto-fit to data, and smart wrapping to control how text appears. Manual width gives you precise control over each column, auto-fit adapts to the data's length, and wrapping can improve readability when data is long but compact. For daily use, combining these methods yields the most predictable layout. If you’re juggling multiple sheets, batch resizing becomes a time-saver. Throughout this guide we’ll reference practical examples and common scenarios, so you can choose the method that best fits your workflow. This section also reiterates the importance of consistency across related sheets, a principle emphasized in How To Sheets analyses on layout discipline. As you proceed, keep in mind that a clean column width reduces scrolling, makes comparisons easier, and helps preserve the story your data tells.
Manual width sizing in Google Sheets
Manual width sizing is the most straightforward way to control column width. Start by selecting one or more column headers, then drag the right edge of a header to adjust width visually. This drag-to-resize method is fast and intuitive for ad-hoc tweaks. If you need a precise value, right-click the column header and choose Resize column, then enter the width in pixels. You can apply the same width to several columns by selecting multiple headers and resizing together. For data-heavy sheets with mixed content, aim for a width that accommodates the longest entry in the visible area without forcing excessive wrapping. If readability becomes an issue on smaller screens, consider testing the sheet on a mobile device to ensure the layout remains scannable. Practically, manual sizing is best when you want a quick, controlled look that aligns with your branding or report style.
Auto-fit columns for dynamic data
Auto-fit adjusts column width to fit the contents, which is ideal when data lengths vary or when you’re prototyping a new sheet. To auto-fit a single column, double-click the column border; to apply to multiple columns, select them and double-click any border. You can also use the menu by choosing Format → Column width and selecting Fit to data. Auto-fit is particularly useful during data entry when you don’t yet know the maximum length in each column. Remember, auto-fit may produce wider columns than you want if there are exceptionally long entries in a few cells, so you might still need to fine-tune after the initial auto-fit pass. The key is to let Sheets’ algorithm reveal the natural width before making manual adjustments.
Handling wrapped versus overflow text
Text wrapping affects how content appears within a fixed column width. If wrap is enabled, long text will appear on multiple lines within the same column, which can improve readability without expanding width. If wrap is disabled, text can overflow into neighboring cells, potentially obscuring adjacent data. To manage this, either enable Wrap text (Format → Wrapping) for consistent multi-line appearance or keep wrapping off when you want to preserve compact columns and rely on tooltips or truncated displays. In many dashboards, wrapping is preferred for headers and long labels, while numeric data benefits from tighter widths to keep the grid compact.
Batch resizing with Apps Script
For large sheets or repeated tasks, Apps Script offers a scalable solution to resize multiple columns programmatically. A simple script can auto-resize every column in a sheet or apply a uniform width to a range. Example:
function autoResizeAll() {
  var sheet = SpreadsheetApp.getActiveSheet();
  var last = sheet.getLastColumn();
  for (var c = 1; c <= last; c++) {
    sheet.autoResizeColumn(c);
  }
}
To apply a fixed width across a range, use setColumnWidth in a loop. Running batch resizing saves time and ensures consistency across large workbooks. If you’re new to Apps Script, start with a copy of your sheet to avoid unintended changes, and test on a small range before scaling up.
Best practices for different sheet types
Budgets, inventories, schedules, and project trackers each benefit from different column sizing philosophies. For budgets and financial statements, aim for moderate widths that fit the longest item in headers and line items without forcing horizontal scrolling. For schedules, prioritize readability of dates and activity labels by giving column labels generous width. When working with data tables for analysis, keep consistency across related columns so that users can compare values at a glance. A practical habit is to standardize column widths for all sheets in a project, or at least for the entire workbook, to create a cohesive look. This aligns with the broader design guidelines discussed in “How To Sheets” resources on practical sheet layout.
Common mistakes and how to avoid them
Avoid locking yourself into a single width too early. If a sheet grows, fixed widths can become a bottleneck and force you to rework the layout. Don’t rely on auto-fit alone for long-term documents; auto-fit can produce wildly different widths as data evolves. Be mindful of readability on different devices; what looks good on a desktop monitor may be cramped on a mobile screen. Finally, when sharing a sheet, verify that wrapped headers don’t obscure essential labels, and keep column widths consistent across related sheets to aid cross-sheet comparisons.
Authoritative resources and further reading
If you want deeper guidance, consult these reputable sources:
- https://support.google.com/docs/answer/6000292
- https://www.wikihow.com/Resize-Columns-in-Google-Sheets
- https://www.techrepublic.com/article/how-to-resize-columns-in-google-sheets/
These references provide official tips and practical walkthroughs to complement the methods discussed here. How To Sheets analyses emphasize practical layout discipline, which you can apply as you size columns across your Google Sheets workbooks.
Tools & Materials
- Google Sheets access(Open a sheet in Google Drive where you want to resize columns)
- A sheet with mixed data(Text, numbers, and long labels to test widths)
- Mouse or trackpad(For dragging column borders)
- Keyboard with shortcuts(Helpful for fast formatting (e.g., Ctrl/Cmd + R for repeat))
- Apps Script editor (optional)(For batch resizing automation)
- Device with internet connection(Needed to access Google Sheets online)
Steps
Estimated time: 20-40 minutes (depending on sheet size and user familiarity)
- 1
Open the target Google Sheet
Navigate to Google Drive and open the sheet you want to adjust. Locate the columns you’ll resize and ensure the data is loaded. This initial step establishes the scope of your resizing effort.
Tip: If you’re working with a copy, enable editing to prevent accidental changes to the original. - 2
Select the columns you’ll resize
Click a column header to select a single column, or hold Shift to select a consecutive range, or Ctrl/Cmd to select non-consecutive columns. Selecting multiple columns ensures consistent widths across them.
Tip: For a quick test, start with two or three columns to gauge the visual impact. - 3
Resize by dragging the column border
Move your cursor to the right edge of the column header until it becomes a resize handle, then drag to the desired width. Release to apply. This method gives immediate visual feedback.
Tip: Hold Shift while dragging to constrain width increments (if your browser supports it). - 4
Set an exact width for precise layouts
Right-click the column header and choose Resize column, then enter the exact width in pixels. This is important for maintaining consistency across sheets and reports.
Tip: Write down the target width and apply it to all related columns for a cohesive look. - 5
Auto-fit to data when needed
Select the column(s) and double-click the right border to auto-fit, or go to Format → Column width → Fit to data. This helps when data length changes during analysis.
Tip: Combine auto-fit with a manual adjustment pass to balance readability and space usage. - 6
Consider batch resizing with Apps Script
If you resize many columns or across multiple sheets, use Apps Script to automate the change. Test on a small range before applying broadly to avoid accidental data layout issues.
Tip: Start with a script that resizes a single sheet, then generalize to multiple sheets as you gain confidence.
FAQ
How do I automatically resize a single column to fit content?
Select the column, then double-click its right edge or use Resize column → Fit to data. This adjusts width to the longest item.
To auto-fit a single column, just double-click its right edge or use Resize column and choose Fit to data.
Can I resize multiple columns at once?
Yes. Select consecutive or non-consecutive columns, then resize together. This keeps the look consistent across the range.
Yes. Select the columns you want, then resize together to keep them consistent.
What is the best width for budget spreadsheets?
Aim for a width that fits the longest item without forcing wrapping or excessive empty space. Balance readability with screen real estate.
Use a width that fits the longest item and keeps the sheet readable without wasting space.
Is wrapping text necessary when resizing?
Wrapping can improve readability for long labels. If wrap is off, content may overflow, so choose the setting based on your data.
Wrapping is often helpful for long labels; choose wrapping based on readability.
How can I reset column widths to default?
There isn’t a single reset button; you must manually resize back to a default look or use a script to standardize widths across a range.
There isn’t a built-in reset, so resize manually or with a script to standard widths.
Watch Video
The Essentials
- Auto-fit columns to data first
- Set precise widths for a clean layout
- Resize multiple columns together for consistency
- Verify readability on all devices