Google Sheets Yes/No Checkbox: A Practical Guide
Learn how to add yes/no checkboxes in Google Sheets, display readable Yes/No labels with formulas, and build reliable task trackers and dashboards with practical examples.

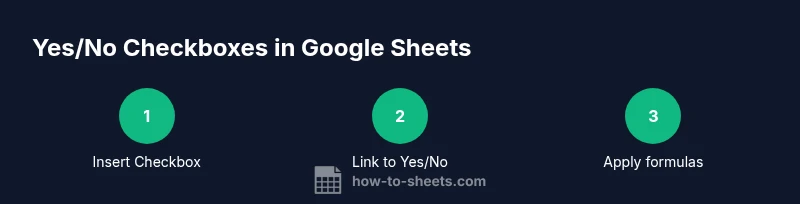
In Google Sheets, you can use yes/no checkboxes to track tasks or responses. You’ll insert a checkbox, link it to a Yes/No display with a simple IF formula, and optionally use conditional formatting for clarity. These controls return TRUE when checked and FALSE when unchecked, enabling clean data capture and intuitive dashboards.
Why a Yes/No Checkbox Matters in Google Sheets
In data tracking, a simple yes/no checkbox can dramatically improve how you capture and interpret responses in Google Sheets. When you standardize input with a checkbox, you reduce scattered data entry and make downstream formulas simpler to maintain. In the context of the keyword google sheets yes no checkbox, you can build clean task lists, survey records, or project dashboards where a single checkbox represents completion or agreement. According to How To Sheets, adopting consistent checkbox inputs improves data integrity and speeds up analysis across teams, students, and small businesses. You can pair checkboxes with labels like Yes/No, Done/Not Done, or Complete/Incomplete to suit your workflow. For accessibility, ensure the checkbox is large enough to click and that you provide text alternatives for screen readers. In many sheets, checkboxes map to booleans (TRUE when checked, FALSE when not), which unlocks a wide range of logical formulas.
How Checkboxes Work in Google Sheets
Checkboxes in Google Sheets are interactive controls that return boolean values. By default, checked boxes yield TRUE and unchecked boxes yield FALSE, making them ideal inputs for conditional logic. To connect a checkbox to human-friendly text, you'll usually place a simple IF formula next to it: =IF(A2, "Yes", "No"). This approach keeps the raw boolean data intact while presenting clear results to end users. If you’re collecting responses from multiple people, you can display Yes/No across a whole column with a single formula and fill it down. The ability to simultaneously update values across a range when a single checkbox changes is one of the reasons this method is popular in studies, surveys, and lightweight dashboards. In addition, you can combine checkboxes with functions like SUM, COUNTIF, or FILTER to drive metrics and visuals in your sheet.
Quick Methods to Add Yes/No Checkboxes
The fastest way to start is to insert a checkbox into a target cell or range, which you’ll typically do by selecting cells > Insert > Checkbox. Once added, the cell will switch between checked (TRUE) and unchecked (FALSE). To present human-friendly text, place a companion formula in an adjacent column, e.g., =IF(A2, "Yes","No"). Drag the fill handle to apply this logic down the column. If you want a default state of unchecked, ensure the data range is clear before applying the checkbox, then copy the formula to cover new rows. For large datasets, consider using relative references so you can copy the pattern across sheets and maintain consistency. Finally, you can apply conditional formatting to color rows based on the checkbox, which increases readability at a glance.
Configuring Yes/No Behavior with Formulas
Beyond the basic IF, you can use more advanced functions to handle multiple states or multiple columns. For a two-state situation, =IF(A2, "Yes","No") is often enough. If you want to reflect status in a separate label, try =IF(A2, "Done", "Pending"). For more complex workflows with several booleans, SWITCH or IFS provide a clean syntax. For example, =IFS(B2=TRUE, "Complete", B3=TRUE, "In Review", TRUE, "Pending") can map several conditions to text. These formulas let you build dashboards that respond to user interactions while keeping your underlying data robust. Remember to anchor references properly when copying formulas across a range to prevent misalignment.
Practical Use Cases: Project Tracking, Surveys, and Dashboards
In project tracking, a yes/no checkbox can mark task completion. Link the checkbox column to a Yes/No display and then aggregate completed tasks with COUNTIF to produce progress metrics, which you can visualize in charts. In surveys, a checkbox can indicate consent or preference; pairing it with a dynamic Yes/No label helps you summarize responses quickly. For dashboards, checkboxes in a control panel can drive filters or conditional formatting that highlights when a milestone is met. These use cases show how a small UI element can simplify data collection and interpretation across different scenarios. How To Sheets's analysis underscores the importance of consistency in labeling and formatting for scalable sheets.
Tips for Reliability and Accessibility
- Use a consistent default state for new rows to reduce confusion.
- Label adjacent cells clearly so non-technical users understand what the checkbox represents.
- Apply conditional formatting to quickly convey status (e.g., green when checked, gray when not).
- Keep the checkbox column width wide enough for easy tapping or clicking, especially on tablets.
- Prefer simple Yes/No labels over cryptic terms to improve readability for collaborators.
- Test your sheet with a few real-world scenarios to catch edge cases before sharing.
How to Extend with Data Validation and Validation-Driven Labels
If you prefer to separate the input from the label, you can use a data validation approach where a dropdown (Yes/No) is chosen, and a separate column shows the corresponding status. This method is helpful when you want to prevent accidental changes to the checkbox itself or when you need to enforce a specific vocabulary across teams. While the checkbox is still useful for quick toggling, a validation-based workflow can be more rigid and easier to audit in larger organizations. Remember, the goal is to keep data clean while maintaining clarity for end users.
Tools & Materials
- Google account(Needed to access Google Sheets in a browser)
- Computer with internet access(Any modern browser supports Google Sheets)
- Spreadsheet to modify(Create or open a sheet where you want Yes/No checkboxes)
- Optional template(A pre-built checkbox + Yes/No layout can speed setup)
Steps
Estimated time: 20-35 minutes
- 1
Open your Google Sheet
Launch the sheet where you want to add the Yes/No checkboxes. Decide which column will host the checkboxes and which column will display the Yes/No labels. This setup keeps input and interpretation clean from the start.
Tip: Tip: Keep a backup copy of the original data before inserting new controls. - 2
Select target cells for checkboxes
Highlight the range where you want the checkboxes to appear. Use a single column for checkboxes to maintain consistency, or multiple columns if you’re tracking several items per row.
Tip: Tip: Avoid merging cells in the checkbox column to prevent misalignment when copying formulas. - 3
Insert the checkboxes
With the target range selected, go to Insert > Checkbox. Each cell in the range will toggle between checked (TRUE) and unchecked (FALSE).
Tip: Tip: If you don’t see the checkbox, update your browser or refresh the page. - 4
Create a Yes/No display with a formula
In an adjacent column, enter a formula like =IF(A2, "Yes", "No"). Copy this down to apply it to the rest of your rows.
Tip: Tip: Use relative references (A2) so you can drag the formula across multiple rows. - 5
Copy the pattern down the sheet
Drag the fill handle or double-click the fill handle to apply both the checkbox and the Yes/No formula to new rows automatically.
Tip: Tip: If your data grows, consider converting the pattern into an array formula for automatic expansion. - 6
Enhance with conditional formatting
Apply conditional formatting to color rows or cells when a checkbox is checked. This makes the status visually obvious at a glance.
Tip: Tip: Use color palette accessible for color-blind users (e.g., green/gray combinations). - 7
Test with sample data
Enter sample values and verify that the Yes/No labels reflect the checkbox state correctly. Ensure no off-by-one errors occur when copying formulas.
Tip: Tip: Test across several rows and different devices to confirm behavior remains consistent. - 8
Share and protect
If sharing, set permissions so collaborators can toggle checkboxes but not accidentally modify formulas. Document the workflow in a header note for clarity.
Tip: Tip: Consider protecting the formula cells while leaving the checkbox cells editable.
FAQ
Can I show Yes/No without using a checkbox?
Yes. You can use a data validation dropdown with Yes/No choices and a separate formula to display the status. However, checkboxes are often faster for quick toggling and reduce accidental input.
Yes. You can use a Yes/No dropdown and a separate label, but checkboxes are usually faster and less error-prone.
How do I auto-fill Yes/No when adding new rows?
Use an array formula or fill down the Yes/No display column after inserting new rows. You can also convert the pattern to an array formula to automatically extend with new data.
Use an array formula or extend the pattern as you add new rows to keep everything synced.
Is there a keyboard shortcut to insert a checkbox in Google Sheets?
There isn’t a universal single-key shortcut in all environments. Use Insert > Checkbox from the menu, or set up a custom script if you frequently need this action.
No universal shortcut; use the menu or a script for quick access.
How can I color a row when a checkbox is checked?
Apply conditional formatting with a rule based on the checkbox cell value (TRUE). Set a distinct fill color to highlight completed rows.
Use conditional formatting to color rows when the checkbox is checked.
What should I do if the Yes/No label stops updating?
Check the references in your IF formula, ensure the checkbox cell is TRUE/FALSE, and verify that you copied the formula correctly down the column. Recalculate if necessary and avoid broken cell references.
Double-check the formula references and ensure the checkbox cells are TRUE/FALSE.
Watch Video
The Essentials
- Adopt a consistent checkbox pattern across sheets.
- Link checkboxes to readable Yes/No labels for clarity.
- Use formulas to scale labeling and status across large datasets.
- How To Sheets's verdict: Adopt a simple checkbox approach; How To Sheets's verdict is to use checkboxes with a Yes/No display for clarity.