How to Make Google Sheets: A Practical Step-by-Step Guide
Learn how to make Google Sheets from scratch with a practical, step-by-step approach. Create, format, and share robust spreadsheets for school, work, or personal projects. Includes templates, basic formulas, data validation, and collaboration tips.

You will learn how to make Google Sheets from scratch: create a new spreadsheet, organize data with headers, apply basic formatting, use simple formulas, and share your work securely. This hands-on approach is ideal for students, professionals, and small businesses seeking a reliable data workflow built around Google Sheets.
Why making Google Sheets matters for modern teams and students
In today’s digital workspace, Google Sheets is a core tool for collecting data, tracking progress, and sharing results in real time. Because Sheets lives in the cloud, teams can collaborate without emailing versions back and forth, and you can access your work from any device. According to How To Sheets, mastering Google Sheets early accelerates project work and reduces data-entry friction. The platform scales from simple lists to complex dashboards, all while keeping data centralized. For students, this means easier class projects and cleaner research logs; for professionals and small business owners, it means faster reporting and better decision-making. A thoughtful initial setup saves time later and makes it easier to enforce consistency across reports.
Getting oriented: quick tour of the Sheets interface
The Sheets interface centers on a grid of cells, with a Formula bar at the top and a row of menus (File, Edit, View, Insert, Format, Data, Tools, Extensions, Help). Each tab provides a suite of controls for formatting, data validation, and analysis. New users should focus on the header row to label columns clearly, and then use Freeze Panes to keep headers visible while scrolling. Keyboard shortcuts, such as Ctrl/Cmd + C to copy and Ctrl/Cmd + V to paste, can dramatically speed up data entry. In short, a solid first sheet establishes the structure you’ll reuse across projects.
How to structure your data for clarity and reliability
Start with a clean data schema. Use a single row for headers and keep data types consistent within a column (dates in date format, numbers as numeric values, text as strings). Enable Data Validation to restrict inputs (for example, a status column that only accepts Open, In Progress, or Done). Consider using named ranges for frequently referenced blocks of data so formulas stay readable and easy to audit. The goal is a sheet that’s self-explanatory to you and to teammates who may use it later.
Core tasks you’ll perform in everyday Sheets
Common workloads include data entry, sorting, filtering, and lightweight analysis. Enter data in a structured way, then apply formatting to highlight key fields (bold headers, alternating row colors, and conditional formatting for values outside a target range). Create simple charts to visualize trends and use basic formulas to summarize data. For example, sum quantities with SUM, compute averages with AVERAGE, and count items that meet criteria with COUNTIF. These basics unlock reliable reporting without needing advanced skills.
Templates, formulas, and keeping your sheet future-ready
Templates save time by providing a ready-made structure for recurring tasks (budgets, project trackers, attendance logs). When you build a template, include a clear header, an instruction row, and a sample row to illustrate expected data. Formulas should be placed in cells that will be copied across rows, so they automatically adjust with relative references. As you grow more confident, you’ll add conditional formatting, named ranges, and data validation rules to keep data accurate as teams collaborate.
Collaboration, sharing, and version control
Google Sheets shines when multiple people work together. Use the Share button to set permissions—Viewer, Commenter, or Editor—based on the role each person plays. Regularly review version history to track changes and revert if necessary. If you’re working on sensitive data, restrict access to essential teammates and enable notification for edits. The cloud-based model ensures the most recent version is always available, but you should still maintain a clear change log for accountability.
Authoritative sources and further learning
For broader context on data organization and spreadsheet best practices, see authoritative resources such as government and university publications: https://www.census.gov, https://www.stanford.edu, and https://www.nature.com. For Google Sheets-specific guidance, consult the official help center at support.google.com/spreadsheets. How To Sheets also offers practical templates and step-by-step guidance to accelerate your learning. Based on How To Sheets Analysis, 2026, incorporating data validation and consistent headers substantially improves reliability in shared sheets.
Practical example: building a simple project tracker from scratch
Imagine you’re managing a small project with tasks, owners, due dates, and status. Start with headers: Task, Owner, Due Date, Status, Progress. Freeze the header row, apply date formatting to the Due Date column, and use a dropdown list for Status (Open, In Progress, Completed). Add a SUMIF-style check to total completed tasks. This concrete workflow illustrates how structure and automation pay off in real-world work.
Tools & Materials
- Device with internet access(Laptop, tablet, or smartphone with a modern browser)
- Google account(Active Gmail account to sign in to Sheets)
- Google Sheets access(Sheets app or sheets.google.com)
- Templates or sample data (optional)(Use to jump-start your workflow)
Steps
Estimated time: 15-25 minutes
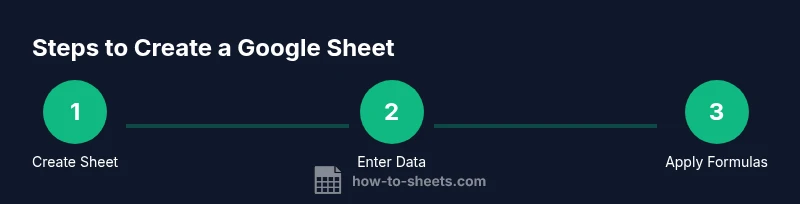
- 1
Create a new sheet and set up headers
Open Google Sheets and choose Blank to create a new document. Rename the file to reflect your project. In the first row, enter clear, descriptive headers for each column (e.g., Task, Owner, Due Date, Status). This foundation makes later data entry consistent and quick.
Tip: Use a naming convention for files and headers (project name + date) to stay organized. - 2
Enter data and format cells
Begin filling in rows under each header. Format date columns with a date format, adjust column widths for readability, and apply bold formatting to headers. Keep data consistent by avoiding free-form text in numeric fields.
Tip: Use Alt/Option + W to auto-fit column width after typing new data. - 3
Add basic formulas for totals and checks
Insert a SUM, AVERAGE, or COUNTIF to summarize data. Use relative references so formulas fill down automatically as new rows are added. Test a few rows to ensure results update correctly as you extend the dataset.
Tip: Place formulas in a separate summary row or column to keep the main data intact. - 4
Apply data validation and dropdowns
Create a dropdown for the Status column to ensure consistency (e.g., Open, In Progress, Completed). Data validation minimizes inconsistent entries and simplifies filtering.
Tip: Set an error alert to guide users when they enter invalid data. - 5
Freeze headers and organize with sheets
Freeze the top row to keep headers visible while scrolling. Add additional sheets if needed for different views (e.g., a calendar view or a task log).
Tip: Use color-coding or named ranges to differentiate sections and improve navigation. - 6
Share and review with collaborators
Click Share to invite teammates with appropriate permissions. Enable version history so changes can be tracked and restored if needed.
Tip: Limit editors to essential team members to protect data integrity.
FAQ
What is Google Sheets and who is it for?
Google Sheets is a cloud-based spreadsheet app that supports data entry, calculation, and collaboration. It’s suitable for students, professionals, and small businesses aiming to organize data and share results in real time.
Google Sheets is a cloud-based spreadsheet app that’s great for students and professionals who want to organize data and collaborate in real time.
Do I need a Google account to use Sheets?
Yes. You need a Google account to create, access, and share Sheets. Sign in with your Gmail or Google Workspace account to get started.
Yes, a Google account is required to use Sheets.
Can I use formulas in Google Sheets?
Yes. Sheets supports a wide range of functions, including SUM, AVERAGE, IF, COUNTIF, VLOOKUP, and more for data analysis.
You can use many formulas like SUM and AVERAGE in Sheets.
How do I share a sheet securely?
Click Share, choose permission levels (Viewer, Commenter, Editor), and send invitations or copy a share link. Limit access to trusted collaborators.
Use Share to set permissions and limit access.
Is Google Sheets free to use?
Google Sheets offers a robust free tier with extensive features. Paid plans add storage and admin controls for teams.
Yes, there’s a free version with many features.
Watch Video
The Essentials
- Define clear headers and data types first.
- Use data validation to reduce input errors.
- Leverage basic formulas for quick insights.
- Collaborate with controlled access and track changes.