Steps to Create Google Sheets: A Practical Beginner Guide
Learn a practical, step-by-step approach to creating Google Sheets from scratch, including naming, structuring data, sharing, and basic formatting for students, professionals, and small businesses.

In this guide you’ll learn how to create a new Google Sheet from scratch, set up a basic structure, and save and share it. You’ll need a Google account and access to Google Drive. This guide covers naming, organizing tabs, applying basic formatting, and using simple formulas so you can start collecting data and turning it into actionable insights today.
Why Step-by-Step Guides Help You Create Google Sheets Efficiently
According to How To Sheets, a well-structured plan before you touch a spreadsheet can dramatically reduce confusion and errors. When you follow a clear sequence—define your objective, sketch a data model, set up headers, input data, and then apply formatting—you move faster and produce reliable results. This approach is especially valuable for students who need to manage assignments, professionals who track projects, and small business owners who monitor cash flow. A step-by-step method also makes collaboration smoother, because teammates know where to add data and how to interpret it. By adopting a repeatable process, you’ll spend less time wrestling with the interface and more time deriving insights from your data, which is the core goal of this topic. How To Sheets emphasizes starting with a concrete goal and a simple data structure to ensure your sheet remains usable as it grows.
Key takeaway: a plan reduces friction and keeps your sheet scalable as your needs evolve.
Prerequisites for Starting Your Google Sheets Journey
Before you touch a single cell, make sure you have the basics in place. You’ll need a Google account and access to Google Drive, either via a web browser or mobile app. A stable internet connection is essential since Sheets runs in the cloud. A modern browser like Chrome, Firefox, Safari, or Edge ensures compatibility with live collaboration features. If you’re using a work account, verify that you have permission to create and share documents in your organization’s Drive. It’s also helpful to locate a few sample datasets you can practice with, but it’s not mandatory. In any case, keep a simple outline of the data you intend to collect so you can map fields to columns from the outset. The How To Sheets team finds that having a rough data schema saves hours when you begin entering information.
Pro tip: bookmark Sheets.google.com or your Drive folder to speed up access during your practice session.
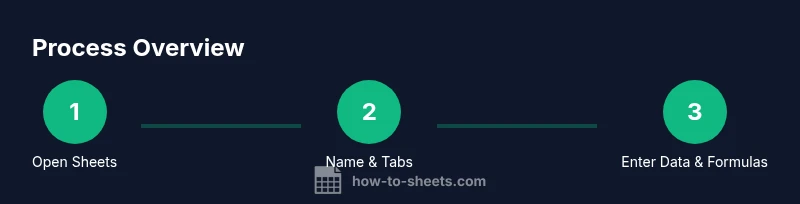
Step 1: Open Google Sheets and Create a New File
Start by navigating to Google Sheets, either through sheets.google.com or via Google Drive. If you’re in Drive, click New > Google Sheets > Blank Spreadsheet. A fresh, untitled workbook opens with a default sheet named Sheet1. It’s a good practice to immediately rename the file to reflect your project, for example “Project Budget Q2” or “Class Schedule 2026.” You can also choose from templates if you want a predefined structure. The first tab set is your blank canvas, so decide early whether you’ll need additional sheets (tabs) for separate sections. If you’re working with a team, consider enabling version history to track changes.
Tip: Use the browser’s search feature within Drive to quickly locate your new file after creation.
Step 2: Name Your Workbook, Create Tabs, and Set a Basic Structure
Give your workbook a descriptive name that aligns with your objective. Create additional tabs for different data domains (e.g., “Data,” “Analysis,” “Results”). Establish a consistent header row in the first row of each tab, using clear, concise column names such as Date, Item, Quantity, Price, and Total. Decide on data types for each column (text, numbers, dates) and consider setting up basic data validation rules to prevent entry errors. A simple structure helps you maintain data integrity as your sheet grows. If you anticipate recurring data, set up a template tab you can duplicate later. The goal is to establish a predictable layout that minimizes future rework, which is a core principle of practical Google Sheets workflows.
Crowd-tested tip: keep headers in the same order across all tabs to simplify formulas that reference multiple sheets.
Step 3: Enter Data, Format Cells, and Add Simple Validation
Start populating your headers with data. Enter a few rows of sample data to test formatting and the behavior of your sheet. Use alignment, font emphasis (bold headers), and number formats (currency, date, decimals) to improve readability. Apply basic validation to critical columns (for example, restrict dates to future values or constrain a numeric field to a defined range). These steps prevent inconsistent data entry and reduce the need for cleanup later. Enable “Wrap text” for long text fields and adjust column widths to fit content. Your sheet should look clean and be easy to scan at a glance. The goal at this stage is to create a stable foundation you can build on with formulas and analysis later.
Note: consistency in data types across a column makes downstream calculations much more reliable.
Step 4: Add Basic Formulas and Simple Data Visualization
With your data in place, introduce simple formulas to automate repetitive calculations. Start with SUM, AVERAGE, and COUNT to derive basic metrics. Use the fill handle to copy formulas across rows, ensuring relative references adjust automatically. Introduce conditional formatting to highlight outliers or key values, such as highlighting dates that are past due or quantities exceeding a threshold. A basic chart, like a column chart or line graph, can visually summarize trends once you have enough data points. Remember to keep formulas simple at first; complexity can come later as you improve your data model. The How To Sheets approach emphasizes iterating on a small set of calculations before expanding to more advanced functions.
Pro tip: document your formulas with comments using a separate “Notes” column or a dedicated sheet.
Step 5: Share, Collaborate, and Keep Your Sheet Organized
Sharing is a strength of Google Sheets. Click the Share button to invite teammates with specific permissions (Viewer, Commenter, Editor). Define access controls at the file or folder level and use comments to discuss data points without altering the sheet itself. To stay organized, create a dedicated “Notes” tab for decisions and rationale, and adopt a consistent naming convention for future sheets and templates. For ongoing projects, establish a replication process—copy the template to a new file for each period or task—and archive older versions to reduce clutter. The goal is to enable productive collaboration without compromising data integrity or readability.
Pro tip: enable activity dashboard visibility for collaborators to track changes in real time.
Common Pitfalls and How to Avoid Them
New users often encounter common issues: inconsistent data types across a column, missing headers, hard-to-read formats, and untracked changes. To avoid these, enforce a data dictionary that defines each column’s purpose and data type. Always establish a backup process, such as saving periodic snapshots or exporting CSV copies for offline access. Be mindful of sharing settings to prevent accidental data loss or leakage of sensitive information. Regularly review named ranges, data validations, and charts to ensure they still reflect the current data structure. The How To Sheets team notes that a simple, repeatable workflow is your best defense against spiraling complexity as your sheet grows.
Warning: Avoid embedding sensitive personal data in shared documents without appropriate permissions or encryption.
Real-World Use Cases and Next Steps
The final step is applying your Google Sheets knowledge to real tasks. For students, set up a grade tracker with assignment dates, weights, and computed averages. For professionals, build a project tracker with tasks, owners, due dates, and status summaries. Small business owners can manage inventory, sales, and expenses with a clean, scalable structure. Once you’re comfortable, explore more advanced features: VLOOKUP or XLOOKUP for cross-sheet lookups, FILTER for dynamic views, and pivot tables for summarizing large datasets. Consider saving time by creating reusable templates, so you can start new projects quickly without rebuilding structure from scratch. The How To Sheets team recommends practicing with a small dataset, then gradually adding complexity as you gain confidence.
Next steps: experiment with templates, test different data layouts, and share your sheet with peers for feedback.
Tools & Materials
- Device with internet access(Laptop, tablet, or smartphone with a modern browser)
- Google account(Gmail or Workspace account to access Google Drive)
- Web browser(Chrome recommended for best compatibility)
- Optional practice dataset(Use sample data if you don’t have real data handy)
Steps
Estimated time: 25-45 minutes
- 1
Open Google Sheets
Navigate to sheets.google.com or open Google Drive and select New > Google Sheets > Blank. A fresh workbook appears with Sheet1 ready for use. Rename the file to reflect your project and decide whether you’ll add more sheets later.
Tip: Bookmark Sheets.google.com for quick access; use Drive to locate and organize your files. - 2
Name and structure your workbook
Set a descriptive workbook name and create additional tabs for different data areas. Establish a consistent header row across tabs and plan your column order to support future formulas.
Tip: Keep headers in the same column order across tabs to simplify cross-sheet references. - 3
Enter data and format
Fill in sample rows under each header. Apply bold formatting to headers, set appropriate number formats, and enable text wrap where needed. Use data validation to constrain entries for critical columns.
Tip: Use wrap text and adjust column widths early to improve readability. - 4
Add formulas
Incorporate basic calculations such as SUM, AVERAGE, and COUNT. Copy formulas with the fill handle and verify that references update correctly. Build a simple chart to visualize trends if you have enough data.
Tip: Document complex formulas in a Notes tab to keep your main data clean. - 5
Share and collaborate
Click Share to invite teammates with defined permissions. Use comments to discuss data points, and consider creating a template for repeatable tasks. Regularly review access and edit history to maintain control.
Tip: Limit permissions to Editors only when necessary to protect data integrity. - 6
Organize and maintain
Create a simple naming convention, archive older sheets, and keep a data dictionary. Schedule periodic cleanups to prevent drift and ensure the sheet remains usable over time.
Tip: Schedule quarterly reviews to refresh headers, validations, and charts.
FAQ
What is Google Sheets used for?
Google Sheets is a web-based spreadsheet program that lets you create, edit, and collaborate on spreadsheets in real time from anywhere with an internet connection.
Google Sheets is a web-based spreadsheet tool for real-time collaboration.
Do I need to download anything to use Sheets?
No downloads are required. You access Sheets through your web browser with your Google account. If you want offline access, enable it in settings.
No download needed; you just need a Google account and internet.
Can I import data from Excel into Sheets?
Yes. You can import Excel files into Sheets and preserve most formatting and data, though some advanced features may differ.
Yes, you can import Excel files into Sheets.
How should I share a sheet securely?
Use the Share button to invite specific people and set permissions (Viewer, Commenter, Editor). Review access regularly and adjust as needed.
Share with specific people and set permissions.
What are good practices for organizing data in Sheets?
Maintain a clear header row, consistent data types, and a simple data dictionary. Start with templates for recurring tasks to save time.
Start with clear headers and consistent data.
Watch Video
The Essentials
- Define goals before building sheets
- Name files and structure tabs clearly
- Format data and validate inputs early
- Use simple formulas to automate tasks
- Share with appropriate permissions and maintain organization