How to Collapse Rows in Google Sheets: A Step-by-Step Guide
Learn how to collapse rows in Google Sheets using grouping and outlines. This practical guide covers setup, multi-level collapsing, tips, and common pitfalls for students and professionals.

Quick answer: You can collapse rows in Google Sheets to hide details and simplify large spreadsheets. This feature uses grouping or outline, letting you expand or collapse sections with a click. To use it, arrange data in consecutive rows and apply Data > Group Rows (or right‑click and choose Group). You can add multiple levels for deep hierarchies.
Why collapse rows in Google Sheets matter
Collapsing rows helps you manage large datasets by hiding details you don’t need right now. This keeps critical information visible while giving you quick access to hidden data when needed. According to How To Sheets, outlines and grouping reduce on-screen clutter and improve navigation in complex spreadsheets. When used thoughtfully, they support faster analysis, cleaner reports, and better collaboration for students, professionals, and small business owners. By structuring data with collapsible rows, you create a flexible, readable layout that scales with your project.
Understanding grouping and outline levels in Google Sheets
Google Sheets uses an outline structure called grouping. You create a group to hide a block of consecutive rows, then you can expand it later. Groups can be nested to form multiple levels (Level 1, Level 2, etc.), allowing you to collapse big sections and drill down into details on demand. This approach aligns with common data-management practices and is especially useful for monthly reports, project plans, and inventory logs.
How to create and manage groups: practical basics
To start, select the rows you want to hide, then choose Data > Group Rows from the menu. Sheets adds a collapsible outline bracket to the left of the row numbers. Click the minus sign to collapse and the plus sign to expand. You can add additional groups by selecting larger ranges and applying Group again, creating a multi-level outline. Remember to label group headers clearly so you can navigate quickly.
Working with multiple levels: nested groups and expanding logic
Nested groups let you build a multi-tier view, such as Year > Quarter > Month. When you collapse a Level 1 group, only the top-level header remains visible; expanding reveals Level 2 and beyond. You can control visibility with the small triangles in the margin or the menu commands. For large datasets, start with the broadest grouping first, then add layers as needed to preserve context while keeping the sheet manageable.
Collapsing rows vs. filtering: choosing the right tool
Sometimes it’s tempting to filter data to hide details, but grouping offers different benefits. Filters affect the data in place and can remove lines from the view for all users, while groups merely hide rows in your current view (and can be shown again without altering the underlying data). Groups are ideal for project plans, budgets, and quarterly reviews where you want to toggle visibility quickly without altering the dataset.
Practical pitfalls and troubleshooting tips
Common issues include accidentally collapsing the wrong range, losing track of which rows are grouped, or over-using levels that yield a confusing interface. Keep group headers concise, use descriptive labels, and consider color-coding outlines for quick scanning. If a group seems to disappear, verify you haven’t collapsed all parent levels and that you’re viewing the correct outline level. Also, remember that ungrouping will restore the original row order.
Real-world use cases and best practices
In an expenses workbook, you can group monthly rows under quarterly sections, then nest weeks under each month. In a student roster, group students by class and section to hide attendance notes until you’re ready to review. The How To Sheets team recommends starting with a clean header row, freezing the top row, and using named ranges for group boundaries. Regularly save versions to capture your outline structure, and communicate with teammates about how the grouping is organized to avoid confusion.
Tools & Materials
- Computer with Google Sheets access(Ensure you are signed in to your Google account and have edit access to the target sheet)
- Reliable internet connection(Stable connection helps avoid interruptions while grouping large ranges)
- Mouse or trackpad(Precise clicking on collapse/expand icons)
- Keyboard with arrow keys(Helpful for navigating rows quickly)
- Labeling materials (optional)(Post-it notes or sheet titles to label groups clearly)
Steps
Estimated time: 5-10 minutes
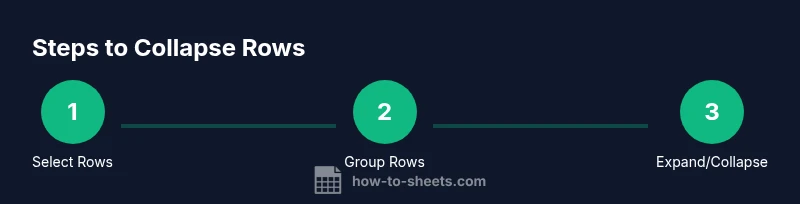
- 1
Select the rows to group
Click and drag to highlight the consecutive rows you want to collapse, including any header if desired. This defines the block that will be hidden when collapsed.
Tip: Start with a clean, contiguous block to avoid partial grouping. - 2
Create the first group
Go to Data > Group Rows to create an outline bracket on the left. This adds a collapsible control next to the grouped rows.
Tip: Verify the bracket aligns with your intended range before collapsing. - 3
Collapse and expand
Click the minus sign to collapse and the plus sign to expand. You can collapse multiple groups at once by collapsing the top-level group.
Tip: Use the outline controls to jump between levels as needed. - 4
Add a second level
Select a sub-range within the first group and apply Group again to create a nested level. This is useful for multi-tier data like Year → Quarter.
Tip: Label levels clearly to avoid confusion when drilling down. - 5
Manage visibility across levels
Use the outline bar to drill down; collapse the top level to reveal subgroups, then expand as needed. Plan your levels to maintain context.
Tip: Avoid creating too many levels in a single sheet to prevent clutter. - 6
Ungroup to revert
To remove grouping, select the grouped rows and choose Data > Ungroup Rows. This restores the original row order.
Tip: If you need to revert entirely, consider saving a version before changes.
FAQ
What does collapsing rows in Google Sheets accomplish?
Collapsing rows hides a block of rows from view without deleting data. It creates a collapsible outline so you can focus on summary information and expand sections as needed.
Collapsed rows hide data for focus without deleting anything.
Can I use multiple levels of grouping?
Yes. You can nest groups to form several levels (for example Year > Quarter > Month) and collapse or expand each level independently.
Yes, you can nest groups to create multiple levels.
How do I remove a grouping?
Select the grouped rows and choose Data > Ungroup Rows to remove the outline while keeping your data intact.
Ungroup the rows to remove the outline while keeping your data.
Will grouping affect other users?
Grouping primarily affects your view. If you publish or share a sheet, others can apply their own groupings without changing your current outline.
Grouping is local to your view unless you share the outline.
Is there a keyboard shortcut to collapse all groups?
There isn't a universal keyboard shortcut to collapse all groups; use the outline controls or menu options.
There isn't a universal shortcut; use the outline icons.
What’s the difference between hiding rows and collapsing groups?
Hiding rows changes visibility for all viewers and data; collapsing groups hides only in your view and preserves the underlying data.
Hiding hides data for everyone; collapsing hides only in your view.
Watch Video
The Essentials
- Group rows to simplify large sheets.
- Use multiple levels to create a clean outline.
- Label groups clearly for quick navigation.
- Hiding via grouping is view-only; data remains intact.
- Ungroup to revert to the original layout.