How to Delete Cells in Google Sheets: A Step-by-Step Guide
Learn how to delete cells in Google Sheets with clear methods for single cells, ranges, and entire rows or columns. This complete guide covers clearing, shifting options, and best practices to avoid data loss.

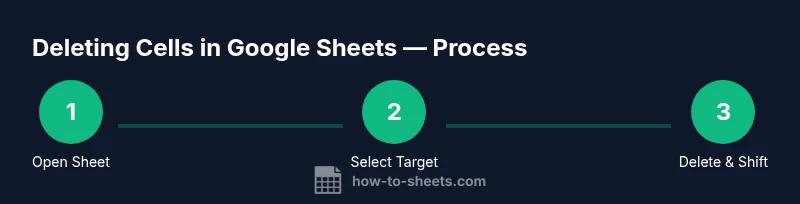
You’ll learn how to delete cells in Google Sheets by removing content, shifting adjacent data, or clearing formatting. The guide covers three practical methods: deleting a single cell, deleting a range of cells (with shift options), and removing entire rows or columns. You’ll also see tips to avoid unintended data loss and maintain layout.
Why deleting cells matters
According to How To Sheets, efficiently deleting cells in Google Sheets helps keep your data organized, readable, and free from gaps that can disrupt formulas or data analysis. When used strategically, deleting cells can simplify complex sheets, reduce confusion for collaborators, and preserve the visual layout of your dashboard. This section explores common scenarios where removing cells is preferable to clearing content, and how the act of deletion interacts with relative references, filters, and conditional formatting. Framing questions like: Do you want to preserve adjacent data or shift it to fill the gap? Will formulas reference the deleted cells? Answering these questions upfront reduces mistakes and preserves spreadsheet integrity. As you scale your sheets for coursework or client reports, knowing when to delete instead of clear is a valuable skill that saves time and prevents downstream errors.
Clearing contents vs deleting cells
A fundamental distinction in Google Sheets is between clearing a cell’s contents and deleting the cell itself. Clearing content leaves the blank cell in place, which can affect formatting, alignment, and formulas that reference that position. Deleting a cell removes that position entirely and shifts surrounding cells based on your chosen option. This difference matters for maintaining consistent row heights, column widths, and the behavior of functions like VLOOKUP or INDEX/MATCH. How To Sheets emphasizes planning before deletion, especially on shared documents, to avoid unintended shifts that could invalidate analyses or cause misinterpretation of results. When collaboration is involved, it’s often safer to clear contents first and reassess the impact before deleting.
Deleting a single cell
Deleting a single cell is the simplest operation, but it can have ripple effects if the cell is part of a formula range or a merged cell. The typical approach is to select the cell, right-click, and choose Delete cells, then pick whether to shift remaining cells up or left. If the deleted cell is part of a merged region, you may need to unmerge first to prevent layout corruption. In practice, always review formulas and dependencies after deleting a single cell. The goal is to preserve data integrity while removing only the unwanted value.
Deleting a range of cells
When removing a block of cells, you can opt to shift surrounding cells up or left to fill the gap, or you can shift entire rows or columns depending on the range. This is particularly useful in data cleaning tasks where thousands of blanks accumulate or when reorganizing a dataset into a tighter structure. Before performing a range deletion, highlight the exact rectangle, then access the Delete cells option and choose the shift direction that maintains the intended data layout. Always test on a copy if you’re unsure, since large-range deletions can dramatically alter references and charts.
Deleting entire rows or columns
Deleting entire rows or columns is a heavier operation that affects every cell in the affected area. This is ideal when a dataset has obsolete sections, such as completed project timelines or historic records that should be excluded from current analyses. Selecting a row or column, right-clicking, and choosing Delete rows/columns removes the whole line, shifting the rest of the sheet accordingly. If your sheet contains formulas or charts tied to the deleted area, you’ll want to review and update references to avoid broken outputs or misrepresented visuals.
Practical tips for avoiding mistakes
To minimize error, consider the following practices: keep a backup copy of important sheets, work on a duplicate sheet when applying mass deletions, and use Undo (Ctrl/Cmd + Z) quickly if you realize a mistake. Verify that important calculations reference the correct cells after deletion, and re-check any filters or conditional formatting rules that might hinge on the removed positions. For teams, document the deletion rationale in a comment or changelog so collaborators understand the changes and can reproduce results if needed. Remember, deliberate planning reduces the risk of data loss and misinterpretation.
Tools & Materials
- Device with internet access(Desktop, laptop, or mobile device with a modern browser)
- Google account with Sheets access(Signed in to Google and have edit permissions)
- Spreadsheet open in Google Sheets(The exact file you intend to edit)
- Uninterrupted internet connection(Stable connection reduces risk of partial saves)
- Backup copy (optional)(Create a duplicate before large deletions)
Steps
Estimated time: 6-12 minutes
- 1
Open the target Google Sheet
Launch Google Sheets and open the specific document containing the cells you want to delete. Verify you have the correct version by cross-checking the tab name and data domain.
Tip: If you’re working in a shared file, consider notifying collaborators before making edits. - 2
Select the cell or range to delete
Click a single cell or click-and-drag to highlight a range. For non-contiguous cells, hold Ctrl (Cmd on Mac) while selecting each cell or use the Shift key for contiguous blocks.
Tip: Double-check the selection to avoid accidental deletion of adjacent data. - 3
Delete using menu or right-click
Right-click the selection and choose Delete cells, or go to Edit > Delete cells in the menu. A dialog appears asking how to shift the remaining cells.
Tip: If you don’t see the shift options, ensure you’re not deleting entire rows or columns. - 4
Choose shift direction
Pick whether to shift up, shift left, or delete the entire row/column depending on your goal. This choice determines how surrounding data will fill the gap.
Tip: Shifting left for a range in a single row preserves row structure; shifting up preserves column structure. - 5
Review formulas and references
After deletion, scan for affected formulas, named ranges, or charts. Update references if necessary to prevent errors in results or visuals.
Tip: Use Find and Replace to locate references that may have shifted. - 6
Use Undo if something goes wrong
If the result isn’t what you intended, press Ctrl/Cmd + Z to undo the deletion and revert changes.
Tip: If multiple steps were taken, undoing may require several presses to backtrack precisely. - 7
Document and back up
Note the deletion rationale in a comment or changelog and consider saving a backup copy for future reference.
Tip: A backup file is especially valuable before mass deletions or reorganizations.
FAQ
How can I delete a single cell without affecting adjacent data?
To delete a single cell with minimal impact, select the cell, choose Delete cells from the menu, and opt to shift up or left. Review formulas that reference that position and adjust as needed.
If you delete a single cell, be sure to check related formulas and ranges to avoid broken calculations.
What is the difference between clearing contents and deleting cells?
Clearing contents leaves the cell in place but empty; deleting the cell removes that position and shifts nearby cells. Clearing is safer when you want to preserve structure, while deleting changes layout.
Clearing keeps the grid intact; deleting changes where data appears.
How do I delete multiple cells and shift data correctly?
Select the range, choose Delete cells, and pick the appropriate shift direction (up or left). For large ranges, test on a copy first to see how charts and formulas adjust.
For large ranges, test on a copy to avoid surprises in charts or formulas.
Can I undo deletions after saving the document?
Yes, Google Sheets keeps an edit history. Use Edit > Undo or Ctrl/Cmd + Z to revert recent deletions. For older changes, use File > Version history to restore a prior version.
You can undo recent deletions, or restore an older version if needed.
What happens to formulas referencing deleted cells?
If a referenced cell is deleted and shifted, formulas may break or reference new positions. After deletion, verify all formulas and adjust ranges as required.
Deleted cells can shift references; always verify formulas after deleting.
Is there a keyboard shortcut to delete a cell quickly?
There isn’t a universal single-key shortcut for deleting a cell; use the right-click menu or Edit > Delete cells, then choose the shift option. Keyboard options can vary by browser.
Use the menu to delete and choose how to shift; shortcuts aren’t universal.
Watch Video
The Essentials
- Choose the right delete method for your data layout
- Always review references after deletion
- Backup before large deletions
- Differentiate between clearing and deleting to preserve layout