How to Make a Schedule on Google Sheets: A Step-by-Step Guide
Learn how to make a schedule on google sheets with a reusable calendar, date formulas, and formatting tips. Ideal for students, professionals, and small business owners seeking practical, step-by-step guidance.

You'll learn how to make a schedule on google sheets. By the end, you'll have a reusable calendar grid with date headers, time slots, and auto-fill formulas that keep weekdays aligned. This guide covers templates, formulas, and formatting tips to build weekly or monthly schedules. You’ll need a Google account and a rough plan for your schedule structure (days, tasks, and owners).
Why scheduling in Google Sheets saves time
For students, professionals, and small business owners, a dedicated schedule in Google Sheets centralizes tasks and deadlines, reducing miscommunication. According to How To Sheets, a well-structured sheet can replace multiple calendars and email threads, cutting back-and-forth. The How To Sheets team found that this approach often results in fewer schedule conflicts and faster weekly planning. The flexibility of Sheets lets you tailor views, share with teammates, and keep everything in one searchable place. This foundation makes it easier to scale from a weekly plan to a monthly overview, without losing sight of priorities.
Designing the schedule: layout decisions that scale
The layout you choose for a Google Sheets schedule determines how quickly you can read and act on information. Start with a two-axis layout or a single row of dates across the top and tasks down the left side. Create consistent column order: Date, Day, Task, Owner, Status, and Notes. Freeze the header row to keep context as you scroll. A clean palette with bold headers and alternating row colors improves readability. If you’re coordinating with multiple teams, consider a separate sheet for each project or week, linked by a central dashboard. How To Sheets emphasizes using templates that enforce naming conventions, status labels, and date formats to reduce errors and speed up setup.
Weekly vs monthly templates: choosing the right scope
A weekly template works well for recurring routines like classes, sprints, or shift schedules. A monthly view helps capacity planning and long-term milestones. If you expect to revisit the same tasks, build a shared weekly sheet and then duplicate it for subsequent weeks. Consider adding a Summary row or a dashboard tab that shows completions, overdue tasks, and total hours. The key is consistency: once you pick a structure, reuse it across periods to accumulate dependable data. How To Sheets analysis shows that standardized structures reduce version conflicts and save planning time.
Populate dates and days using simple formulas
To automate date rows, place your start date in a dedicated cell (for example, B1) and use a date-generation formula to fill the week. A common approach is to enter =SEQUENCE(7,1,B$1,1) in B2 to fill seven consecutive dates across a row. In the row below, use =TEXT(B2, "ddd") to display the weekday names. Copy the formulas across the week and down the column for additional weeks. By anchoring the start date, you can quickly regenerate future schedules without manual entry. This minimizes manual errors and keeps the calendar synchronized with real dates.
Inputting tasks and owners: basic data structure
Structure your data with clear columns: Date, Day, Task, Owner, Status, Priority, and Notes. Use consistent data entry rules (e.g., Title Case for tasks, initials for owners). Implement a small list for Status (Not Started, In Progress, Completed) and bind it with Data Validation so teammates select from a predefined set. This reduces miscommunication and makes filtering easier later. Keeping the layout tidy supports quick updates during busy weeks.
Formatting, conditional formatting, and data validation
Format date cells as dates, bold headers, and use alternating row colors for readability. Add conditional formatting to highlight overdue tasks or high-priority items. Build a simple Status column with a color-coded system (e.g., Not Started = gray, In Progress = blue, Completed = green). Use Data Validation to restrict Status values, and protect key formulas or headers to prevent accidental edits. A clean, color-coded sheet makes it easy to scan and act on tasks at a glance.
Saving as a template and sharing
Once you’re satisfied with the structure, save the sheet as a reusable template (File > Make a copy) and remove sample data. Consider placing templates in a dedicated Drive folder for easy access. When sharing, set appropriate permissions (viewer vs. editor) based on whether collaborators should modify the schedule. Linking the template to a calendar or project plan can help align timelines and responsibilities. The How To Sheets team recommends treating templates as living documents that you update after each project cycle.
Authority sources
- https://www.sba.gov
- https://support.google.com/docs
- https://hbr.org
Tools & Materials
- Google account with access to Google Sheets(Sign in to Drive and open a new Google Sheets file in a desktop browser for full features.)
- Blank Google Sheet(Create a new spreadsheet specifically for your schedule; plan for a grid with days across columns.)
- Rough date range reference(If possible, have a starting date to anchor your grid.)
- Printer (optional)(If you want a printable version, ensure margins and orientation are set.)
Steps
Estimated time: 40-60 minutes
- 1
Create a new Sheet for your schedule
Open Google Sheets, click Blank, and rename the file to something descriptive like 'Weekly Schedule'. Set a working title in the header row. This creates a dedicated canvas to structure your schedule.
Tip: Use a descriptive file name and set the first row as your overall title. - 2
Set up the calendar grid
Decide whether dates run across the top or down the side. Create headers such as Date, Day, Task, Owner, Status, and Notes. Freeze the header row so it remains visible as you scroll.
Tip: Keep headers simple and consistent across weeks. - 3
Add date generation for a week
Enter your start date in a cell and use a date-generating formula to fill the week. Example: in B2 enter =SEQUENCE(7,1,B$1,1) and format the cells as dates.
Tip: Use a header cell to anchor your start date. - 4
Populate tasks and owners
Fill in the Task, Owner, and Status columns for each row. Use a drop-down data validation for Status to standardize entries.
Tip: Define a small list of statuses for consistency. - 5
Apply formatting and validation
Format dates as dates, bold headers, and add conditional formatting to highlight overdue items.
Tip: Keep conditional rules simple to avoid slow performance. - 6
Create a reusable template, then save
Make a copy for future weeks or months (File > Make a copy). Remove sample data and lock critical columns if needed.
Tip: Use a named template folder to locate templates quickly. - 7
Share with teammates
Use the Share button to grant viewing or editing access. Consider linking to a calendar when you need cross-reference with others.
Tip: Set permissions carefully to protect formulas and structure.
FAQ
What is the best layout for a Google Sheets schedule?
A two-axis layout with dates across the top and tasks down the side is common. Freeze headers and use bold titles for readability.
Use a layout with dates across the top, tasks along the side, and frozen headers for readability.
How can I auto-fill dates in a schedule?
Use SEQUENCE or WORKDAY functions to generate dates, then wrap with TEXT if you want weekday names.
Auto-fill dates using SEQUENCE or WORKDAY, then format for weekdays.
How do I share a Google Sheets schedule with teammates?
Click Share, choose Editor or Viewer permissions, and add collaborators. Consider using comments for context.
Share with teammates by adjusting permissions.
Can I turn my schedule into a reusable template?
Yes. Save the file as a template or copy it for a new period. Remove sample data before reuse.
Save as a template for future weeks.
What are common pitfalls when scheduling in Sheets?
Overly complex formulas, missing header freezes, or inconsistent statuses can cause errors. Keep it simple.
Avoid overcomplicating formulas and keep headers fixed.
Which formulas help with deadlines and progress?
Use conditional formatting for overdue items and IF-based logic to categorize status.
Use conditional formatting and simple IF logic.
Watch Video
The Essentials
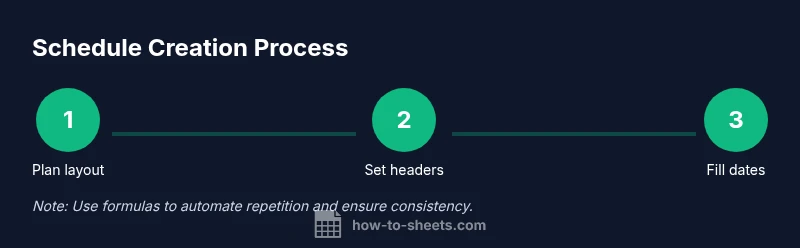
- Plan layout first and define headers
- Use SEQUENCE to auto-fill dates
- Keep data validation consistent across weeks
- Format for readability and quick scanning
- Save as a reusable template in Drive