Wrap Text in Google Sheets: A Practical Step-by-Step Guide
Learn practical, step-by-step methods to wrap text in Google Sheets, improve readability, auto-fit rows, and maintain tidy spreadsheets across datasets for students, professionals, and small businesses.

By the end of this guide, you will be able to wrap text in Google Sheets across single cells or entire columns, auto-fit rows, insert manual line breaks, and maintain consistent readability in tables and reports. You'll learn when to use wrap, how to apply it with keyboard shortcuts and menus, and how to troubleshoot common edge cases. According to How To Sheets, effective wrapping reduces misreads and speeds data reviews.
What wrap text means in Google Sheets
Wrap text in Google Sheets refers to displaying long cell content on multiple lines within the same cell, instead of overflowing into adjacent cells or being truncated. This feature helps keep tables readable when you have lengthy descriptions, notes, or IDs. When wrap is disabled, long content may spill over or appear as a single line, forcing readers to horizontally scroll or guess where content ends. Understanding when to wrap text is the first step toward cleaner, more professional spreadsheets. In practice, wrapping is especially valuable for lists, metadata, and comments attached to data rows. It pairs well with other readability practices like consistent column widths and alignment. According to How To Sheets analyses in 2026, teams that adopt consistent wrapping report faster reviews and fewer misreads across data-heavy sheets.
Quick-start: wrap text in the Sheets toolbar
To enable wrap for selected cells, highlight the target area and click the toolbar button that shows a curved arrow with lines (Wrap Text). If you prefer keyboard access, press a quick shortcut to toggle wrap in the active cell. Wrapping affects only the active selection by default, but you can extend it to an entire range or entire sheet if needed. When wrap is on, Google Sheets will display content on multiple lines, and the height of the row will usually increase automatically to accommodate the lines. This simple change dramatically improves the legibility of descriptions, notes, and URLs within your data table.
Formatting with the Format menu: Wrap Text and beyond
Beyond the toolbar, you can access wrap settings via the Format menu. Format > Wrapping > Wrap to enable multi-line display, or choose Clip to forcibly truncate content to a single line. The Wrap option is ideal when you have dynamic data that grows or shrinks over time, ensuring consistent presentation. For users who want precise control, consider combining wrap with vertical alignment (top, middle, bottom) to place wrapped text exactly where you want within a cell. Remember to audit adjacent cells for overflow after changing wrap settings.
Auto-fit rows after wrapping
Wrapper-friendly content often requires taller rows to remain legible. Google Sheets can auto-fit row height, but you may need to trigger it manually when wrapping is first applied. A quick method is to double-click the row boundary in the row header or use the menu: Format > Row height > Fit to content. Auto-fit helps you avoid truncated lines while preserving grid alignment across your dataset. This is especially helpful for long descriptions, status notes, and instructions embedded in tables.
Merging cells and wrap text: considerations
If you merge cells, wrapping behavior can become inconsistent. In many cases, it’s best to avoid merging for content areas that require wrapping, or to merge only a single cell in a row and wrap the content within that merged area. When wrapping in merged cells is necessary, test across a few rows to ensure the wrapped text remains readable on different screen sizes or print layouts. Standard practice favors maintaining separate, wrap-enabled cells rather than relying on merged blocks for long text.
Inserting manual line breaks for exact formatting
Sometimes you want control over where a line breaks inside a cell. In Google Sheets, you can insert a manual line break by pressing Alt+Enter (Windows) or Option+Enter (Mac) while editing the cell. This technique creates a new line within the same cell, which is particularly useful for names, addresses, or multi-part descriptions that you want to present on separate lines. After inserting, keep wrap enabled so all lines display properly.
Column width strategies for wrapped text
Wrapping improves readability but can create awkward, narrow columns. A practical approach is to adjust column widths to balance wrapped content with the rest of the sheet. Start by selecting the column, then drag the column boundary to a width that neatly fits the wrapped lines. If you have a mix of short and long entries, consider standardizing the maximum width and rely on line breaks to format longer content. Consistency matters for readability and scanning across rows.
Tips for multilingual or non-Latin text
Wrap works well with most languages, but some scripts render differently when line breaks appear in mid-words. If you work with multilingual data, test wrap behavior in each language, especially for right-to-left scripts. In some cases, adjusting text direction or font can improve legibility. Always preview your sheet on different devices to ensure consistent wrapping across platforms.
Accessibility and readability best practices
Readable spreadsheets consider contrast, font size, and line spacing. When wrapping text, avoid overly small fonts or compressed line heights that reduce legibility. Use bold headers, consistent indentation, and minimal use of merged cells to create a clean, accessible data view. If you share sheets with others, include a brief note explaining wrapping conventions to maintain consistency across collaborators.
Tools & Materials
- Device with internet access(Any computer, Chromebook, or tablet with a modern browser)
- Google Sheets access(A Google account to access Sheets)
- Mouse or trackpad(Precise cell selection and dragging)
- Notes app or document editor(To capture steps or create a checklist)
Steps
Estimated time: 20-30 minutes
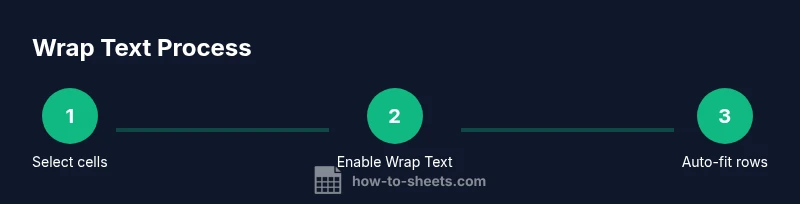
- 1
Select target cells
Choose the cells or range you want to wrap. This defines the scope so only intended content wraps. If you need the change across multiple columns, select the entire region first.
Tip: Use Ctrl/Cmd+Shift+Right Arrow to quickly extend the selection. - 2
Enable wrap text
Apply Wrap Text from the toolbar or Format menu to convert long lines into multi-line content. This confirms that content will appear on multiple lines within the same cell.
Tip: If you don’t see the toolbar, enable it from View > Show toolbar. - 3
Auto-fit row height
After wrapping, rows may need height adjustments. Auto-fit by double-clicking the row boundary or using Format > Row height > Fit to content. This preserves legibility.
Tip: If many rows wrap, consider applying auto-fit to all selected rows at once. - 4
Insert manual line breaks
For precise control, edit a cell and press Alt+Enter (Windows) or Option+Enter (Mac) to insert a line break. This is helpful when lists or addresses must appear on separate lines.
Tip: Combine with wrap to ensure each line remains visible. - 5
Adjust column width
Resize columns to balance wrapped content with surrounding data. A good width reduces the number of visible lines per cell and improves readability.
Tip: Aim for a width that minimizes wasted horizontal space while keeping text legible. - 6
Review and normalize
Check all affected cells for consistent wrapping. Unwrap or re-wrap if some entries look awkward. Consistency improves scanning and collaboration.
Tip: Use a formatting style guide if sharing sheets with a team.
FAQ
What is wrap text in Google Sheets?
Wrap text displays long content on multiple lines within a single cell, preventing overflow and improving readability.
Wrap text makes long content fit inside a cell by using multiple lines, which is easier to read.
How do I automatically wrap text for an entire sheet?
Select all cells in the sheet, then apply Wrap Text from the toolbar or Format menu to enable multi-line display everywhere.
Select the whole sheet, then turn on wrap text to apply it broadly.
Can I wrap text in merged cells?
Wrapping in merged cells is supported in some cases, but it can produce inconsistent results. Prefer wrapping within individual cells when possible.
Wrapped text in merged cells may be inconsistent; test it on a small area first.
Why does wrapping hide data in my sheet?
If row height isn’t tall enough, wrapped lines may appear hidden. Auto-fit rows or manually adjust height after wrapping.
Wrapped text might be hidden if the row is too short; adjust height to reveal all lines.
Is wrapping different on mobile devices?
Wrapping behaves similarly on mobile, but screen size can affect readability. Preview on a mobile device to ensure readability.
Wrap works on mobile too, but check how it looks on small screens.
Watch Video
The Essentials
- Enable wrap to display long content clearly
- Auto-fit row heights after wrapping
- Insert manual line breaks for precise formatting
- Resize columns to balance wrapped content