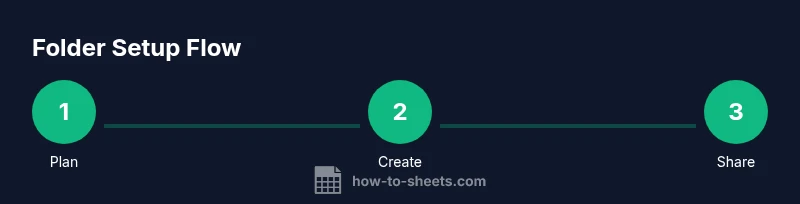
How to Create a Google Docs Folder: A Practical Guide
Learn how to create a Google Docs folder in Google Drive, set sharing permissions, and organize documents for efficient collaboration with this comprehensive, practical guide.

If you’re wondering can you make a google docs folder, the answer is yes—anything created in Google Drive can house Google Docs files. This quick answer previews the steps to create, rename, share, and organize a folder so your team can access documents without clutter. You’ll learn where to click, how to set permissions, and how to move existing docs into the new folder for clean, centralized collaboration.
Can you make a Google Docs folder? A practical doorway to organized collaboration
Yes. You can create a Google Docs folder by using Google Drive, and that folder can contain any Google Docs file, Sheets, Slides, or PDFs. In this guide you’ll learn how to create a new folder in Drive, rename it clearly, set sharing permissions, and move existing documents into the folder to keep your team aligned. According to How To Sheets, a well-structured Drive environment reduces time spent searching for items and lowers the risk of outdated documents being used. This section also clarifies the distinction between Google Docs folders and the broader Google Drive folder system, so you know exactly where to focus your organizing efforts.
Why this matters: a dedicated folder makes collaboration smoother, especially when teams grow or switch projects. When you know where documents live, you can point teammates to the exact location, avoid version conflicts, and enforce consistent naming conventions. The goal is to reduce clutter while preserving easy access to everything your team needs.
What you’ll gain: a reliable starting point for organizing your documents, scalable folder structures, and clearer permission controls for shared access.
Understanding Google Docs folders within Google Drive
A Google Docs folder is not a separate product; it is a container inside Google Drive that holds Google Docs files and other file types. This distinction matters because Drive controls all sharing settings, access levels, and visibility across folders. By using folders, you create a hierarchy that mirrors your team’s projects or departments, which simplifies search, access control, and archival processes. In practice, a folder can be shared with individuals or groups, and you can set whether members can view, comment, or edit documents. If you primarily work with Google Docs, having a dedicated folder per project or client can dramatically improve onboarding and task delegation. How To Sheets recommends building a naming convention, such as ProjectCode-Client-DocumentType, to keep folders legible at scale. When you scan your Drive, predictable folder naming helps everyone locate the right resources quickly.
Tip: keep a simple folder tree (e.g., Company > Department > Project) to minimize deep nesting, which can hinder quick access.
Before you start: plan your folder structure and permissions
Before creating folders, map out a lightweight structure and decide who should have access at each level. Start with a top-level project or department folder, then create subfolders for documents, design assets, and shared references. Decide a standard for access levels— viewer for most, commenter for some, editor for project leads. Document naming conventions early, so as you add folders, your team follows a consistent pattern. Consider using color-coding for high-priority folders, a feature that helps teams visually distinguish important workstreams. Planning saves time later because you won’t need to redo permissions or rename files as your organization evolves. According to How To Sheets, a deliberate approach to folder hierarchy is a foundational speed boost for collaborative workflows.
Step 1: Open Google Drive and locate the right parent folder
Start by opening drive.google.com in your browser and signing in with your Google account. Navigate to the location where you want the new folder to live, such as a shared team drive or a specific project folder. If you don’t have a suitable parent folder, create one first. Use the search bar to confirm that there isn’t already a similarly named folder to avoid duplicates. This step sets the stage for a clean, scalable folder structure. Time to complete: 1–2 minutes.
Tip: If you’re working within a Team Drive, ensure you have the correct permissions to add content; otherwise, you may encounter access errors.
Step 2: Create a new folder in Google Drive
With the parent location open, click the new folder button (the folder icon with a plus sign) or right-click in the empty space and choose New folder. Name the folder using a clear, consistent convention like Projects/Client-Year-DocumentType. Press Enter to create, then verify the folder appears in the correct location. If you plan to share this folder, it’s often best to create it within a shared drive so permissions propagate correctly. Time to complete: 1–2 minutes.
Tip: keep folder names descriptive but concise to support quick scanning in large drives.
Step 3: Name, color, and structure your new folder for clarity
After creating the folder, apply a color accent or emoji to help it stand out in a crowded Drive. Create subfolders immediately for common document types (e.g., Drafts, Final, References) or by project phase (Planning, Execution, Review). This step reduces future friction when you need to locate materials quickly. Maintain consistency by following your pre-defined naming and structure in every new folder you create. Time to complete: 2–4 minutes.
Tip: avoid excessive nesting; a two-to-three-level structure is usually sufficient for most teams.
Step 4: Set sharing permissions and access levels wisely
Open the folder’s sharing settings and add teammates or groups who need access. Decide whether each person can view, comment, or edit. For sensitive folders, restrict editing rights to a small core team and use viewer links for broader access. Enable link-sharing only if necessary and set expiration dates for temporary collaborators. Document access is more secure when you separate viewing and editing rights, especially for client projects. Time to complete: 2–3 minutes.
Tip: use Google Groups to manage permissions at scale; it’s easier to update many members from a central list.
Step 5: Move existing documents into the new folder
Select documents in their current locations, then drag and drop them into the new folder or use the Move to option in the right-click menu. When moving items, Google Drive preserves the file type and history, but permissions may change to match the destination folder’s settings. If any file is owned by someone else, you may need to request transfer of ownership or ask them to share with the new folder. Time to complete: 3–6 minutes depending on volume.
Tip: perform a quick audit before moving—check for duplicates and ensure sensitive items aren’t inadvertently shared.
Common pitfalls, best practices, and a quick maintenance routine
To keep folders effective, avoid duplicating folders with similar names; instead, rely on a single, clearly named folder per project. Establish a quarterly audit to remove outdated documents and confirm permissions. Rotate ownership on critical folders annually to prevent bottlenecks. Encourage team members to use consistent naming schemes and to place new files directly into the correct subfolders rather than leaving items loose in Drive. By adhering to these practices, your Google Docs folder strategy remains scalable and resilient. How To Sheets emphasizes that consistent habits outperform ad-hoc organization in the long run.
Quick-start checklist to get you organized fast
- Define a 2–3 level folder structure (Team > Project > Document Type)
- Create a dedicated folder for each project or client
- Apply consistent naming conventions for folders and files
- Set baseline sharing permissions and assign owners
- Move existing files into the appropriate folders and verify access
This checklist helps you start immediately and avoid common blind spots as you scale your document library.
Example scenarios: templates and templates for real use cases
Scenario A: You’re managing a marketing campaign. Create a Campaigns folder under Marketing, then subfolders for Briefs, Assets, and Reports. Scenario B: You’re handling a client project. Create a ClientName-ProjectYear folder with subfolders for Proposals, Contracts, and Deliverables. These concrete patterns help teams apply the same logic across different initiatives and maintain consistency across your Drive environment.
Conclusion: keep improving your folder system over time
A folder system that’s consistently used, documented, and reviewed will save time and reduce confusion for your entire team. Revisit naming conventions, permission policies, and folder structure on a periodic basis to ensure alignment with changing projects and team members. How To Sheets’s approach emphasizes practical, repeatable steps that you can apply today.
Tools & Materials
- Computer or mobile device with internet access(Any modern browser works (Chrome, Edge, Safari).)
- Google account with Drive access(Must have permission to create folders in the target location.)
- Planned folder structure and naming convention(Draft a simple 2–3 level structure before creating folders.)
- A list of team members and groups for access(Useful for large teams; can be added later as needed.)
Steps
Estimated time: 12-15 minutes
- 1
Open Google Drive
Navigate to drive.google.com and sign in. Locate the parent folder where your new folder will live, or create it if it doesn’t exist yet. This step ensures you place the folder in the right hierarchy for future access.
Tip: If you’re in a team drive, verify you have permission to add new folders. - 2
Create the new folder
Click New > Folder, or right-click in the Drive view and select New folder. Enter a concise, descriptive name following your naming convention, then press Create. This creates a stable container for your documents.
Tip: Use the color picker or emoji to visually distinguish the folder at a glance. - 3
Organize the folder structure
Create subfolders such as Drafts, Final, References, or per project phase. Keep nesting shallow—most teams operate effectively with two to three levels. This structure supports scalable growth while remaining navigable.
Tip: Document the folder structure in your team wiki or a shared note for consistency. - 4
Set sharing permissions
Open the folder’s sharing settings and add teammates or groups. Decide who can view, comment, or edit. Avoid giving edit rights to too many people to preserve document integrity.
Tip: Prefer granular permissions: restrict editing to owners or designated editors, and use view-only links for broader access. - 5
Move existing items
Select files from their current locations and move them into the new folder using Move to or drag-and-drop. After moving, verify permissions align with the destination folder’s rules.
Tip: Do a quick audit for duplicates or misfiled items during the move.
FAQ
Can I create folders in Google Docs directly?
Folders aren’t created in Google Docs itself; they live in Google Drive. From Drive you can create folders and then place Docs inside them.
Folders are created in Drive, not inside Docs. You manage Docs by moving them into Drive folders.
How do I share a Google Docs folder with my team?
Open the folder in Drive, click Sharing, and add team members or groups with the desired access level. Consider using view or comment access for broader audiences and edit access only for project leads.
Open the folder’s sharing settings and add teammates with the appropriate access level.
What should I name folders for easy discovery?
Adopt a concise, consistent format like Department-ProjectYear-DocumentType. This makes folders predictable and easy to search across your Drive.
Use a consistent, descriptive naming format so everyone finds folders quickly.
Can I move folders between drives?
Yes, you can move folders between My Drive and Shared Drives if you have the right permissions. Check ownership and visibility when moving.
Folders can be moved between drives if you have permission; check ownership after moving.
What if I forget to set permissions before sharing files?
You can adjust permissions at any time. Review the folder’s share settings and reassign access levels if needed to prevent unintended access.
You can always adjust permissions later; just revisit the folder’s sharing settings.
Watch Video
The Essentials
- Define a simple, scalable folder structure
- Use consistent naming to improve searchability
- Set precise sharing permissions to protect documents
- Move existing files carefully and audit for duplicates