What to Do in Google Docs: A Practical Step-by-Step Guide
Learn how to create, format, collaborate, and export documents in Google Docs with a practical, step-by-step approach for students and professionals.

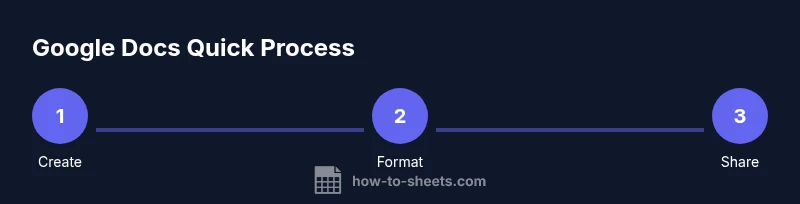
Google Docs empowers you to create, edit, format, and share documents from any device. This guide shows what to do google docs: start a new document, apply formatting, collaborate in real time, insert media, and export or print. By following these steps, students, professionals, and small businesses can work more efficiently with documents.
Getting Started with Google Docs
Google Docs is a flexible, cloud-based word processor that runs in your browser or mobile app. To get started, sign into your Google account and navigate to docs.google.com, or access Docs from Google Drive. Start with a blank document or pick a template that fits your task. Give your document a descriptive title so teammates can locate it quickly. If you anticipate limited connectivity, enable offline editing in Drive settings so you can work without internet.
If you're asking what to do google docs, this section frames your first project: decide the document type (essay, report, proposal), set a clear purpose, and outline the main sections before writing. A strong start saves time later and makes collaboration smoother.
Document structure and basic formatting
A well-structured document uses a clear hierarchy. Start with a title, followed by section headings, subheadings, and body paragraphs. Use Google Docs’ built-in styles (Normal text, Heading 1, Heading 2, etc.) to create a consistent structure that’s easy to skim. Paragraph alignment, line spacing, and margins affect readability; choose 1.15–1.5 line spacing for most professional documents and justify only when required for a formal look. Avoid over-formatting—consistent styles make universal sharing and updating faster.
To keep everyone on the same page, apply heading styles to major sections and subheadings to subsections. You can adjust the default font and size in the toolbar, then reuse those settings across the document to maintain a cohesive appearance.
Text formatting and styles
Formatting is more than bold and italics. Use the Styles panel to apply consistent formatting across headings, body text, and captions. Shortcuts help speed up work: Ctrl/Cmd+B for bold, Ctrl/Cmd+I for italics, Ctrl/Cmd+U for underline. Use the Paint Format tool to copy formatting from one section to another. Consider using bullet and numbered lists to organize ideas, and keep lists parallel in style. For citations or footnotes, insert a footnote or use the References tool to manage sources.
Remember to check accessibility: ensure your color contrasts are strong, and use descriptive link text for hyperlinks so readers with assistive technologies can navigate easily.
Working with lists, headers, and footers
Lists organize ideas clearly. Create bulleted or numbered lists, then nest sublists to reflect hierarchy. Headers and footers provide repeated information like document titles, page numbers, or author names; insert them via the Insert menu. Use page breaks to separate sections, and insert a table of contents generated from your headings to help readers jump to sections quickly. Consistency in list formatting makes your document scannable and professional.
Inserting media and tables
Images, charts, and tables can illustrate concepts and organize data. Use Insert > Image to add a photo or diagram from your device or web search; adjust size and wrap text to fit the layout. Tables help present structured data; define columns, rows, and header rows for clarity. When inserting media, add alternative text (alt text) to improve accessibility for screen readers. Always optimize image preview size to keep the document readable on multiple devices.
Links, comments, and real-time collaboration
Insert hyperlinks to external sources with descriptive text to provide context. Add comments to propose edits or ask questions; collaborators can reply directly in the thread. Real-time collaboration shows cursors and edits by others, making teamwork faster. Use the Share button to invite teammates with specific permissions (viewer, commenter, editor). If you’re coordinating a group task, set deadlines and assign tasks using comments and action items.
Using templates and add-ons
Templates save time by providing ready-made structures for reports, resumes, newsletters, and meeting notes. Explore templates from Google Docs or your organization’s template library, and customize them to fit your brand. Add-ons extend functionality—for example, grammar checkers, citation managers, or diagram tools. Before installing an add-on, review permissions and reviews to ensure safety and compatibility.
Version history and recovery
Google Docs automatically saves versions as you work. Access Version history to view, name, or restore previous edits. This is essential when multiple people edit a document or when you need to revert after an unwanted change. To name a version, open Version history and click the three-dots menu to save a current state with a clear label. Regularly using version history prevents accidental data loss.
Export, print, and sharing options
Documents in Google Docs can be exported to PDF, Word, or other formats via File > Download. Printing directly from the browser is straightforward, with print settings you can adjust for margins, headers, and page size. Sharing controls remain central: decide whether collaborators can comment, edit, or only view. For sensitive material, use advanced sharing settings and disable options like download or print for certain users when necessary.
Accessibility and mobile considerations
Accessibility features help a wider audience consume content. Use alt text for images, clear heading structure, and readable fonts. Google Docs on mobile offers touch-friendly editing; enable offline mode if you need to work offline. Keep in mind that formatting may shift slightly on smaller screens, so review documents on mobile devices before sharing broadly.
Common workflows: proposals, reports, and resumes
For proposals, use a clear executive summary, a bold problem statement, and a structured plan with milestones. For reports, present data using consistent headings, tables, and visuals. Resumes benefit from a clean, scannable layout with consistent margins and typography. Save your favorite formats as templates to reuse across projects, reducing repetitive setup time.
Final checklist to maximize productivity
Before publishing or sharing, review document structure, formatting consistency, and accessibility. Confirm that links work, images have alt text, and the table of contents is up to date. Check sharing settings to ensure the right people have access, and enable offline editing if you may work without internet. Keep a habit of naming conventions and version labels to streamline future edits.
Tools & Materials
- Google account with Docs access(Needed to store and sync documents.)
- Stable internet connection(Essential for real-time collaboration.)
- Web browser or mobile app(Chrome recommended for best compatibility.)
- Optional: Google Docs mobile app(Work on the go; offline mode supported.)
- Printer (optional)(If you need hard copies.)
Steps
Estimated time: 40-60 minutes
- 1
Open or create a document
Launch Google Docs from your browser or mobile app and choose to start a blank document or select a template. Name the file immediately to prevent misplacement. This step ensures your work has a clear starting point.
Tip: Use Ctrl/Cmd + N for a fast new document. - 2
Enter and organize content
Type your content with logical sections and paragraphs. Use headings to create an outline and keep ideas grouped. Regularly save automatically as you type—Google Docs does this by default.
Tip: Press Enter to start a new paragraph; Shift+Enter inserts a line break. - 3
Apply styles and headings
Apply the Styles panel to label sections consistently (Heading 1, Heading 2, Normal text). This makes navigation and TOC generation effortless.
Tip: Default to Heading 1 for main sections and Heading 2 for subsections. - 4
Insert lists and structure
Add bulleted or numbered lists to outline items clearly. Use nested lists to reflect hierarchy and maintain parallel formatting for readability.
Tip: Use the Increase/Decrease indent controls to manage list levels. - 5
Add media and tables
Insert images, charts, or tables to illustrate points and organize data. Always add alt text to media for accessibility and screen readers.
Tip: Compress large images before inserting to keep document size manageable. - 6
Link and comment for collaboration
Embed hyperlinks with descriptive text and invite collaborators with defined permissions. Use comments to discuss edits without altering the main text.
Tip: Tag teammates in comments to assign tasks or ask questions. - 7
Share settings and permissions
Click the Share button and choose whether people can view, comment, or edit. Use restricted access for sensitive documents.
Tip: Review share links regularly to prevent unintended access. - 8
Review versions and export
Use Version history to name and restore previous states. Export or download in formats like PDF or Word when distributing outside Docs.
Tip: Name versions with a clear date and purpose for easy retrieval.
FAQ
What is Google Docs and how is it different from Word?
Google Docs is a cloud-based word processor that auto-saves in Drive and supports real-time collaboration. Microsoft Word is a desktop-focused app with local file storage. Docs emphasizes online access and easy sharing, while Word offers more offline capabilities and advanced desktop features.
Docs is cloud-based and great for collaboration; Word is desktop-focused with more traditional features.
Can I work offline in Google Docs?
Yes. Enable offline editing in Google Drive settings, then you can view and edit documents without an internet connection. Changes sync automatically when you reconnect. This is helpful on unstable networks or during travel.
Yes, you can edit offline; changes sync when you’re back online.
How do I share a Google Doc securely?
Click the Share button, choose specific people or groups, and assign permissions (viewer, commenter, editor). For sensitive documents, use the advanced sharing settings to limit access and disable options like downloading or printing for certain users.
Share with specific people and set permissions; tighten access for sensitive files.
How do I recover an earlier version of a document?
Open Version history from File > Version history to view, name, or restore previous edits. Naming versions helps you find the right state quickly. This is especially useful when multiple people edit a document.
Use Version history to name and restore past edits.
Can I insert images from the web into Google Docs?
Yes. Use Insert > Image > Search the web to find images, then insert and resize. Ensure you have the rights to reuse the image and add alt text for accessibility.
You can search the web for images directly in Docs, then insert with alt text.
What are best practices for collaboration in Google Docs?
Define roles at the start, use comments for feedback, and keep a shared outline. Regularly review Version history to stay aligned and minimize conflicting edits. Establish a clear deadline for drafts to maintain momentum.
Set roles, use comments, and track versions to stay aligned.
Watch Video
The Essentials
- Open and name documents clearly
- Format with styles for consistency
- Collaborate with proper sharing settings
- Export documents in multiple formats
- Use version history to recover previous work