Lock a Cell in Google Sheets: A Complete Step-by-Step Guide
Learn how to lock a cell in Google Sheets to protect data, with practical steps, tips, and best practices for students, professionals, and small teams.

By the end of this guide, you will lock a cell in Google Sheets to prevent unintended edits. You’ll learn when to protect a single cell, a range, or an entire sheet, and how to assign editing permissions. This keeps data safe while collaborating with others, efficiently and securely in online team workflows.
Introduction to locking cells
Locking cells in Google Sheets is a practical way to preserve data integrity when collaborating with others. In this guide, you’ll learn how to lock a cell in google sheets, protect specific ranges, and choose who can edit. We’ll cover different strategies, from locking a single cell to protecting larger ranges, plus real-world scenarios where this helps avoid accidental changes. The How To Sheets team keeps the process clear and actionable, with keyboard shortcuts and visual cues to speed up tasks. This approach empowers you to maintain accuracy without slowing down teamwork.
Choosing what to lock: ranges vs sheets
Decide whether you need to lock a single cell, a contiguous range, or the entire sheet. Locking a single cell minimizes disruption for others, while protecting a sheet offers broader safeguards for sensitive data. Ranges can be tailored for different teams or projects. If you frequently update data, consider creating a protected range for input areas and leaving formula cells editable. This approach reduces mistakes and keeps critical data intact. When you lock cells in Google Sheets, you retain visibility for collaborators while preserving control over edits.
How protection works in practice (overview)
In Google Sheets, protection is implemented through protected sheets and ranges. You don’t “lock” a cell with a password; instead you restrict who can edit the specified area. The owner or editors you designate will still be able to view the content, but only allowed users can modify it. This setup is especially useful for template cells, totals, or formulas that should not be altered by others while still permitting input in designated regions.
Trade-offs and best practices
Locking is a balance between data safety and collaboration speed. Excessive locking can slow workflows, while too little protection invites errors. Common best practices include: locking only what’s necessary, documenting who can edit protected areas, and routinely reviewing protections as teams change. Pair protections with clear communication so everyone understands which cells are locked and why. Always keep a backup of the sheet before applying new protections.
Real-world scenarios and templates
In classrooms, teachers lock answer cells to prevent student edits while allowing input cells. In project teams, protect financial totals or formula cells while letting teammates update inputs. For templates used by multiple departments, create protected ranges for sections that should not be altered and leave template headers editable. These templates save time and minimize mistakes in day-to-day work, ensuring consistent outputs across learners and groups.
Troubleshooting and quick tips
If you don’t see Protect range options, check your permissions or try a different browser. When you share a locked sheet with others, they may still be able to edit if you granted edit access at the sheet level. Always re-check the exact range you protected and review who has permission to edit. For defensible editing, document your protections in a changelog or shared doc.
Tools & Materials
- Computer with internet access(Needed to access Google Sheets)
- Google account with editor rights(Needed to apply protections)
- Target Google Sheet and range(Identify exact cells or sheet to protect)
- Mentor or collaborator list (optional)(If you plan to grant specific editors)
- Backup copy of the sheet(Always good to have a rollback)
- Browser with access to Google Sheets(Chrome recommended for best experience)
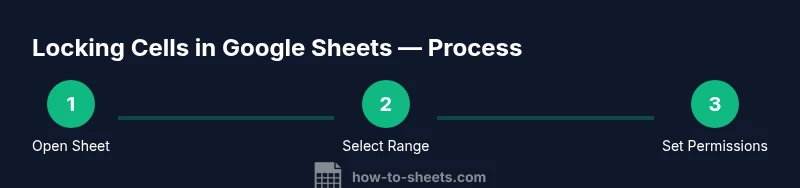
Steps
Estimated time: 10-15 minutes
- 1
Open the target Google Sheet
Launch Google Sheets and open the file you want to protect. Navigate to the sheet or range you plan to lock.
Tip: Double-check you’re in the correct sheet and range before applying protection. - 2
Select the cells or range to protect
Click and drag to select the specific cells, or click the tab name to apply protection to the entire sheet.
Tip: Be precise: only protect data you don’t want edited. - 3
Open the Protect range dialog
Go to Data > Protected sheets and ranges (or right-click the selection and pick Protect range).
Tip: Use a descriptive name for the protection (e.g., 'Final totals, do not edit'). - 4
Configure protection settings
In the sidebar, review the selected range, add a description, and choose whether to protect the range or the entire sheet.
Tip: If applying to a sheet, you’ll set editing restrictions for the whole tab. - 5
Set editing permissions
Click 'Set permissions' and choose who can edit. Options include 'Only you' or custom editors.
Tip: Limit editing to essential stakeholders to reduce risk. - 6
Test the protection
Sign in with a non-editor account or use a different browser to attempt edits in the protected area.
Tip: If edits succeed, revisit permissions immediately. - 7
Save and review
Click Done to apply changes and review the protection in place for accuracy.
Tip: Document the protection in a changelog for future teams. - 8
Modify or remove later
To adjust, return to Protect ranges, select the range, and update permissions or delete the protection.
Tip: Only adjust protections when necessary to minimize disruption.
FAQ
What is the difference between locking a cell and protecting a sheet?
Locking a cell restricts edits to that cell or range, while protecting a sheet can restrict edits across the entire tab. Protecting ranges allows nuanced access control for specific areas.
Lock a cell to restrict edits in a small area, or protect the whole sheet to control changes across the tab.
Can I lock cells for some users but not others?
Yes. Use protected ranges and set permissions to limit edits to selected people or groups.
Yes—define who can edit the protected range and who cannot.
How do I unlock a previously locked cell?
Open the Protect ranges panel, select the protected area, and remove the permission or delete the protection.
Open Protection settings, choose the range, and remove restrictions.
Does locking cells affect formulas?
Locking cells that contain formulas doesn’t stop others from viewing formulas, but editing is restricted unless permission is granted.
Locking only restricts edits; formulas can still be visible depending on sharing settings.
Where are protection options located in Google Sheets?
Protection options live under Data > Protected sheets and ranges in the Google Sheets menu.
Find protections under Data, then Protected sheets and ranges.
Are locked cells visible to collaborators?
Collaboration remains visible, but edits are restricted to permitted users only.
Locked areas show as protected; only permitted editors can change them.
Watch Video
The Essentials
- Protect only what’s needed to preserve data integrity.
- Use clear naming and documentation for protections.
- Test permissions with a non-editor account.
- Regularly review protections as teams change.
- Locking cells and ranges helps avoid accidental edits.