Add a Calendar to Google Sheets: Step-by-Step Guide
Learn how to add a calendar to Google Sheets using date pickers, data imports, and Apps Script automation. Build a reusable calendar template for planning, deadlines, and milestones with practical methods and templates.

To add a calendar to Google Sheets, learn practical methods for date entry, event syncing, and calendar data import. This guide covers built-in date pickers via data validation, importing calendar events with Google Calendar API or iCal feeds, and a lightweight Apps Script approach to keep Sheets in sync. Use these templates for schedules, deadlines, and project milestones.
What adding a calendar to Google Sheets unlocks
A calendar in Google Sheets helps you manage dates, schedules, and deadlines without leaving your workspace. By combining date fields, event data, and lightweight automation, you can turn a plain grid into a functional planning tool. According to How To Sheets, the simplest entry-friendly method is a date picker powered by data validation, which reduces errors while keeping your sheet clean. A calendar layout also supports better collaboration because team members can see due dates in one place, without switching applications. In this section, you’ll see how a calendar in Sheets supports planning for students tracking assignment dates, professionals coordinating project milestones, and small business owners managing client deadlines. We’ll discuss what to expect from each approach, how to choose the right method, and how to avoid common pitfalls. You’ll finish with a practical template you can reuse across projects.
Methods overview
There are three practical avenues to add calendar functionality to Google Sheets:
- Date picker with data validation for clean, error-free date entry.
- Importing calendar data (ICS feeds or calendar API) to populate events alongside dates.
- Apps Script automation to pull events and keep the sheet synchronized with Google Calendar.
Each method suits different needs—from simple date entry to full calendar synchronization. The choice depends on how much automation you want and whether you need live event updates. The remainder of this guide dives into each approach and shows how to combine them into a single, reusable calendar template.
Method 1: Date picker with data validation
The most beginner-friendly way to add a calendar-like experience in Sheets is via a date picker. You configure a date column with data validation so users can only enter valid dates, reducing typos and formatting issues. Start by selecting the date column, choosing Data validation, and selecting Date as the criteria. You can also add a custom formula to enforce a specific date range (for example, only future dates in the current year).
Practical example: create a sheet column labeled “Due Date” and apply a date range of today to 12/31/2026. This creates an easy, intuitive calendar input method without leaving Sheets. If you want to highlight today’s dates automatically, pair this with conditional formatting rules (discussed later).
Method 2: Import calendar data into Sheets
If you already manage events in Google Calendar, you can import those events into Sheets to view and analyze them beside dates. A common approach is to export or fetch a calendar feed (ICS) or use the Google Calendar API via Apps Script to pull event data into a dedicated sheet. Keep in mind that ICS feeds may require parsing logic, and API calls are subject to quota limits. For many teams, a simple solution is to fetch upcoming events for a specific calendar and display fields like event title, date, start time, and location.
Limitations to note include potential delays in updates and the need to refresh data periodically. A practical pattern is to set a refresh interval—say every 15 minutes—and provide a manual refresh button for absolute certainty.
Method 3: Apps Script to sync events
Apps Script provides deeper calendar automation. With a few lines of code, you can fetch events from Google Calendar, format them for a calendar view in Sheets, and write them into a designated range. A typical script runs on a trigger (hourly or every 30 minutes) to keep Sheets in sync with Calendar. You’ll learn to authenticate, query the calendar, map fields to your sheet (title, date, start time, end time, description), and handle errors gracefully.
This method is best when you need real-time-ish data, automated updates, and the ability to filter or transform events. It does require basic JavaScript knowledge and a small amount of Apps Script familiarity, but the payoff is a highly automated calendar embedded directly in Sheets.
Designing a calendar template in Sheets
A usable calendar template balances clarity, readability, and flexibility. Start with a clean layout: a month header, a row for days of the week, and a grid for dates. Use formulas to auto-fill dates for the current month, and protect header rows to prevent accidental edits. Add separate sheets for event details, summaries, and a mini-month view. Use named ranges for key blocks (e.g., dates, events, headers) to simplify formulas and scripts. If your audience includes students or contractors, consider a permission-friendly layout that hides sensitive information by default and reveals it only to authorized collaborators.
Real-world use cases
A calendar in Google Sheets shines in education, small business, and project management. Students can track assignment due dates and exam schedules on a single sheet; professionals can monitor milestones and client deadlines; small business owners can coordinate marketing campaigns and inventory drop dates. In each case, combining a date-entry system with an events sheet and optional script-based sync delivers a powerful planning tool without forcing users to switch apps. Start with a simple date picker, then incrementally add imports and automation as needed.
Troubleshooting common issues
If dates aren’t behaving as expected, check regional date formats and ensure your sheet locale matches the intended format. When importing calendar data, verify time zones and event fields; mismatches can produce off-by-one-day errors. If Apps Script runs slowly, review script complexity and API quotas. Finally, before sharing widely, duplicate the sheet to preserve the original data and test permissions with a stakeholder user.
Quick-reference templates and samples
To accelerate adoption, maintain a small library of templates: a basic date-picker calendar, an event-import calendar, and a calendar-with-Apps-Script template. Each should include a clear title, a data validation range, and a short description of intended use. You can reuse these templates to onboard new teammates, adapt to different calendars, or prototype additional features like reminders, color-coding by category, or export to other formats.
Tools & Materials
- Google account with access to Google Sheets and Google Calendar(Use the same account for seamless access and sharing.)
- A dedicated Google Sheets workbook for the calendar(Create a standalone file to keep calendar data organized.)
- Stable internet connection(Required for live calendar imports and Apps Script updates.)
- Apps Script editor (optional for calendar automation)(Needed if you choose the Apps Script method.)
- Calendar feed URL (ICS) or Google Calendar API access (optional)(Used for importing events into Sheets.)
- Template calendar layout (downloadable sample)(Helpful starting point for quick setups.)
Steps
Estimated time: 60-90 minutes
- 1
Create a new Sheets workbook and prepare a Calendar tab
Open Google Sheets and create a new workbook named “Calendar Toolkit.” Add a dedicated tab labeled “Calendar” and reserve a layout area for the month view, a data entry column (dates), and a separate events area. This initial setup gives you a clean canvas to apply date validation, layout grids, and imports.
Tip: Name the tab clearly and set the locale correctly in File > Settings to ensure dates parse consistently. - 2
Set up a date column with data validation
Select the column you’ll use for date entry (e.g., column A). Go to Data > Data validation, choose Date as the criteria, and set an appropriate range (e.g., today to end-of-year). This enforces correct date formats and prevents invalid entries.
Tip: Optionally add a custom formula to restrict dates to a custom window (e.g., is between startDate and endDate). - 3
Build a monthly calendar grid
Create a grid that shows days for the current month. Use a start date formula like =DATE(year,month,1) to anchor the grid, then fill subsequent cells with incremental dates. Label columns for Mon–Sun and rows for weeks. This grid becomes the visual calendar in Sheets.
Tip: Copy-paste a simple month template and adjust year/month with a year-month selector to reuse across months. - 4
Add color coding with conditional formatting
Set up conditional formatting to highlight today’s date and upcoming events. For example, use a formula like =A2=TODAY() to color today’s cell, and create another rule to highlight dates within a chosen alert window.
Tip: Combine with event dots by using a helper column that marks events parallel to the date column. - 5
Import calendar events into Sheets
Create an Events sheet and fetch events from ICS feeds or Google Calendar API. Map fields such as Title, Date, Start, End, and Location into columns so they align with your calendar grid.
Tip: If using ICS feeds, you may need a small Apps Script to parse the data into usable fields. - 6
Create a lightweight Apps Script for auto-sync
Open Extensions > Apps Script and write a small function to fetch events and populate the Events sheet. Add a time-driven trigger to run periodically (e.g., every 30 minutes) to keep Sheets updated.
Tip: Start with a minimal script that logs results, then gradually add formatting and error handling. - 7
Test, validate, and share your calendar
Run through a full test: enter sample dates, import events, verify color rules, and ensure updates reflect in the grid. Duplicate the file before sharing to avoid data loss, then grant collaborators appropriate access levels.
Tip: Document the steps you took and share a short user guide with teammates.
FAQ
What is the easiest way to add a calendar to Google Sheets?
For most users, starting with a date picker via data validation is simplest. It ensures clean date entry and supports basic calendar views. If you need automatic event updates, consider Apps Script or calendar imports as a next step.
The easiest method is to start with a date picker using data validation for clean date entry, then add automation if you need updates.
Can I auto-sync events from Google Calendar to Sheets without Apps Script?
Yes, you can import events using ICS feeds or Google Calendar's export features to populate a sheet. However, full automation generally requires Apps Script or an external tool to keep data in sync.
You can import events automatically via ICS feeds, but true ongoing synchronization usually needs Apps Script.
Are there limits when importing calendar data into Sheets?
Imports are subject to Google service quotas and the size of the data. Large calendars can slow down a sheet, so filter for a smaller date window or schedule incremental imports.
Be mindful of quotas and size; limit imports to what you need.
How can I protect calendar data while sharing the sheet?
Use Sheets sharing settings to limit who can edit. Consider protecting sensitive sheets or ranges and using view-only access for collaborators who don’t need to modify calendar data.
Limit who can edit and protect sensitive ranges in your calendar sheet.
Do I need to know Apps Script to implement calendar automation?
Not always. You can achieve basic calendar functionality with date pickers and imports. Apps Script becomes valuable when you want automatic syncing, custom event fields, or complex filtering.
Apps Script is optional for basic calendars but helpful for automation.
Watch Video
The Essentials
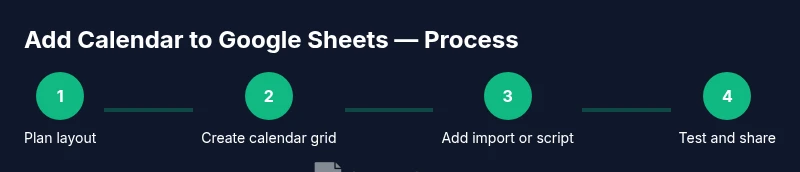
- Plan your layout first to reduce rework
- Choose the method that fits your automation needs
- Test on a duplicate to protect data
- Automate updates with Apps Script where appropriate
- Share your calendar with proper permissions