Amortization Table in Google Sheets: Step-by-Step Guide
Learn to build a dynamic amortization table in Google Sheets using PMT, IPMT, and PPMT formulas. This practical guide helps students, professionals, and small business owners track loan payments, visualize interest vs principal, and adjust scenarios instantly.

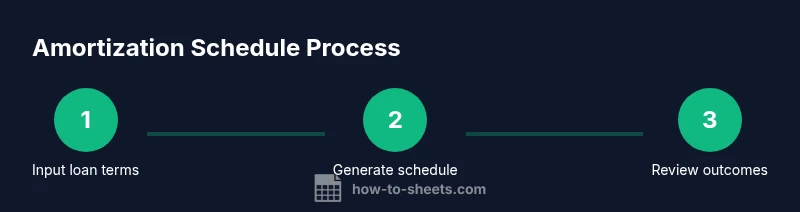
You will build a dynamic amortization table in Google Sheets that shows each loan payment’s principal and interest, plus the remaining balance. Input loan amount, rate, term, and start date, then use PMT, IPMT, and PPMT formulas to automate every row. This method works for mortgages, car loans, and personal loans, and updates instantly with input changes.
What an amortization schedule does and who should use it
An amortization schedule is a record that shows how each loan payment is split between principal and interest over time. In practical terms, it answers questions like: How much of my monthly payment goes toward paying down the loan, and how long until the balance is paid off? For borrowers, this is essential for planning budgets, evaluating loan offers, and identifying the impact of extra payments. For investors or financial planners, an amortization table helps forecast cash flow and compare loan scenarios side by side.
When you build this in Google Sheets, you gain two key advantages over a static calculator. First, the schedule updates automatically when you adjust inputs such as the loan amount or the interest rate. Second, you get a transparent, auditable view of every payment, including the cumulative interest paid. According to How To Sheets, an amortization table helps you visualize how loan payments split between interest and principal over time.
The schedule becomes more valuable when you add variation: you can model biweekly payments, extra principal, or different loan terms to see how the payoff date shifts. It also serves as a teaching tool for students learning about loans and amortization. In short, a well-constructed Google Sheets amortization table turns complex math into a clear, adjustable map of a loan’s life.
Planning inputs: loan amount, rate, term, start date
Before you touch formulas, gather the four core inputs that drive every payment schedule: the loan amount (the principal you borrow), the annual interest rate, the term of the loan (in years), and the start date of the first payment. In a practical sheet, place these constants in clearly labeled cells and reference them throughout the grid. This separation makes it easy to run scenarios—adjust the rate by a few tenths of a percent, or switch from a 15-year to a 30-year term—and instantly see how the payment and total interest change. For readability, prefer a consistent currency format for the loan amount and payments, and use a date format that matches your locale for the first payment date. If you’re teaching or collaborating with others, add a short note or a legend explaining every input cell and its unit (for example, annual rate as a percentage, not a decimal). This upfront planning saves you from hunting down broken references when you extend the table to 360 rows or beyond.
How To Sheets analysis shows that planning inputs carefully reduces errors and speeds up scenario testing.
With inputs in place, you’re ready to connect the numbers to the formulas that drive the schedule.
Core formulas: PMT, IPMT, PPMT explained
The heart of an amortization table is the set of formulas that translate loan terms into a payment schedule. In Google Sheets, the PMT function computes the fixed payment amount per period, given the rate per period, number of periods, and present value. For a typical monthly loan, rate per period = annual rate / 12, and total periods = term in years × 12. IPMT returns the amount of interest portion in a given period, while PPMT returns the principal portion. By combining these functions, you can break each payment into its two components and track the running balance. Use negative signs to reflect cash outflows in standard accounting style, but be consistent across the sheet. For variable-rate loans, additional logic can adjust IPMT and PMT as rates change. This approach yields a transparent, auditable baseline that you can augment with extra payments or alternative payoff strategies.
Building the sheet layout: headers, date, and balance formulas
A clean layout helps prevent mistakes as you fill in dozens or hundreds of rows. Start with a header row that labels each column: Payment#, Payment Date, Payment, Interest, Principal, Balance. Beneath the headers, create a formula row for the first payment: compute the payment amount with PMT and set the initial balance to the loan amount. For the date column, you can increment the date by one month using EDATE or DATE functions, ensuring that future payments land on the same day of the month. The balance column should start with the loan amount and then subtract the principal portion from the previous balance. Formatting matters here: format currency for dollar columns, and use a subtle color for the balance column to guide the eye. Test a few rows manually to verify that the sums align and that the balance decreases with each payment. A well-structured layout reduces maintenance when you add extra payments or switch to a biweekly schedule later.
Automating with formulas: essential functions and checks
Once you have the grid, automate the core calculation with a small set of formulas. The monthly payment is PMT(rate/12, term12, -loanAmount). The interest portion for period n is IPMT(rate/12, n, term12, -loanAmount). The principal portion is PPMT(rate/12, n, term*12, -loanAmount). Place these formulas in their respective columns and copy them down. Include a simple check row that sums all Interest and Principal to verify they equal the total payments over the term. Another validation step is to ensure the final Balance reaches zero (or very close due to rounding). For scenarios with variable rates or extra payments, wrap the formulas with IFERROR to prevent stray errors from breaking the entire schedule. This approach gives you a robust, reusable model you can adapt to most loan types or templates.
Handling extra payments and biweekly schedules
People frequently pay extra principal or switch to biweekly payment schedules to accelerate payoff. Model these scenarios by adding an Extra Principal column and adjusting the balance calculation accordingly. For biweekly payments, you can simulate reduced monthly payments by doubling the number of payments per year (26 instead of 12) and halving the payment amount, then adjusting the balance formula to reflect this cadence. You may also incorporate conditional logic to stop extra payments once the loan is zero. Document the assumptions in a notes cell so that anyone reviewing the sheet understands why the cadence changes. This flexibility is a powerful reason to build the table in Sheets rather than a static calculator.
Validation, testing, and common mistakes with amortization tables
Before you rely on any schedule for decision making, test it against a known loan example or a spreadsheet template you trust. Common mistakes include misaligned rate periods, incorrect reference to the loan amount, or not locking input cells when copying formulas. Make sure your date increments are consistent and that currency formatting is applied uniformly. A frequent issue is rounding errors that accumulate and prevent the final balance from landing exactly at zero. Add a final balancing row that accounts for any rounding discrepancy and clarify how it’s treated (such as applying the remainder to the last payment). If you plan to share the sheet with others, protect the input cells and provide a clear legend so users don’t accidentally overwrite formulas.
Real-world use cases and next steps
Whether you’re a student budgeting a loan, a professional evaluating car financing, or a small business owner planning equipment purchases, an amortization table in Google Sheets provides clarity and control. Start with a simple mortgage-like loan and then expand the model to reflect different scenarios—adjust the rate, term, and payment cadence until you understand the sensitivity of your payoff date and total interest. The How To Sheets team recommends taking time to build and test a reusable template, then documenting assumptions so teammates or clients can follow your logic. With a solid foundation, you can share, customize, and reuse your amortization schedule across multiple projects.
Tools & Materials
- Computer or tablet with internet access(Google account; access to Google Sheets)
- Loan details (amount, annual rate, term, start date)(Have a concrete example for testing (e.g., $250,000 at 4.5% for 30 years))
- Optional: extra payment plan outline(To model extra payments or biweekly schedules easily)
- Worksheet-ready data formats(Consistent currency formatting; date format aligned with locale)
Steps
Estimated time: 30-60 minutes
- 1
Gather loan details
Collect the principal, annual interest rate, loan term, and first payment date. Verify units (e.g., rate as a percentage, term in years). This establishes the backbone of your schedule.
Tip: Use a real loan example to validate formulas later. - 2
Create a new Google Sheet and name it
Open Google Sheets, start a new blank file, and name it clearly (e.g., “Mortgage Amortization - 2026”). Set the locale if needed for number and date formats.
Tip: Create a separate tab for inputs and another for the schedule to reduce cross-linking errors. - 3
Label headers and define columns
Set up columns such as Payment#, Payment Date, Payment, Interest, Principal, Balance. Freeze the header row to keep labels visible while scrolling.
Tip: Use a consistent currency format for monetary columns. - 4
Enter loan constants
Place loanAmount, rate, and term in dedicated cells and reference them with absolute addresses (e.g., $B$2). This makes it easy to adjust values without breaking formulas.
Tip: Keep constants on a single sheet or clearly separated area. - 5
Calculate the regular payment
In the first row, compute the monthly payment with PMT(rate/12, term*12, -loanAmount). Ensure you display a positive amount by wrapping in a minus sign if needed.
Tip: Use a separate cell to store the PMT result for reuse. - 6
Compute interest and principal portions
For period n, use IPMT(rate/12, n, term*12, -loanAmount) for interest and PPMT(rate/12, n, term*12, -loanAmount) for principal. Place in their respective columns.
Tip: Remember rate per period is annual rate divided by 12. - 7
Initialize the first row balance
Set Balance for the first payment as =loanAmount - Principal for period 1. Then increment balance by subtracting the principal portion each subsequent row.
Tip: Keep Balance as a dedicated column to help validation. - 8
Drag formulas to fill the schedule
Fill the PMT, IPMT, PPMT, and Balance formulas down to cover all periods (e.g., 360 rows for a 30-year loan). Check last row balance.
Tip: Use Ctrl+D or autofill to apply formulas consistently. - 9
Add extras and formatting
If modeling extras or biweekly cadence, add columns and adjust balance calculations accordingly. Apply conditional formatting to highlight near-zero balances and roundings.
Tip: Document assumptions in a notes cell for collaborators.
FAQ
What is an amortization table and why use it?
An amortization table shows how each payment reduces principal and pays interest over time. It helps you predict payoff date, total interest, and the impact of extra payments. It’s especially useful for loans and mortgages.
An amortization table shows payment breakdowns over time, helping you predict when a loan is paid off and how much interest you’ll pay.
Can I create this in Google Sheets without Excel?
Yes. Google Sheets supports PMT, IPMT, and PPMT, and you can build a complete amortization schedule entirely online without Excel. You can also share and collaborate in real time.
Yes, you can do it entirely in Google Sheets and share it with others.
How do I adjust for extra payments?
Add an Extra Principal column and subtract that amount from the balance after applying the regular principal portion. You may also simulate with occasional one-time payments and reflect the updated payoff date.
Add extra payments in a separate column and reflect them in the balance.
Why isn’t my final balance exactly zero?
Rounding errors can leave a tiny residual balance. Treat the last payment as adjustable to settle the loan, or add a final balancing row to account for rounding discrepancies.
Rounding can cause tiny residuals; adjust the last payment accordingly.
How do I export or print the amortization table?
Use Google Sheets’ built-in export or print options. For clean results, ensure the layout fits on the print page and that currency formats are preserved.
Export or print from Google Sheets with proper layout.
What if the loan terms change during the schedule?
Update the input cells and let the PMT/IPMT/PPMT formulas recalculate. If you model rate changes, consider creating scenarios or a separate sheet tab to compare outcomes.
Change inputs and recompute; create scenarios for rate changes.
Watch Video
The Essentials
- Define loan inputs clearly
- Use PMT, IPMT, PPMT to split payments
- Drag formulas carefully to avoid misreferences
- Test with known examples
- Document assumptions for collaborators