Fix Google Docs Margins: Step-by-Step Guide
Master Google Docs margins with a practical, step-by-step approach. Learn default margins, how to set exact values, troubleshoot common issues, and maintain consistency across documents.

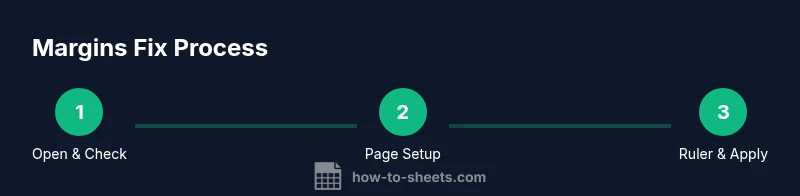
By the end of this guide you will be able to fix Google Docs margins across most documents. You’ll adjust page setup, use the ruler, and set custom margins for consistent results. This approach covers default margins, when to apply changes to sections, and how to reset margins to the default if needed. According to How To Sheets, consistent margins improve readability and ensure printed output matches expectations.
Why margins matter in Google Docs
According to How To Sheets, margins are more than empty space around text — they define how your content looks on the screen and on the page when printed. Proper margins improve readability, give your document a professional feel, and help ensure that your text and images aren’t cropped by printers or viewers. When margins are too small or inconsistent, long paragraphs can look cramped, headers may run into the edge of the page, and the overall layout can feel off. This section explains the role margins play in typography, page balance, and accessibility so you can approach fixes with clarity rather than guesswork.
Quick checks and defaults
Most Google Docs documents start with a standard set of margins (the default is designed for common print sizes). Before you change anything, open Print Preview (Ctrl/Cmd+P) or View > Print layout to see how your document will appear on paper. If you share PDFs, the preview helps you spot margins that might be too tight or too generous. Keep in mind that margins affect every page unless you use section-based formatting. When in doubt, compare your document against a clean template and note any recurring alignment issues.
Using Page Setup and the ruler to set margins
Page Setup in Google Docs is the central place to define margins for the whole document or a specific section. To reach it, go to File > Page setup and choose your margin values. You can also enable the ruler (View > Show ruler) and manually drag the margin indicators to fine-tune spacing. For precision, input exact values in inches or centimeters and then apply to the desired scope (Whole document or This section). This combination of numeric input and visual adjustment gives you consistent results across pages.
Troubleshooting common margin issues
If margins seem off after pasting text, the content may carry its own formatting. Use Clear formatting (Ctrl/Cmd+) or paste as plain text, then reapply margins. Section breaks can create multiple margin regions; ensure each section uses the intended settings by selecting the section and applying Page setup with the correct scope. Headers and footers can also affect perceived margins, especially on tall pages; disable header/footer margins or adjust them in Page setup if needed.
Best practices for consistent margins across documents
Create a reusable template with your preferred margin settings and header/footer configurations. Save the template in Google Drive or as a local copy, and start new documents from that template to ensure uniformity. When sharing documents, consider exporting as PDF to preserve margins across devices. Finally, maintain accessibility by avoiding margins that are too tight for readers using small displays or assistive technologies.
Tools & Materials
- Computer or mobile device with internet access(Access to Google Docs via browser or mobile app)
- Google account with Google Docs access(Needed to open, edit, and save documents)
- Printer or print preview capability(Optional for verifying margins on paper)
- Ruler visibility in Google Docs(Enable View > Show ruler for precise adjustments)
- Template document(A preconfigured document to copy margins from)
Steps
Estimated time: 10-15 minutes
- 1
Open the document and review current margins
Open your Google Docs file and switch to Print Layout or Preview to see how margins appear on the page. Note any pages where margins look inconsistent or cramped. This initial check establishes a baseline so you know what you’re aiming to fix.
Tip: Compare with a known good document to calibrate your perceived margins. - 2
Access Page Setup to view defaults
Go to File > Page setup to view the current margin values. Decide whether you’ll apply changes to the Whole document or This section based on your layout needs. If in doubt, start with Whole document for consistency.
Tip: Write down the current values before changing them to enable a quick reset. - 3
Set custom margins using precise values
Choose Custom margins and input exact measurements for top, bottom, left, and right. Use common defaults (e.g., 1 inch or 2.54 cm) as a starting point. Apply to the chosen scope and review the result in Print Layout.
Tip: For multi-page documents with images, plan margins wide enough to avoid cropping visuals. - 4
Fine-tune with the ruler
Enable the ruler (View > Show ruler) and drag the margin markers to refine spacing. This visual adjustment helps you catch subtle alignment issues that numeric values alone might miss.
Tip: Zoom in to ensure margins align with content blocks across pages. - 5
Check sections and apply scope correctly
If your document uses different layouts, consider Section Breaks and apply Page setup to This section. Verify each section uses the intended margins to prevent drift across pages.
Tip: Always re-check after inserting a section break, as margins may reset. - 6
Preview and verify in Print Layout
Return to Print Layout and review multiple pages. Look for headers, footers, and images that might push content beyond margins. Make adjustments as needed before finalizing.
Tip: Test with both text-heavy and image-heavy pages to ensure universal margins. - 7
Save as a template for future use
If you’ll reuse these margins, save the document as a template or create a dedicated template file. This helps maintain consistency across new documents without repeating setup steps.
Tip: Name templates clearly (e.g., 'Margins-Standard Template') to avoid confusion. - 8
If issues persist, reset to defaults
If margins drift or you encounter stubborn alignment, reset to Google Docs default margins and re-apply your preferred values carefully. This ensures you’re starting from a clean baseline.
Tip: Document the reset steps so you can repeat them quickly in future edits.
FAQ
What are Google Docs default margins?
Google Docs defaults are set to a standard document margin that aims to fit typical page sizes. If you notice content feeling cramped, you can adjust via Page Setup or apply a template with larger margins for readability.
Google Docs uses a standard default margin. You can change it in Page Setup if you want more space or stricter alignment.
How do I set margins for a single section?
Insert a section break to segment the document, then open Page Setup and choose This section as the target. Input your margins and confirm. This keeps changes localized to the selected portion of the document.
Use a section break and Page Setup, then apply to This section to customize margins per area.
Why are margins different in print preview?
Print preview reflects printer-specific constraints and margins. Differences can occur if the printer reduces or scales the page, or if there are headers/footers affecting content width.
Print preview shows how margins look on paper; printer settings may change the final result.
Can I set margins per page in Google Docs?
Google Docs mainly manages margins at the document or section level. For pages with different layouts, insert section breaks and apply distinct margins to each section as needed.
Margins are set by section or document; use section breaks for per-section margins.
How do I reset margins to default?
Open Page Setup and choose the default margins, then apply to the desired scope. If needed, clear any custom values and re-confirm. This gives you a clean baseline to start from.
Use Page Setup to reset to default margins and re-apply as needed.
Watch Video
The Essentials
- Define target margins before drafting.
- Use Page Setup for global changes.
- Ruler adjustments provide precise fine-tuning.
- Test in Print Layout to confirm results.