Google Sheets Size A4: A Practical Print Setup Guide
Learn how to configure Google Sheets to print on A4 paper, including setting the page size, orientation, margins, and scaling. A practical, step-by-step guide for consistent A4 outputs across printers.

This guide teaches you how to configure Google Sheets to print on A4. You’ll learn how to set the page size to A4, choose portrait or landscape, adjust margins, and apply scaling so the content fits cleanly on standard A4 paper. This approach works for formulas, tables, and charts across worksheets. Follow the steps for consistent results across printers.
Why A4 matters in Google Sheets printing
Understanding google sheets size a4 matters for teams, students, and professionals who need reliable, shareable printouts. When your sheet is sized to A4, you avoid last‑minute cropping, awkward wraps, and wasted paper. According to How To Sheets, reliable A4 output starts with three pillars: setting the page size, choosing the right orientation, and controlling margins. If you skip any of these, critical data can be clipped or appear cramped. In practice, preview the print layout in Google Sheets’ Print settings and adjust until headers stay visible and key columns fit on the page. This is especially important for budgets, schedules, and dashboards that teams rely on during meetings. Based on How To Sheets research, previewing print layouts reduces misalignment and inconsistency across devices and printers. Remember to consider accessibility: readable fonts, adequate line height, and clear contrast improve scanning and comprehension. With A4, you’ll present data that’s easy to read in meetings, classrooms, and client briefings.
How to set page size to A4 in Google Sheets
Setting google sheets size a4 begins in the print dialog. Open the sheet you want to print, then press Ctrl+P (Cmd+P on Mac) to open the print preview. In the dialog, locate the paper settings and select A4 as the paper size. Confirm orientation (portrait or landscape) and choose a scale mode such as Fit to page or custom scaling. If needed, adjust margins to avoid clipping; always recheck the preview after changing any option. This process applies to single sheets or multi‑sheet workbooks, and it translates well to exporting as PDF. The goal is a predictable, publication‑ready layout that matches standard A4 dimensions.
Orientation and margins: portrait vs landscape and margins
Choosing the right orientation is driven by content shape: tall datasets often print best in portrait, while wide spreadsheets benefit from landscape. Margins are the second lever; narrow margins can help fit more columns on a page, but too narrow margins may cut data when printed. In Google Sheets’ print settings, switch orientation and then pick margins that preserve readability while maximizing usable space. If a header row or important column is at risk of being split across pages, tweak margins or switch orientation again. For shared templates or recurring reports, keep a consistent margin standard to streamline publishing.
Scaling and fit to page options
Scaling choices directly affect how much data fits on each page. Use Fit to page to shrink large sheets so all content fits on one page, or use a custom scaling percentage for precise control. When data includes many columns, Fit to page can reduce legibility; in that case, try Fit to width or selectively print only a defined print area. Always preview after selecting a scaling mode. If your sheet contains charts, ensure the charts remain legible at the chosen scale. For iterative reporting, consider exporting to PDF after confirming the final scale to preserve the layout.
Headers, footers, and repeating rows
Repeating header rows on every page keeps context visible in multi‑page prints. In Google Sheets’ print dialog, enable the option to Repeat frozen rows or specify header rows to repeat at the top of each page. This is crucial for long budgets and schedules where readers refer to column labels across pages. If you freeze rows for navigation, that same freezing helps rule which rows repeat during printing. By maintaining header visibility, you reduce the risk of misinterpreting column data on subsequent pages.
Handling large datasets across multiple pages
When a sheet spans many pages, print range control becomes essential. Use the Print Area controls to limit the output to the most relevant data, or restructure the sheet so readers can digest the view page by page. Breaking up data into logical sections (e.g., by quarter or category) helps maintain coherence across pages. If necessary, enable page breaks and verify their positions in the preview. This approach keeps large reports readable and ensures that each page presents a complete, comprehensible subset of the data.
Cross-device and browser considerations
Print previews can behave differently across devices and browsers. Chrome generally provides the most consistent results for Google Sheets, but you may notice small differences in other browsers. Always run a quick test print on the target device before distributing final copies. If you notice margins shifting or data wrapping oddly, re‑open the print dialog and adjust paper size, orientation, or margins. Staying consistent in browser choice and print settings reduces surprises when colleagues print from shared links.
Exporting to PDF while preserving A4
Exporting to PDF is a reliable way to preserve an A4 layout for sharing or archiving. In the print dialog, choose Destination as Save as PDF, ensure Paper size is A4, and select your preferred orientation and scaling. After exporting, open the PDF to verify that headers, margins, and data columns align with expectations. Saving as PDF is especially helpful for distributing static reports that must look identical on every device.
Common mistakes and quick fixes
Common mistakes include skipping the print preview, leaving margins at defaults that don’t fit your data, and printing without locking specific print areas. Quick fixes involve always checking the preview, adjusting margins to better fit your content, and using the 'Fit to page' or 'Fit to width' options when necessary. If content is cropped, recheck the print area settings and consider switching orientation to gain more horizontal space. Finally, ensure you are working with the latest browser version for the most reliable rendering.
Tools & Materials
- Device with internet access(Use a modern browser (Chrome recommended) to access Google Sheets.)
- Printer or PDF printer(Necessary for physical prints or digital exports.)
- Your Google Sheet ready for printing(Clean data, clearly labeled headers, and tested formulas.)
- Test paper or scrap sheet(Optional for a real‑world print test.)
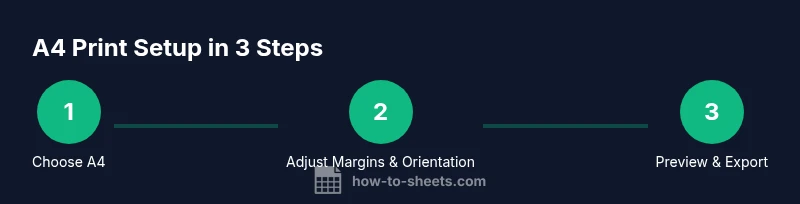
Steps
Estimated time: 10-15 minutes
- 1
Open the Print dialog
Navigate to the sheet you want to print and open the print preview with Ctrl+P (Cmd+P on Mac). This brings up Google Sheets’ print settings where you can adjust page size and layout. Ensure you’re viewing the correct worksheet or print area before committing to changes.
Tip: Use the keyboard shortcut to speed up the workflow. - 2
Set paper size to A4
In the print dialog, locate the paper size setting and choose A4. This aligns the print area with standard European and many global paper sizes, reducing surprises at the printer.
Tip: Confirm you’re in the correct tab (Layout/Preview) where paper size is adjustable. - 3
Choose orientation
Decide between Portrait and Landscape based on data shape. Portrait fits tall data well; Landscape helps wide tables and charts. Recheck the preview after choosing orientation.
Tip: If you’re unsure, print a quick one-page test in both orientations. - 4
Adjust margins
Select margins that prevent data from being cut off while maximizing usable space. If column labels wrap or headers spill, widen margins slightly or switch orientation.
Tip: Avoid overly narrow margins that cut into content on the page edge. - 5
Enable scaling or fit to page
Use Scale to fit or Fit to page to ensure your content is legible on A4. Large sheets may need reduced scale, while smaller sheets can fill more of the page.
Tip: Preview after adjusting scaling to avoid unreadable text. - 6
Preview and export/print
Review the final layout in the preview. If satisfied, print or export to PDF. Save the PDF with a meaningful name for easy sharing.
Tip: Always verify headers and key columns appear on every page.
FAQ
How do I set the page size to A4 in Google Sheets?
Open the Print dialog (Ctrl+P), then under the paper size options select A4. Confirm orientation and scaling, then preview before printing or exporting.
Open Print, choose A4, adjust orientation and scaling, then preview before printing.
Can I print multiple pages on A4 without scaling?
Yes, you can print multiple pages by selecting the appropriate print area and avoiding aggressive scaling. Use Preview to verify each page looks correct.
Print multiple pages by setting the right print area and checking the preview.
How can I repeat header rows on every page when printing?
In the print settings, enable the option to repeat header rows at the top of each page. This keeps column labels visible on every page of a multi-page print.
Turn on header repetition in the print settings to keep labels on every page.
Does printing from mobile preserve A4 size?
Printing from mobile devices can vary by app and browser. Test on the target device to confirm A4 sizing works as expected.
Test print from mobile to confirm the A4 layout works on that device.
How do I export a Google Sheet as an A4 PDF?
Use File > Print and set Paper size to A4, then choose Destination: Save as PDF. Open the PDF to verify margins and content.
Export as PDF from the print menu and check the result.
What if margins get cropped in the printout?
Adjust the margins in the print dialog, or switch to landscape orientation to gain more horizontal space. Preview again to confirm.
Increase margins or switch orientation and preview before printing.
Watch Video
The Essentials
- Set the page size to A4 in Google Sheets’ Print settings
- Choose the appropriate orientation for your data
- Use margins and scaling to fit content on a page
- Preview before printing to avoid misalignment
- Export to PDF to preserve exact A4 layout across devices