How to Print Google Sheets on One Page: Step-by-Step Guide
Learn to print Google Sheets on a single page with fit-to-page, margins, orientation, and print area. Step-by-step for students, professionals, and small businesses.

You can print Google Sheets on one page by adjusting print settings to fit a single page. Open File > Print, set Scale to Fit to page, choose portrait or landscape, and select narrower margins. According to How To Sheets, preview the result before printing to avoid cropped data, and save a PDF for sharing.
Why fitting to one page matters
For students, professionals, and small business owners, knowing how to print google sheets on one page helps deliver concise, actionable reports. When data is spread across many pages, stakeholders may miss key trends or misinterpret numbers. A single-page printout keeps headings visible, reduces scrolling, and makes it easier to share in meetings. According to How To Sheets, the most successful printouts use fit-to-page settings to ensure the entire most important data fits on one sheet without cramped text. This approach works whether you’re summarizing a budget, tracking a project timeline, or preparing a dashboard extract. Before you print, ask what readers need to see at a glance, and design the page around that core message.
Prepare Your Sheet for Printing
Before you dive into the print dialog, clean up your sheet so it prints cleanly. Remove hidden columns, clear extraneous rows, and fix any misaligned data. Freeze header rows if they help readers retain context. If your sheet contains multiple tabs, decide which tab or range deserves priority for the one-page print. Consider duplicating or staging the essential data on a dedicated tab to avoid accidentally printing every tab.
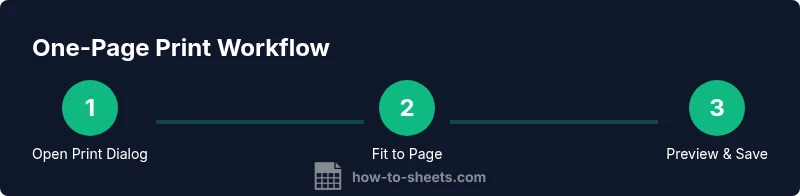
Open the Print Dialog and Start with Fit to Page
In Google Sheets, open the print dialog by choosing File > Print or pressing Ctrl/Cmd+P. In the right-hand print panel, switch the destination to the built-in print driver or Save as PDF. Select the option that mirrors your goal: Current sheet, Selected cells, or Entire workbook. Start with Fit to page to test how your data reflows; you’ll usually see immediate improvements as the content tightens to a single page.
Set Orientation, Margins, and Scaling
Orientation can dramatically affect readability. Portrait is common for narrow data sets; landscape works well for wide tables. Choose margins that maximize data while keeping the page legible—comfortable white space helps reading. Use Scaling to Fit to Page; if text becomes too small, adjust to 95–105% or try a different orientation. Preview frequently to understand how changes affect line breaks and column widths.
Define Print Area and Repeat Headers
If only a portion of your sheet needs printing, select the exact range before opening the Print dialog and choose Printed area or Selected cells. If your print includes multiple rows, repeat header rows at the top of each printed page to preserve context. This is especially important for longer spreadsheets with several columns; header repetition keeps column labels visible as pages turn.
Preview, Adjust, and Save as PDF
Always use the preview to check for cropped data, orphaned column headers, or broken formulas. Adjust margins, scaling, and the page orientation until everything fits cleanly on one page. When satisfied, print or export as PDF for sharing. Saving as PDF preserves layout and formatting regardless of the recipient’s software.
Special Cases: Charts, Images, and Large Spreadsheets
Charts or images sometimes shift when printing. Consider creating a dedicated screenshot panel or exporting charts to a separate PDF page if needed. For large spreadsheets, you may need to print in sections or adjust page breaks to keep key data legible. Splitting complex datasets into smaller, thematically focused pages often yields the best one-page result.
Troubleshooting Common Issues
If data still splits across two pages, it’s usually due to excessive column width or font size. Reduce font size slightly, collapse unused columns, or rotate headers. If numbers appear blurry, switch to a higher print resolution or adjust the printer’s quality settings. Always re-check the print preview after each adjustment to avoid surprises on paper.
Quick Benchmark Tips for Busy Schedules
When you’re pressed for time, aim for the simplest layout that communicates the core message. Use Fit to Page, a single orientation, and a narrow margin profile first. If additional content must fit, consider combining related data into a compact table and removing nonessential columns.
Tools & Materials
- Printer or PDF printer (Save as PDF)(Any modern printer or PDF virtual printer for digital sharing)
- Computer with internet access(Open Google Sheets and access the Print dialog)
- Google account with access to the sheet(Ensure you have view/edit permissions as needed)
- Standard paper (A4 or Letter)(Match your printer settings to your paper size)
- Paper tray with appropriate margins(Optional but helpful for consistent margins)
Steps
Estimated time: 15-20 minutes
- 1
Open the Print dialog
Open the Google Sheets file and press File > Print or use Ctrl/Cmd+P to access the print setup. This brings up the print preview where you can start testing fit options.
Tip: Tip: Use the preview pane to visually confirm what will print before sending to a printer. - 2
Enable Fit to Page and select orientation
In the print settings, choose an option that fits the content to a single page. Decide between portrait or landscape based on data width and header visibility.
Tip: Tip: If data is many columns, landscape often preserves readability without shrinking fonts excessively. - 3
Adjust margins and scaling
Set margins to a comfortable level and apply scaling to keep all data visible without crowding. Start with 100% scale and adjust in small increments as needed.
Tip: Tip: Avoid maxing out scale; aim for legible fonts (at least 8–9 pt depending on print size). - 4
Define print area and repeat headers
If only a subset prints, select the range and choose the appropriate print area. If your sheet has headers, use the option to repeat header rows on every page.
Tip: Tip: Repeating headers is especially helpful for long tables with many columns. - 5
Preview, adjust, and export as PDF
Review the final layout in the preview. When satisfied, choose Save as PDF or send directly to a printer. This ensures a consistent, shareable output.
Tip: Tip: Save the configuration as a mental note or a written checklist for future print jobs. - 6
Handle charts and images gracefully
If your print includes charts, consider exporting charts separately or ensuring they scale without distortion. Place charts strategically on the page to maintain readability.
Tip: Tip: Sometimes it’s cleaner to print charts on a separate page or as a separate PDF page. - 7
Finalize and distribute
After exporting or printing, verify the physical or digital copy matches your expectations. Share via email or a shared drive using the PDF file for consistent viewing.
Tip: Tip: Keep a simple one-page template for common reports to save time on future prints.
FAQ
What is the best way to fit a Google Sheet onto one page?
Start with File > Print, enable Fit to Page, and choose an orientation that keeps headers readable. If needed, adjust margins and scale slightly until everything fits on one page.
Begin with Fit to Page and the right orientation, then fine-tune margins and scale until the content fits neatly on one page.
Can I print multiple sheets on one page?
Google Sheets prints by tab. To have content from multiple tabs on a single page, you’ll need to consolidate the data into one sheet or export the needed sections as a combined PDF.
Sheets prints per tab; combine the data or export as a single PDF to capture multiple tabs.
Why is my data cropped in the print preview?
Cropped data usually means the page isn’t wide enough or margins are too large. Try decreasing font size slightly, reducing column widths, or switching to landscape orientation.
If it’s cropped, try landscape orientation or reduce column widths and font size a bit.
Is there a way to save these print settings for future use?
Google Sheets doesn’t offer a formal print preset, but you can document your preferred settings and apply the same approach each time you print or export as PDF.
There isn’t a built-in preset, but you can reuse your preferred settings by keeping a quick reference.
What should I do with very large spreadsheets?
Print in sections or isolate the most important portion on a dedicated sheet. Use page breaks to control where data splits across pages and maintain readability.
For large sheets, print in parts and use page breaks to keep each page clear.
Watch Video
The Essentials
- Plan the data to fit on a single page
- Use Fit to Page and the right orientation
- Define print area and repeat headers for context
- Preview before printing or exporting as PDF