How to Set Print Area in Google Sheets
Learn how to set the print area in Google Sheets with a clear, step-by-step method. Select the exact range, adjust margins and scaling, preview, and print or export to PDF with confidence.

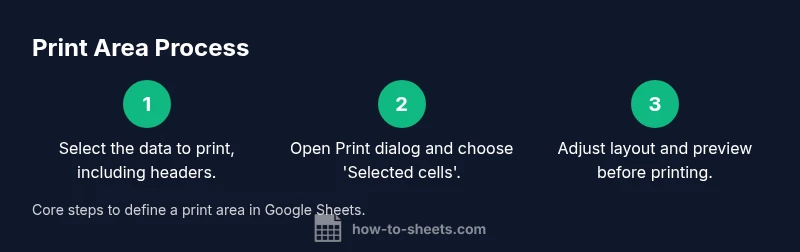
To set the print area in Google Sheets, start by selecting the cells you want to print, then open the Print dialog (File > Print or Ctrl+P) and choose 'Selected cells'. Adjust orientation, margins, and scaling as needed, and preview before printing to ensure only the chosen data prints. If you need a recurring print range, save it as a named range for quick reuse.
Why Setting a Print Area Helps Your Work
In Google Sheets, printing without a defined print area can waste ink and paper, and clutter the output with unnecessary data. By defining a print area, you guide printers and PDF exports to show only the data readers need. This improves readability, especially for reports, budgets, and data summaries. According to How To Sheets, a deliberate print area saves time in review cycles and reduces questions about what data is included. When sharing documents with teammates or clients, a clean print area projects professionalism and clarity. For students, professionals, and small business owners alike, a well-defined print area streamlines distribution and ensures consistency across exports. Before printing, consider which rows, columns, and headers must appear on every page, and whether page breaks should repeat headers or titles. A thoughtful print area also enables better control over margins and scaling, preventing awkward splits across pages. The result is a polished print that conveys your message accurately, every time.
Quick Overview of Print Settings in Google Sheets
Google Sheets’ print experience is designed to be straightforward. After selecting your print option, you’ll land in a Print Preview screen that shows how your sheet will appear on paper or as a PDF. You can choose between printing the Current sheet, the Selected cells, or the entire workbook, depending on what you need to share. The preview updates in real time as you adjust options like orientation (portrait or landscape), margins, and scaling. You can also decide whether to repeat header rows on every page, which is especially helpful for long lists. When you’re happy with the preview, you can print or export as PDF. If your data spans multiple areas, consider printing them in separate batches to avoid an overly long single print job. The goal is to understand how each option affects your final output and to maximize clarity for your audience. For teams and instructors, consistent print settings help avoid confusion across documents and projects.
Defining a Print Area: Practical Guidelines
Choosing the print area is about clarity and relevance. Identify the exact rows and columns that contain headers and the data readers need. If you’re preparing a quarterly report, include the header row and data for that period, excluding unrelated columns. Avoid printing hidden columns or extraneous data that could distract the audience. Use bold headers to improve scan-ability, and consider freezing the first row so headers remain visible on larger printouts. A good practice is to test print a small sample of your range to verify alignment and readability before printing the full document. You might also decide which columns should repeat on every page. If your sheet contains multiple sections, plan whether they should print on separate pages or be combined. Consistency in print area makes reviews faster and reduces questions about data scope. The How To Sheets team notes that a consistent print area improves collaboration and reduces last-minute adjustments in shared documents.
Preparing Your Data for Printing
Before opening the Print dialog, tidy your data to avoid surprises on print. Ensure headers are present and correct, and remove any extraneous rows that don’t contribute to the intended narrative. If your sheet is long, consider freezing the header row so it remains visible on each page, and verify that negative numbers or currency formats print correctly. Check column widths and text wrapping; you may need to wrap text or manually adjust column widths to prevent truncation in the printout. Create a compact data range that includes necessary labels and units, so readers don’t have to cross-reference elsewhere. If you plan to reuse this exact print setup, note the range and settings you used for easy replication in future documents.
Step 1: Prepare Your Data for Printing
Define a precise area that includes headers and all necessary data. Ensure there are no hidden columns that should not appear in print. Consider creating a blank line between sections if printing multiple blocks, which keeps the output neat and scannable. When in doubt, run a quick print preview to confirm that headers line up with their data and that currency, dates, and numbers render correctly. If your sheet uses merged cells, test how they print as merged cells can sometimes shift alignment. The main objective is a clean, legible print that matches your intended message.
Step 2: Access the Print Dialog and Choose Print Area
Open the Print dialog by selecting File > Print or pressing Ctrl+P. In the preview pane, switch to the option that prints either the Current sheet, Selected cells, or the entire workbook. For a defined print area, choose Selected cells after you have highlighted the specific range. If you don’t see the exact range reflected in the preview, revisit your selection and re-open the dialog. The goal is to ensure the dialog mirrors your intended area exactly before proceeding.
Step 3: Configure Layout: Orientation, Scaling, and Margins
Fine-tune how your print will look by adjusting orientation (portrait or landscape), margins (normal, narrow, or custom), and scaling (fit to width, fit to page, or custom scaling). Portrait is common for simple lists, while landscape helps wider tables fit on a single page. Use 'Fit to width' to prevent unwanted line breaks, especially for long headers. Checking the preview helps you confirm how the page breaks will appear. If your print includes headers, verify that header rows repeat correctly across pages. These tweaks ensure the final output is readable and professional.
Step 4: Preview and Finalize Your Print
Review the final result in the Print Preview to confirm everything looks correct. If you’re printing, send the job to your printer; if you’d rather share digitally, export as a PDF. Before saving, double-check that the page count and data ordering align with your presentation needs. If you’re planning to reuse this print setup, save your range and preferences as a named range or document note for quick access in the future. The goal is a repeatable, dependable print workflow.
Step 5: Save and Reuse Your Print Settings for Consistency
When you’ve achieved a satisfactory setup, establish a repeatable process. Save the exact range you printed as a named range so you can reselect it quickly in future sessions. Document the print settings you used (orientation, margins, scaling) to make it easy for teammates to reproduce the same output. If you frequently generate the same reports, consider creating a template sheet that contains pre-formatted headers and data blocks you regularly print. The How To Sheets team recommends building predictable print workflows to save time and reduce misprints in ongoing projects.
Tips for Large Spreadsheets and Avoiding Common Errors
- Test print in stages: start with a small subset of your data before printing the entire range. - Use 'Selected cells' to isolate the exact area you want, avoiding accidental data leakage. - If rows or columns aren’t aligning as expected, adjust wrapping, font size, and column widths in the on-screen view before printing. - For lengthy reports, consider printing in multiple batches to maintain readability. - When printing to PDF, verify that hyperlinks and embedded visuals render correctly in the export. The goal is to deliver crisp, accessible documents every time.
Final Checks Before Printing
Before you press Print, confirm the print area includes all essential information, such as headers and units. Verify that the page orientation matches the data shape and that margins won’t cut off critical content. A quick final check can save you from wasted sheets and last-minute edits. If you need to reuse the same print setup, save it as a named range and maintain a small checklist for future prints. The overall aim is a smooth, predictable printing experience that reduces errors and saves time.
Tools & Materials
- Computer with internet access(Any modern browser (Chrome/Edge/Firefox) works with Google Sheets.)
- Active Google account(You must be signed in to access and modify Google Sheets.)
- Google Sheets document to print(Open the document and select the exact range you want to print.)
- Printer or PDF export option(Decide whether to print physically or save as PDF for digital distribution.)
- Optional: named range or annotation method(Helpful for reusing the same print area in future sessions.)
Steps
Estimated time: 15-20 minutes
- 1
Select the print area
Click and drag to highlight the exact cells you want to print, including any header rows you need. This defines the data that will appear in the final output.
Tip: Include headers if they help readers understand the data; they often improve readability on printed pages. - 2
Open the print dialog
Go to File > Print or press Ctrl+P to open the Print Preview. The dialog reflects your current selection and shows a live preview.
Tip: If the preview doesn’t match, reselect the area and reopen the dialog. - 3
Choose print area option
In the Print dialog, select 'Selected cells' (or the equivalent option) to restrict printing to your highlighted range.
Tip: If you don’t see this option, switch to a different tab or adjust your selection and retry. - 4
Configure layout
Adjust orientation, margins, and scaling. Use 'Fit to width' or 'Fit to page' to minimize page breaks and avoid cropping.
Tip: Preview again after changes to ensure headers remain visible and data aligns properly. - 5
Preview and print or save
Review the final layout in the preview. Print to a physical printer or export as PDF for sharing.
Tip: Save settings for future use by noting the exact range and options you selected. - 6
Reuse print area for consistency
If you frequently print the same range, define a named range and document the print settings for quick replication.
Tip: Named ranges help you reselect the same area without re-choosing each time.
FAQ
Can I print only part of a sheet without altering the original data?
Yes. Highlight the exact range you want to print and choose the 'Selected cells' option in the Print dialog to print only that area.
Yes—just select the area you want and print the selected cells.
Is there a way to print headers on every page?
Yes. Use the print settings to repeat header rows on each page, which helps readers follow the data across pages.
Yes, enable repeating headers in the print settings.
How can I print to PDF from Google Sheets?
In the Print dialog, choose the PDF export option or 'Save as PDF' to generate a shareable document.
Choose Save as PDF in the print dialog.
What if my print area changes often?
Use a named range to quickly reselect the same area, and keep a note of the preferred print settings.
Create a named range to reuse the area.
Can I print multiple non-adjacent ranges at once?
Google Sheets prints a single contiguous range. For multiple areas, print them separately or combine data into a single print area.
Print each area separately or combine them into one range.
Watch Video
The Essentials
- Define the exact print area before printing
- Use Print Preview to validate layout
- Print area = selected cells for precise output
- Reuse settings with named ranges for consistency