How to Print Google Sheets on 8.5 x 11 (US Letter): A Practical Guide
Learn how to format Google Sheets for US Letter (8.5 x 11) printing with precise margins, headers, and scaling. A step-by-step workflow to ensure clean, print-ready documents.

Learn how to format Google Sheets for 8.5 x 11 printing. This quick guide covers setting the print area, margins, and scaling for clean results and consistent alignment. Perfect for students, professionals, and small businesses.
Why printing correctly matters on 8.5 x 11\n\nPrinting from Google Sheets to US Letter (8.5 x 11 inches) is a common task for budgets, schedules, project trackers, and checklists. If margins are inconsistent or data breaks across pages, it wastes time and creates confusion when the paper copy lands on someone's desk. A well-prepared printout aligns data, preserves column headers, and keeps formulas readable without excessive wrapping. The How To Sheets team often sees users underestimate the importance of a precise print setup, which leads to last-minute tweaks before sharing copies with teammates. By investing a few minutes in page layout and print options, you can produce professional, consistent results that translate from screen to paper. This section introduces the core ideas and a repeatable workflow you can apply to budgets, inventories, and schedules—whether you’re a student, professional, or small business owner.
Prepare your data for print: layout basics\n\nBefore touching page settings, clean up your sheet. Remove unnecessary columns, hide data you won’t print, and consider how wrapped text will appear on paper. If you keep too many columns, data becomes unreadable when scaled to fit a page. A practical rule is to print only the data you need on the first pass, then adjust if more context is required. Freeze header rows so titles stay visible as you scroll and when printed. This approach reduces confusion and makes your paper copy look professional. The How To Sheets team recommends establishing a standard layout for recurring reports: a single data table with a clear header row, a summary section, and any footnotes placed below. When you design for print, think in audience terms—what will the reader need to know at a glance? Use consistent column widths, straightforward labels, and avoid merging cells in ways that complicate copying data into reports. If you must merge for formatting, constrain it to headers or summary lines, not data cells. Finally, ensure your data types remain intact; numbers should align to the right and text to the left for faster scanning. A little upfront planning pays big dividends when your sheet becomes a printed resource.
Page setup and paper size: US Letter, orientation, margins\n\nStart by selecting the page size and orientation in the print dialog. Set the paper to US Letter (8.5 x 11 in) and decide between Portrait or Landscape based on your data layout. Margins should be medium to wide for readability, with rare exceptions for dense tables. In Google Sheets you’ll access these options under File > Print, then Page setup. A consistent margin and orientation prevent data from wrapping awkwardly across pages and help align content with your headers. If you frequently print the same type of sheet, save a basic template with your preferred margins and orientation for faster future work. This small consistency saves time across multiple prints and ensures reproducible results across teammates.
Defining print area and repeating headers\n\nA clean print starts with a controlled print area. Select the exact range you want to print and choose the printer options that print only selected cells or the current region. Repeating header rows on every printed page is essential for multi-page reports. In Google Sheets, you can enable Repeat titles in the Print settings so column headers stay visible on each page. This is especially important for large data sets where readers might flip pages. If headers spill into multiple lines, consider shortening header text or increasing row height for legibility. A well-defined print area with repeating headers dramatically improves the usability of a hard copy across departments.
Scaling and fit-to-page strategies\n\nScaling determines how much of your sheet fits on each page. Options include Fit to width, Fit to height, or a custom scale percentage. For many datasets, Fit to width yields a single-page wide print, while still preserving header context with repeated titles. If you have a tall sheet, you may choose two pages tall and one page wide, adjusting margins to minimize whitespace. Always preview the result before printing to avoid surprises. If you’re exporting as PDF, use the same settings to ensure fidelity between screen and paper. These practices help maintain readability and alignment, reducing the need for post-print corrections. The goal is a predictable, printer-friendly output.
Gridlines, borders, fonts, and readability on print\n\nPrint readability hinges on visual clarity. Decide whether to print gridlines and borders; in many cases, faint gridlines enhance readability, but they can clutter a dense table. Use bold headers and consistent font sizes to improve scanning. Ensure column widths are appropriate so numbers don’t wrap awkwardly. If needed, adjust font type and size specifically for print—some sans-serif fonts read better on paper. For accuracy, run a quick print preview after minor tweaks to verify alignment and legibility across pages. This step reduces back-and-forth edits and ensures a clean, professional appearance. In this section, you’ll balance aesthetics with readability to make your printed sheets truly usable.
Preview, export, and print workflow\n\nBefore sending anything to a printer, review a final print preview. In Google Sheets, use File > Print to access a live preview and tweak settings as needed. When you’re satisfied, you can either print directly or export as a PDF for sharing. Saving a PDF preserves layout and fonts, and makes it easier to distribute to colleagues who may use different devices. If you work with sensitive data, consider applying password protection to the PDF or restricting access to the shared drive. This workflow ensures that your print-ready sheets travel securely from screen to paper. The end result should be a professional, on-brand document ready for distribution.
Common pitfalls and troubleshooting\n\nEven experienced users encounter printing pitfalls. Common issues include data spilling onto extra pages, headers dropping off, or margins changing when switching printers. Address these by double-checking page setup, margins, and print area in the preview. If you notice inconsistent results across printers, save a PDF and use a single printing method for all recipients. Keep a quick-reference template with standard settings so you don’t start from scratch each time. How To Sheets analysis shows that establishing a fixed print template reduces errors and saves time over repeated tasks. With careful preparation and a reliable workflow, you’ll consistently achieve accurate, print-ready results.
Tools & Materials
- Google Sheets (web)(Open sheets.google.com and sign in.)
- US Letter paper (8.5 x 11 in)(Set page size to Letter in Page setup.)
- Printer or PDF printer(Use a printer or Save as PDF for distribution.)
- Web browser with print preview(Chrome/Edge/Firefox recommended.)
- Ruler or gridlines display for testing(Enable gridlines to preview print alignment.)
Steps
Estimated time: 25-40 minutes
- 1
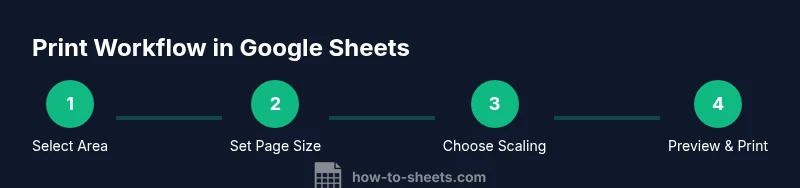
Open and select the data to print
Open the sheet you plan to print and highlight the exact range you want in the final copy. This ensures you print only the required data and avoids unintended rows or columns. Nudge columns wider if necessary to keep values legible in print.
Tip: Use the keyboard to quickly select a region: click the start cell, hold Shift, then click the end cell. - 2
Set the page size to US Letter
Access the print dialog and choose Page setup. Set paper size to US Letter (8.5 x 11 in) and decide between Portrait or Landscape based on data orientation. Consistent margins help align the content with headers across pages.
Tip: If you print often, save this setup as a template for future sheets. - 3
Define the print area and headers
In the Print settings, select Print Area or Current Sheet and confirm the exact range. Enable Repeat titles (header rows) on every printed page to keep column labels visible as the data spans pages.
Tip: Keep header text short to avoid wrapping. - 4
Choose scaling and fit
Experiment with Fit to width or Fit to page height to balance readability and page count. If your sheet is dense, a custom scale (for example 90%) can preserve font size while fitting more data per page.
Tip: Always preview after changing scale to verify readability. - 5
Adjust borders and gridlines
Decide whether to print borders or gridlines. Borders can help distinguish regions, while gridlines may clutter a dense table. Use bolded header cells to guide the reader first.
Tip: For dense data, print gridlines lightly or disable them for a cleaner look. - 6
Preview and tweak
Open the print preview and verify alignment, margins, and header repetition. Make small adjustments if any data is cut off or misaligned. This step reduces post-print corrections.
Tip: Zoom in the preview to catch tiny formatting issues. - 7
Export or print
If sharing, export as PDF to preserve layout across devices. If printing, choose the appropriate printer and confirm final settings before printing.
Tip: Name the PDF with a version tag (v1, v2) for easy tracking. - 8
Final check and archive
Review the final physical copy for legibility, then store the digital file in a shared folder. Document any printer-specific quirks to streamline future prints.
Tip: Create a quick checklist to reuse settings for similar sheets.
FAQ
How do I set the print area in Google Sheets?
Select the cells you want to print, then open File > Print and choose the option to print the selected cells or the current region. This confines the print output to your chosen area.
Select the area, then print and choose to print only the selected cells so you don’t waste paper.
Can I print multiple sheets on one page?
Yes. Use the Print dialog to export to PDF and choose the option to print all sheets or specific sheets, depending on your needs. This keeps data organized across pages.
You can print multiple sheets by configuring the print dialog before printing or exporting to PDF.
How do I preserve headers on every printed page?
Freeze or repeat header rows in the Print settings so column labels stay visible on every page. This helps readers follow the data across pages.
Repeat the header rows in the print options so each page shows the column titles.
Why is my content cut off or scaled wrongly?
Adjust the scaling and margins in the Print settings and preview the result. Ensure your data fits within the chosen page breaks to avoid cutoffs.
If things get cut off, tweak scale and margins and preview again before printing.
Can I export a PDF with 8.5 x 11 formatting?
Yes. Use File > Print and select Save as PDF to create a PDF that preserves your layout for sharing.
You can export a PDF with the same 8.5 by 11 layout using the print dialog.
What if gridlines are not visible on print?
Turn on gridlines in the print settings or choose to print borders for better readability. Gridlines help separate data on paper.
Enable gridlines in the print options to improve readability.
Watch Video
The Essentials
- Start with US Letter size and consistent margins.
- Print only the necessary data with a defined print area.
- Use repeating header rows on every page.
- Always preview before printing or exporting to PDF.