How to Check Your Google Docs History: A Step-by-Step Guide
Learn how to check your Google Docs history, review edits, and restore past versions with a practical, step-by-step guide for students, professionals, and teams.

Why Google Docs history matters
Understanding Google Docs history isn’t just about recovering lost text; it’s about tracking collaboration, accountability, and the evolution of a document over time. In this guide you’ll learn how to check your google docs history, what you’ll see in Version history, and how to use that information to govern edits, resolve conflicts, and preserve milestones. According to How To Sheets, a clear history helps teams stay aligned, especially when multiple people contribute asynchronously. This knowledge is valuable whether you’re a student, a freelancer, or a small business owner who relies on Google Workspace for shared documents. You’ll gain practical steps, visuals, and real-world tips you can apply immediately to your own files.
In Google Docs, every edit is recorded as a version, complete with timestamps and editor names. This creates a robust audit trail that lets you verify who changed what and when. Even if you’re not worried about content losses, version history is a safety net—allowing you to compare revisions, extract specific changes, and restore content that was accidentally removed. The goal is to use the history feature as a proactive tool for clarity and quality control, not just a last-resort recovery option.
From a workflow perspective, version history becomes especially useful during group projects, client deliverables, or regulated environments where you need an auditable trail. You’ll often find that a few named versions at key milestones—like initial draft, after client feedback, and final edit—save time during reviews and approvals. The goal is to build a habit of documenting milestones within version titles so you can locate critical moments quickly.
This guide is designed to be practical, with desktop and mobile paths, clear examples, and safety notes to avoid accidental overwrites. If you’re new to Google Docs history, think of it as a time machine for your document that respects collaboration dynamics while preserving a reliable record of changes.
"data-utility" tips will help you structure revisions for future projects, and you’ll learn when to rely on automatic saves versus deliberate version naming. As you become more comfortable, you’ll use history not only to recover content but to communicate clearly with teammates about the document’s evolution.
note”:null,
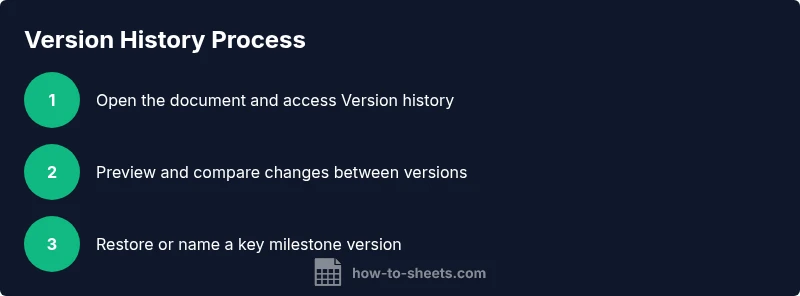
Accessing Version history on desktop and mobile
Accessing Version history in Google Docs is straightforward on both desktop and mobile, but the paths differ slightly. On desktop, open the document you want to audit and navigate to File > Version history > See version history. You can also use the keyboard shortcut Ctrl/Cmd+Alt+Shift+H to open the same panel quickly. On mobile devices, open the document, tap the three-dot menu (More options), select Version history, and choose See version history. This flexibility lets you review edits anywhere, whether you’re near a computer or on the go.
When you open Version history, you’ll see a panel listing revisions by date and editor. Each entry may show the user’s name or initials if you’re collaborating with others. The interface preserves both automatic saves and user-named versions, giving you a quick sense of the document’s evolution. If you’re working with sensitive material, make a habit of checking permission settings beforehand to ensure only the intended collaborators can access the history.
If you’re working with a multi-file project, you might prefer to start from the main doc and use the version history view to compare changes across related sheets or documents. Remember, the more consistently you name versions at major milestones, the faster you’ll locate the right revision during reviews. And if you’re teaching students or guiding a team, encourage naming conventions that indicate the purpose or date of the change, rather than relying on auto-saved timestamps alone.
In practice, you can toggle between different versions to spot when a key decision occurred or when a particular contributor made a critical change. This makes it easier to craft precise feedback, attribute edits correctly, and maintain document integrity through collaborative cycles.
Reading the version history interface
The Version history pane is designed to be scannable. Each version entry typically shows: a date, time, and the editor responsible for the change. You can click or tap a version to preview its content on the right side without altering the current document. If you want to compare two versions, select the earlier one, then hold Ctrl/Cmd and click the later version to activate a side-by-side comparison if the platform supports it for your document type. This visual approach helps you identify exact lines or sections that changed between milestones.
Beyond viewing, Google Docs provides cues for the magnitude of edits. Short edits like a single word or formatting change may appear as minor revisions, while longer rewrites appear as more substantial version edges. You may also encounter “named versions” that you or your team explicitly saved—these act like bookmarks you can return to quickly. Naming versions is highly recommended for long-running projects, enabling you to jump to meaningful checkpoints without wading through multiple auto-saves.
When scanning history, pay attention to the authorship data. If you’re managing a team’s workload or auditing a document for compliance, knowing who changed what helps you assign accountability and resolve discrepancies efficiently. If a conflict arises between two edits, reviewing the historical record can usually clarify the sequence of events, helping you decide which version to keep or how to merge edits.
Overall, the history interface is a powerful, underutilized feature that improves collaboration quality, maintains accountability, and safeguards key content across revisions. As you gain familiarity, you’ll rely on it to manage milestones, resolve edits, and maintain a clean audit trail for every document.
Restoring, naming, and comparing versions
Restoring an older version is a common task when a mistake slips through or when you want to revert a document to a known good state. In the version history panel, select the target version and choose Restore this version. Note that this action applies the old content to the current document, potentially overwriting more recent edits. If you’re uncertain, use the “Preview” option to confirm the content before restoration. Naming versions is another powerful practice. Click Name this version and provide a concise label that captures the milestone, such as “Draft ready for review - 2026-02-10.” This makes it easier to locate later, especially in longer documents with many revisions.
Comparing versions is particularly valuable when you want to identify exactly what changed between milestones. Use the compare feature (when available) to highlight edits, additions, and deletions. This is especially helpful for editors, reviewers, and clients who need to see specific changes without combing through the entire text.
Pro tips for this step:
- Always preview before restoring to avoid accidentally overwriting work.
- Use meaningful version names that reflect milestones, not just dates.
- Keep a short changelog in a dedicated section of the document for major updates.
If you accidentally restore to a prior version and realize you actually needed a mid-history state, you can often recover the more recent edits by selecting the version just before the restoration and restoring again. The history offers a safety net, but use it with intention to minimize confusion for collaborators.
Real-world walkthrough and best practices
Imagine you’re coordinating a research project with teammates who frequently update a shared Google Doc. You notice conflicting edits, and you’re unsure who made the latest substantive change. A quick check of the version history reveals that a major paragraph was added yesterday by a collaborator who is out of the office today. You can reopen the version from yesterday, preview the changes, and restore only the section that reflects the agreed-upon content. Afterward, you rename that version to reflect the milestone and add a short note in the document’s comment or a dedicated section explaining the decision.
Best practices include naming milestones, tagging versions with concise descriptions, and establishing a routine for checking history at key points in a project. For teams working with sensitive information, consider limiting access to certain documents or enabling stricter sharing settings to reduce the risk of unintended edits. If you’re teaching, incorporate version history into your workflow by encouraging students to name drafts at important steps and to annotate major edits in the document’s comment threads.
Incorporating these habits speeds up review cycles, improves accountability, and ensures that important content remains intact. The more consistently you use version history, the more you’ll trust your documents and the people who contribute to them. Your ability to track edits becomes a quiet, reliable backbone of productive collaboration.
Authority figures and curators often emphasize the importance of an organized history, not only for recovery but for ensuring transparency across all edits. The practical payoff is clear: faster reviews, clearer accountability, and safer, more efficient collaboration across teams, classes, or client projects.
Authority sources and further reading
For deeper understanding and official guidance, consult authoritative documents from the Google Docs help resources and related educational materials:
- https://support.google.com/docs/answer/190843
- https://support.google.com/docs/answer/75712
- https://edu.google.com/products/docs/ (Google for Education documentation)