How to Delete Multiple Rows in Google Sheets
A comprehensive, step-by-step guide to deleting multiple rows in Google Sheets, covering manual deletion, keyboard shortcuts, and filter-based methods while preserving data integrity.

Quick Answer: You can delete multiple rows in Google Sheets by selecting the target rows and choosing Delete rows, via the right-click menu or the Edit/Delete menu. For speed, use the keyboard shortcut Ctrl+- (Cmd+- on Mac) after selecting; to remove non-adjacent rows, hold Ctrl (Cmd on Mac) while clicking each additional row. For safety, create a backup first. According to How To Sheets, a cautious approach helps prevent accidental data loss.
Quick start: three reliable methods
Deleting multiple rows in Google Sheets can be done quickly with three core methods: manual selection, keyboard shortcuts, and filter-based deletion. Each method suits different scenarios—diagonal edits, large datasets, or rows spread across the sheet. Before you begin, ensure you have editing access to the file and that you’ve created a backup copy in case you need to revert. According to How To Sheets, saving a backup on a duplicate sheet or in a separate workbook is a best practice when performing bulk deletions. This preparation makes it safer to experiment with selections and undo actions if something goes wrong. The rest of this guide explains when to use each method, how to execute it, and how to verify that you didn’t remove essential data.
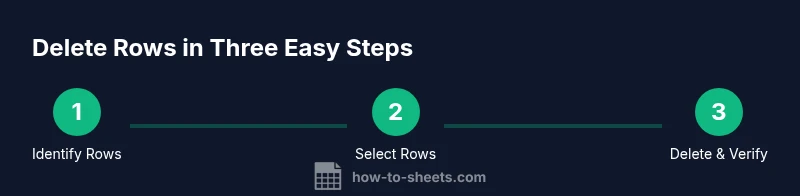
Method 1: Delete by selecting rows manually
This method works best when your target rows are consecutive. Click the row number on the left edge to highlight a row, then drag down to select adjacent rows. Right-click the highlighted area and choose Delete rows X–Y (where X and Y are the first and last row numbers). If you’re using the Edit menu, select Edit > Delete rows X–Y. The key is to ensure the entire row(s) are highlighted; if only cells are selected, you’ll delete data within rows rather than the whole rows.
Method 2: Keyboard shortcuts to delete multiple rows
Keyboard shortcuts speed up bulk deletions. After selecting the target consecutive rows, press Ctrl+- (Cmd+- on Mac) to remove them. This bypasses menus and reduces the chance of mis-clicking. If you need to delete non-adjacent rows, hold Ctrl (Cmd on Mac) while clicking additional row numbers to add them to your selection, then press Ctrl+- (Cmd+-). Remember, this action cannot be undone once you save, so consider using Undo immediately if you spot a mistake.
Method 3: Use filters to isolate and delete
For very large sheets or datasets with scattered rows, filtering helps you isolate unwanted rows. Create a temporary filter view, then apply a condition that only shows rows to delete (for example, where a specific column contains an undesired value or meets a criterion). With the filtered rows visible, delete them using any of the previous methods. After deletion, clear the filter to review the remaining data. This approach minimizes the risk of deleting rows you intended to keep.
Safety and backups: Avoid accidental data loss
Bulk deletions are convenient but risky if you have formulas, merged cells, or protected ranges. Always back up first, preferably by duplicating the sheet or saving a separate copy. After deletion, scan for broken formulas or references that relied on the deleted rows. If you use formulas like VLOOKUP or INDEX/MATCH, confirm that their ranges still align with the remaining data. A small check can prevent cascading errors across your dataset.
Deleting empty rows vs. rows with data
Deleting truly empty rows is generally safe, but sometimes a row may appear empty due to formatting or hidden characters. Before deletion, confirm there’s no data in hidden columns or cells that could affect calculations. If you’re unsure, temporarily hide the rows you don’t want to delete and review their contents, or perform a quick data check (e.g., filter on a key column) to verify emptiness. This careful approach helps maintain data integrity.
Deleting non-contiguous rows
When rows to delete are not next to each other, you can select multiple non-adjacent rows by holding Ctrl (Cmd on Mac) and clicking each target row number. Once selected, use the right-click menu or the Delete rows option. Be mindful that this can disrupt row alignment for any merged cells or dependent formulas, so perform a quick validation pass after deletion.
Common pitfalls and troubleshooting
Merged cells spanning deleted rows can shift content unexpectedly; unmerge if necessary before deleting. Protected ranges prevent deletion; remove protection or obtain permissions before proceeding. If formulas rely on a fixed range, update them after the deletion to reflect the new data boundaries. If you accidentally delete the wrong rows, use Undo immediately and consider restoring from your backup copy.
Best practices and next steps
Establish a standard workflow for bulk deletions: back up, identify the target rows, choose a deletion method, review for side-effects, and save. Consider documenting the steps in a Google Sheets template or a template guide so teammates follow the same process. Regularly audit large sheets for formatting, protection, and formulas to minimize the need for future bulk deletions.
Tools & Materials
- Computer with internet access(Ensure access to Google Sheets and the target file)
- Google account(Sign in to ensure you can edit and save changes)
- Backup copy of the sheet(Create a duplicate or save a local copy before deleting rows)
- Mouse/trackpad and keyboard(Used for quick selection and shortcuts)
Steps
Estimated time: 5-15 minutes
- 1
Open the sheet and locate target rows
Navigate to the Google Sheets file and scroll to the rows you want to remove. Identify whether they are consecutive or scattered. This upfront planning reduces accidental deletions.
Tip: If unsure, create a temporary backup copy before proceeding. - 2
Select the first target row
Click the row number on the left side to highlight the entire row. If deleting multiple consecutive rows, drag to extend the selection. For non-adjacent rows, hold Ctrl (Cmd on Mac) while selecting additional rows.
Tip: Make sure the full row is highlighted, not just individual cells. - 3
Delete the selected rows
Right-click on the highlighted area and choose Delete rows X–Y, or use Edit > Delete rows X–Y. The entire row is removed, and surrounding rows shift up automatically.
Tip: If you see a warning, confirm you want to delete the selected rows. - 4
Verify the result
Scan the sheet to ensure essential data remains intact and formulas reference valid ranges. Check for any shifted columns if formulas rely on fixed positions.
Tip: Use Undo if you deleted the wrong rows, then restore from your backup if necessary. - 5
Optional: delete via filters for safety
If many rows match a criterion, apply a filter to show only those rows and delete them in bulk. Clear the filter afterward to inspect the remaining data.
Tip: Filters help isolate deletions, reducing accidental removals. - 6
Document the change
Record the deletion in a note or changelog within the sheet or project documentation. This makes future audits easier and helps teammates understand the data evolution.
Tip: Link the backup copy in your notes for quick recovery.
FAQ
Can I delete rows without losing formulas that reference those rows?
Yes, but you may need to adjust ranges in formulas after deletion. If possible, perform deletions first on a backup copy and verify results before updating formulas in the original sheet.
Yes, you can, but you may need to adjust ranges in formulas after the deletion. Start with a backup and verify results.
What if I delete the wrong rows by mistake?
Use Undo immediately to revert the last action. If Undo isn’t available, restore from the backup copy you created before deleting.
If you delete wrong rows, press Undo right away or restore from your backup.
Is there a way to delete rows using a script?
Yes. You can use Google Apps Script to delete rows by criteria or indices. This is useful for recurring tasks but requires basic scripting knowledge and testing on a copy first.
Yes, you can delete rows with a script, but you’ll need to test it on a copy first.
How do I delete non-adjacent rows efficiently?
Hold Ctrl (Cmd on Mac) while clicking row numbers to select non-adjacent rows, then delete. For many non-adjacent deletions, consider filters to isolate rows first.
Use Ctrl or Cmd to select multiple non-adjacent rows, then delete, or filter to isolate them first.
What should I do before deleting a large block of data?
Create a backup copy, review dependencies like formulas, and consider doing a staged deletion to minimize risk.
Back up first, review dependencies, and consider staging the deletion.
Do protected ranges prevent row deletion?
Yes. If a range is protected, you must remove protection or obtain edit rights before deleting rows.
Protected ranges can block deletion, so get permission or remove protection first.
Watch Video
The Essentials
- Backup before bulk deletions.
- Choose the deletion method based on row contiguity.
- Verify formulas and references after removal.
- Use filters to safely isolate non-conforming rows.
- Document changes for future clarity.