Itinerary Template for Google Sheets: A Practical Guide
Learn to create a reusable itinerary template in Google Sheets with step-by-step guidance, ready-to-use layouts, and practical tips for trips, fieldwork, and daily schedules.

You will learn to build a reusable itinerary template in Google Sheets that works for trips, meetings, or daily schedules. The guide covers a clean layout, date-aware columns, and reliable data validation, plus sharing tips to keep everyone aligned. By the end, you’ll have a ready-to-use file you can duplicate for future trips and collaborate on in real time.
Why Itinerary Templates Save Time
A well-structured itinerary template in Google Sheets can dramatically reduce planning time, especially when juggling flights, hotels, activities, and meetings. Standardizing the layout minimizes repetitive typing and helps everyone stay on the same page. According to How To Sheets, templates are a practical first step for students, professionals, and small business owners who need reliable, editable roadmaps rather than scattered notes. A good itinerary template includes a clear data model: a date column, a time or time slot column, location, activity, notes, and a contact field for quick reference. You can extend this model for multi-day trips by adding day separators or separate sheets for daily summaries. Importantly, templates should be shareable and permission-friendly so teammates can contribute while you maintain a single source of truth. This section outlines layout choices, data validation tactics, and how to reuse a template across trips.
Designing a Flexible Itinerary Layout
Focus on a core set of columns that support both simple day trips and longer itineraries: Date, Day, Time, Location, Activity, Category, Duration, Notes, and Contact. Use data validation to keep entries consistent—dates in the Date column, standard categories (Arrival, Meeting, Free Time) in a drop-down, and a Duration field with a time format. For travel planning, consider adding an itinerary_id or trip_id to link related entries across sheets. Use conditional formatting to highlight overlapping times or incomplete fields. A flexible layout should also accommodate placeholders for travel documents, reservations numbers, and links to maps. Predefine a summary section that aggregates entries by date or by activity type using SUMIFS or COUNTIFS to view, at a glance, what each day requires.
Leveraging Google Sheets Features for Planning
Google Sheets offers built-in features that turn a basic list into a powerful planning tool. Data validation creates reliable drop-down lists so every entry stays within expected values. The FILTER function can create live dashboards showing activities for a given date or location. Conditional formatting can flag missing fields, duplicate entries, or conflicts in timing. You can also use named ranges to simplify formulas and make it easy to copy the template across trips. Finally, explore sharing options—comment, edit, or view-only—to coordinate with teammates without losing control of the master file. Concrete formula examples will be showcased in the STEP-BY-STEP section.
Template Setup: From Scratch to Reusable
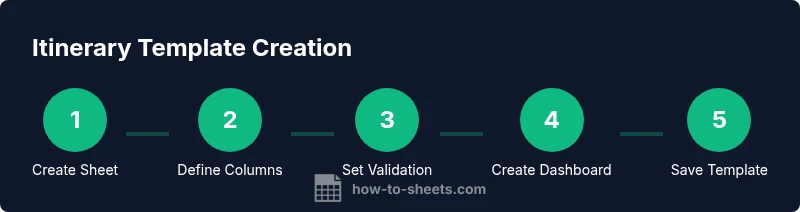
This section explains how to build the template step by step, starting from a clean sheet and ending with a reusable file you can duplicate for future trips. Begin by creating a header row with labeled columns: Date, Day, Time, Location, Activity, Category, Duration, and Notes. Insert data validation rules for Date (date type), Category (custom list), and Location (text with suggestions). Add a summary area that uses SUMIF and COUNTIF to provide counts by day or category. Create a dashboard with a small calendar view using a date picker and a FILTER view to show just one day’s schedule. Finally, save a copy as a template file and test it with two example itineraries to ensure it remains flexible and reliable.
Sample Scenarios: Day Trip, Multi-day, and Business Travel
Consider three common use cases: a single-day city trip, a multi-day conference schedule, and a client visit itinerary. For a day trip, keep rows tight—Date, Time, Location, and Activity—plus a compact summary at the bottom. For multi-day itineraries, add a Day column or create separate sheets per day, and use a master dashboard to track totals by day. For business travel, include a column for department or project code and a link to reservations. Each scenario benefits from consistent formatting and clear color-coding to reduce decision fatigue during travel.
Collaboration, Sharing, and Version Control
With Google Sheets, you can share the itinerary with teammates and set permissions so the right people can edit while others comment. Enable version history to track changes, and add comments to specific cells to capture decisions or updates. If your trip involves multiple stakeholders, consider creating a copy per traveler and keeping a master template for future use. Setting a recurring update schedule helps ensure everyone remains aligned as plans evolve.
Advanced Tips: Automations and Customization
Take it a step further by adding lightweight automation. Use Apps Script to auto-fill dates, pull hotel or flight details from a form, or push completed itineraries to a shared drive. You can also embed simple charts that visualize daily activity counts or time distribution. For non-technical users, leverage add-ons and built-in functions to generate printable itineraries or export to PDF. The key is to keep customization modular so you can reuse the same template for various trips without breaking formulas.
Troubleshooting Common Issues
Common issues include date format inconsistencies across time zones, non-uniform category lists, and accidental overwrites of master data. To fix date issues, ensure all Date cells use the correct date format and consider regional settings. Keep drop-down lists consistent by maintaining a single source of truth for categories. Protect critical ranges in the template so individual travelers cannot accidentally modify formulas. Regularly back up templates and test with sample itineraries before sharing with a team.
Tools & Materials
- Google account with Sheets access(Prefer a workspace account for easy sharing and permissions)
- Google Sheets(Can be accessed via web or mobile app; ensure latest version)
- Sample itinerary idea folder(Optional for organizing templates and test itineraries)
- Predefined category list(Includes Arrival, Meeting, Free Time, Travel, etc.)
- Date/time validation lists(Create in a hidden sheet or named ranges for reuse)
Steps
Estimated time: 25-40 minutes
- 1
Create a new Google Sheet
Open Google Sheets, select Blank, and name the file with a clear trip reference. Create a dedicated Master tab to hold the core layout and a second tab for sample itineraries.
Tip: Name the file with the trip date or destination to make future copies easier. - 2
Define core columns
Add headers: Date, Day, Time, Location, Activity, Category, Duration, Notes, Contact, and Reservations. Freeze the header row for easy scrolling.
Tip: Keep headers consistent across trips; copy the header row when you duplicate the sheet. - 3
Set up data validation
Add Date validation for the Date column, a drop-down for Category, and a predefined list for Location suggestions. Use a separate sheet for lists to keep data clean.
Tip: Always link drop-downs to named ranges for easy updates. - 4
Create a summary/dashboard
Use SUMIF and COUNTIF to show totals per day or category. Build a small calendar-like view using a FILTER function to display one day at a time.
Tip: Name the summary ranges to simplify formulas and future maintenance. - 5
Save as a reusable template
Save a copy as a template file and keep a master version for updates. Document usage notes in a hidden sheet or a README tab for editors.
Tip: Include a short, visible guide at the top of the template for new users. - 6
Test with sample itineraries
Fill in two complete sample itineraries to validate layout, data validation, and dashboard accuracy. Adjust columns or rules if you encounter edge cases.
Tip: Have a third party review the template for clarity and usability.
FAQ
What is the best layout for an itinerary template in Google Sheets?
A successful layout includes Date, Day, Time, Location, Activity, Category, Duration, and Notes, plus a Summary section. Keep lists centralized and maintain consistent headers to ensure easy reuse.
The best layout includes the standard fields and a summary. Keep a centralized list for consistency.
Can I share the itinerary template with teammates in real time?
Yes. Google Sheets supports real-time collaboration with controlled permissions. Use Edit, Comment, and View access as appropriate, and enable version history for accountability.
Yes, you can share and collaborate in real time with proper permissions.
How do I keep dates consistent across time zones?
Set dates and times using a single region setting and avoid starting from multiple local time references. Use explicit time zone notes if it’s necessary to coordinate across zones.
Use one region setting and note time zones when needed.
How can I export the itinerary to PDF for offline use?
Use the File > Download > PDF export option to capture the layout and formatting. Adjust print settings to fit your page and include headers and footers if needed.
Export to PDF via the print menu to share offline.
Is it necessary to use Apps Script for automation?
Not strictly necessary, but Apps Script can automate date filling, data pulls, and exporting. For most templates, built-in functions and add-ons are sufficient.
Apps Script is optional; use built-in features first.
Watch Video
The Essentials
- Plan with a standardized itinerary layout
- Leverage data validation to reduce entry errors
- Use dashboards to summarize daily activities
- Reuse templates to streamline multiple trips
- Collaborate using clear permissions and version history