Event Planning Template in Google Sheets: A Practical Guide
Learn how to build a reusable event planning template in Google Sheets. This guide covers structure, formulas, collaboration, and best practices for successful events using Google Sheets templates.

With this guide, you will build an event planning template in Google Sheets that tracks guests, budgets, timelines, vendors, and RSVPs. You'll learn how to structure tabs, set up data validations, and automate calculations. By the end, you'll have a reusable template ready for any event size. It emphasizes clarity, collaboration, and scalability for students, professionals, and small businesses.
What this template solves for event planners
An effective event planning template in Google Sheets acts as a single source of truth for every moving part of an event—from guest lists and budgets to timelines and vendor communications. It reduces scattered notes, duplicate data, and mis communications. According to How To Sheets, a well-structured template improves consistency, saves time, and makes it easier to onboard new teammates. A strong template supports both simple gatherings and complex conferences by enabling you to scale columns, adjust budgets, and re-use the same framework across multiple events. The goal is to give you a practical, adaptable system that your team can rely on, not a rigid, one-off spreadsheet.
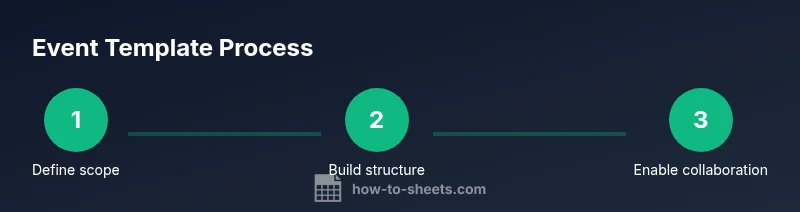
When you start, define the event’s objective, audience, and date range. This clarity informs every tab and formula you’ll create. In addition, plan for collaboration: decide who can edit, who reviews budgets, and who approves final plans. A purposeful template balances structure with flexibility so you can tailor it to wedding planning, product launches, or corporate trainings without rebuilding from scratch.
Core components to include in your event planning template
A comprehensive event planning template typically includes several interconnected tabs. Start with an Overview tab that highlights the event name, date, status, and a quick checklist. Guest List or RSVP tab tracks invitations, responses, dietary needs, and seating constraints. A Budget tab lists line items, estimated vs. actual costs, and a running total. A Timeline tab maps milestones, deadlines, and owners, while a Vendors tab stores quotes, contact details, and payment status. Include a Logistics tab for venue details, equipment, and on-site tasks. Finally, consider a Post-Event tab to capture metrics and lessons learned. Each tab should link to others through clear, consistent identifiers and data ranges to support formulas.
Designing a scalable structure for different event sizes
Design the template to handle both small meetings and large conferences. Use dynamic ranges or named ranges for key data so formulas automatically adjust as you add rows. Implement different cost centers (e.g., venue, catering, entertainment) and allow toggles (Yes/No) to include or exclude line items. Create template sections that can be hidden or shown with a single toggle, keeping the sheet tidy for smaller events while revealing extra detail for bigger ones. A scalable structure also means anticipating recurring events by reusing the same sheet with new data, rather than duplicating entire workbooks. This approach saves time and reduces errors across multiple events.
Building the budget module with Sheets formulas
A solid budget module uses basic yet powerful formulas. Use SUM to tally totals across categories, SUMIF or SUMIFS to group costs by category, and IF to flag overruns. A cautious approach includes a separate column for estimated costs versus actuals, with a simple conditional formatting rule to highlight overruns in red. You can further automate costs by tying vendor payments to budget cells, so when a payment is marked, the remaining balance updates automatically. Keep a separate contingency line item for unexpected expenses. The result is a dynamic, transparent budget that stakeholders can trust.
Scheduling and timelines: turning tasks into a chronological plan
Translate event milestones into a chronological timeline. Record task names, start and due dates, owners, and status. Use conditional formatting to color-code overdue items and to flag dependencies so that a task cannot start until its prerequisite is complete. A Gantt-like visualization can be built with a bar chart that uses the start date and duration. Linking timelines to the Overview tab via data validation keeps the project view in sync. Regularly review the timeline with your team to adjust dates as surprises arise.
Guest list and RSVP tracking: data validation and status
A reliable guest list becomes the backbone of logistics. Create fields for guest name, email, RSVP status, meal preference, and seating group. Use data validation to limit RSVP statuses to a fixed set (e.g., Invited, Attending, Declined, No Response) and to standardize seating groups. Add a separate column for dietary restrictions and accessibility needs. If you’re sending invitations via email, you can prepare a mail merge-ready row export. By centralizing attendee data, you reduce the risk of miscommunication and duplicate records.
Vendor management: tracking quotes, contacts, and payments
Vendors are the lifeblood of events. A Vendor list should capture company name, service type, contact person, phone, email, quote amount, due date, and payment status. Use conditional formatting to highlight upcoming payments and a day-based filter to surface items due this week. Include a field for contract link or file location and another for performance notes. This tab lets you compare quotes, track commitments, and maintain a single source of truth for all supplier relationships.
Collaboration tips: sharing, permissions, and change control
Google Sheets shines when teams collaborate. Set up a shared drive folder with access controls: owners, editors, and viewers as appropriate. Maintain a revision history and add comments for context on changes. Create a simple change-log tab to capture what was updated and by whom. Establish a governance rule: do not edit the same critical formula without notification. Use protected ranges for key cells to prevent accidental edits while still enabling multiple users to contribute where appropriate.
Automation ideas you can implement later
Think of automation as a way to reduce repetitive data entry. You can set up simple automation like copying calculated totals to a summary sheet, triggering email reminders from date fields, or creating calendar events from the Timeline tab. For teams ready to go further, explore Google Apps Script to automate status updates, email notifications, and reminders. Start small with a dedicated automation plan: pick one pain point, implement a simple automation, and gradually expand as you gain confidence.
Step-by-step example: setting up a basic template from scratch
If you’re starting from scratch, begin with a core structure: an Overview tab for the event, a Guest List tab for attendees, a Budget tab for costs, and a Timeline tab for milestones. Create consistent headers, define key data fields, and set up basic formulas for subtotals. Then add a Vendors tab and a Logistics tab to cover supplier details and on-site needs. Use data validation to standardize inputs (e.g., RSVP statuses, currency formats) and apply conditional formatting for quick visual cues. Finally, test with a mock event to ensure that all links, formulas, and data flows work as intended.
Real-world use cases: weddings, conferences, and corporate trainings
Template users span from students planning campus events to professionals coordinating product launches. For weddings, you’ll emphasize guest lists, seating charts, and vendor packages. For conferences, you’ll track multiple sessions, speakers, and room assignments. For corporate trainings, you’ll manage attendance, budgets, and logistics for venues, A/V equipment, and catering. The same Google Sheets framework adapts by swapping in event-specific fields while preserving the underlying structure. The key is to keep data consistent and easily reportable across different events.
Accessibility and templates: making it inclusive
An inclusive event planning template accounts for diverse attendee needs. Add fields for accessibility notes, language preferences, and dietary restrictions. Ensure colors meet contrast requirements for readability, and use descriptive headers for screen readers. Provide alternative text for important visuals and charts. You can also offer a light/dark mode toggle by using conditional formatting rules for better visibility in different lighting conditions. A well-designed template supports all participants and reduces the workload for organizers.
Tools & Materials
- Computer or laptop with internet access(Chrome/Edge; access to Google Drive and Google Sheets)
- Google account(Gmail or Google Workspace account)
- Google Sheets access(Create, edit, and share sheets in Drive)
- Shared folder or drive for templates(Store the master template and linked resources)
- Sample data for testing(Optional dataset to populate the template during setup)
Steps
Estimated time: 60-90 minutes
- 1
Define event scope and objectives
Clarify the event purpose, target audience, date range, and success metrics. This informs the tabs, fields, and formulas you’ll create.
Tip: Document at least three measurable objectives to guide decisions later. - 2
Create core tabs and headers
Set up the main tabs: Overview, Guest List, Budget, Timeline, Vendors, Logistics. Use consistent headers and naming conventions.
Tip: Use a single template file and avoid duplicating sheets for each event. - 3
Set up data validation for inputs
Apply dropdowns for statuses (e.g., RSVP, payment status) and fixed categories (food, venue, entertainment). This reduces errors.
Tip: Validate currency and date fields to ensure consistent formatting. - 4
Add formulas for totals and summaries
Use SUM for subtotals, SUMIF/SUMIFS for category totals, and basic IF statements to flag overruns.
Tip: Keep a separate 'Contingency' line item for unexpected costs. - 5
Link data across tabs
Create cross-tab references so changes in the Budget tab reflect in the Overview automatically.
Tip: Use named ranges for readability and reliability. - 6
Set up collaboration and permissions
Share with teammates, assign roles, and enable comment-only modes for reviewers who don’t edit.
Tip: Enable version history to track changes over time. - 7
Test with a mock event
Populate sample data, run through a dry run, and verify that calculations, filters, and alerts work as expected.
Tip: Ask a colleague to review the data flow for plausibility. - 8
Publish and iterate
Roll out the template to real events, gather feedback, and refine fields and formulas as needed.
Tip: Keep a changelog to document adjustments over time.
FAQ
What is an event planning template in Google Sheets?
An event planning template is a structured Google Sheets file designed to organize attendees, budget, timelines, vendors, and logistics for an event. It provides a repeatable framework that can be reused for multiple events, maintaining consistency of data and reporting.
An event planning template is a reusable Google Sheets file to organize attendees, budget, timelines, and vendors for any event.
How do I customize templates for different events?
Customize by adjusting tab contents, adding or removing fields, and adjusting formulas to fit event size and category. Keep a consistent core structure so you can reuse the template without rebuilding.
You customize by tweaking tabs and fields, but keep the core structure so you can reuse it for different events.
Can I share the template with my team and track changes?
Yes. Use Google Sheets sharing settings, assign roles, and enable version history. Add comments for context and protect critical cells to prevent accidental edits.
Yes. Share with roles and use version history to track changes and protect key cells.
What formulas are most useful for budgeting in Sheets?
Use SUM for totals, SUMIF/SUMIFS for category breakdowns, and IF statements to flag overruns. Link values to the Overview for a live budget snapshot.
Useful formulas include sum totals, category sums, and overrun flags to keep budgets visible.
How do I integrate the template with calendars or forms?
You can export timeline data to calendars or set up simple forms to capture RSVPs, then import responses into Sheets. Advanced automation can connect via Apps Script or built-in integrations.
You can sync with calendars and forms, and use Apps Script for deeper automation.
What are common mistakes to avoid with templates?
Overcomplicating the template, duplicating data, and failing to test with real scenarios. Start simple, validate inputs, and iterate based on feedback.
Avoid overcomplication, duplicate data, and skip testing; start simple and iterate.
Watch Video
The Essentials
- Define clear event objectives before building.
- Keep a simple, scalable tab structure.
- Validate inputs to minimize errors.
- Link data across tabs for automatic updates.
- Collaborate with clear permissions and version control.