PDF to Google Sheets: A Practical How-To
Learn practical, step-by-step methods to extract data from PDFs into Google Sheets, using OCR in Drive, CSV/Excel conversions, and cleanup tips for accurate imports.

In this guide you will learn practical methods to extract data from PDFs into Google Sheets, using OCR in Drive, PDF-to-CSV conversions, and thorough data cleanup. You’ll discover step-by-step workflows, when to choose each method, and how to verify accuracy before importing. No coding experience required. This article includes ready-to-use templates, tips for handling scanned PDFs, and troubleshooting guidance.
Why PDF to Google Sheets matters
Transferring data from PDFs into Google Sheets unlocks the ability to sort, analyze, and visualize information that was previously locked in paged documents. For students, professionals, and small business owners, turning tables and forms from PDFs into editable data saves time, reduces manual retyping errors, and enables faster decision-making. The How To Sheets team has observed that many workflows—finance reports, invoices, product catalogs, and research datasets—benefit from a reliable PDF-to-Sheets path. The goal is to convert data with high fidelity and minimal manual cleanup, so you can reuse it across projects, dashboards, and communications. This section lays the foundation by outlining common data patterns found in PDFs and how they map to Sheets columns.
Understanding common PDF data patterns
PDFs often store data in one of several patterns: clean tables with clear row/column boundaries, irregular tables with merged cells, dense text blocks, or scanned images of documents. Text-based PDFs may extract cleanly, while scanned PDFs require Optical Character Recognition (OCR) to convert images into editable text. When data is well-scanned with good resolution (300 dpi or higher) OCR tends to produce more accurate results, but you still must verify and clean after extraction. Knowing the pattern helps you pick the right workflow from the start and reduces the need for back-and-forth edits.
Defining success criteria for your import
Before you begin, decide what constitutes a successful extraction for your use case. Identify the key columns you expect (e.g., Date, Item, Amount, Total), determine acceptable error rates, and plan how you will handle multi-page tables, footnotes, and column headers that repeat on every page. Establishing these criteria upfront saves time during cleanup and lets you compare the output against the original PDF to measure fidelity. This alignment with your objectives is a core part of a repeatable, scalable workflow.
Tools & Materials
- PDF document to convert(The source file containing the data you want in Sheets)
- Google account with Drive and Sheets access(To upload, OCR, and import data)
- Web browser or desktop app(Chrome, Edge, or Firefox recommended)
- CSV/Excel converter or OCR tool (optional)(Use if Drive OCR isn’t suitable or if you need CSV export)
- A simple Sheets template (optional)(Helps preserve headers and formatting during import)
- Note-taking method or data dictionary(Document mapping rules for repeated imports)
Steps
Estimated time: 60-180 minutes
- 1
Assess the PDF type
Open the PDF and determine whether it is text-based or scanned. If text is selectable, you can often copy and paste or use a quick CSV export. If it’s scanned, OCR will be required to convert images to editable text before extraction.
Tip: Check DPI and clarity; clearer scans yield better OCR results. - 2
Choose your import strategy
Decide between using Google Drive’s OCR (to generate a Google Doc from the PDF) or converting the PDF to CSV/Excel first with an external tool. This choice affects accuracy and workflow speed.
Tip: For large, tabular PDFs, a CSV route often preserves structure better. - 3
Prepare your Sheets workspace
Create a new spreadsheet or use a clean template. Set up header rows corresponding to the PDF table columns and format cells to receive dates, numbers, or text correctly.
Tip: Use a consistent header row across repeated imports for easier automation. - 4
Extract data with Drive OCR
Upload the PDF to Google Drive, right-click, choose Open with > Google Docs. The document will appear with OCR’d text; copy the relevant table and paste into Sheets, ensuring columns align with headers.
Tip: Review a sample of copied rows for spacing and column alignment before continuing. - 5
Or convert PDF to CSV/Excel
If you prefer a structured export, use an OCR-capable converter to export the PDF as CSV or Excel. Download the file and prepare it for import into Sheets.
Tip: Many converters offer column mapping; align exported columns to your Sheets headers. - 6
Import into Google Sheets
In Sheets, go to File > Import > Upload and select your CSV/Excel file, or paste OCR’d data directly. Choose to replace the current sheet or insert as new rows depending on your workflow.
Tip: Choose 'Replace current sheet' only if you’re sure you want to overwrite existing data. - 7
Clean and structure the data
Clean headers, remove stray characters, split merged cells, and set correct data types (date, currency, text). Use built-in functions to normalize formats and remove duplicates.
Tip: Use data validation to prevent future misentries during imports. - 8
Automate for recurring PDFs
If you handle PDFs regularly, consider a lightweight automation: trigger a simple Apps Script that imports a standardized CSV or prompts you to run OCR on new PDFs. This reduces repetitive manual steps.
Tip: Automation shines when the PDF structure is stable across documents. - 9
Verify results and iterate
Cross-check totals, sums, or key values against the source PDF. Note any recurring discrepancies and adjust your mapping or cleanup rules for future imports.
Tip: Maintain a quick data dictionary to track how fields map from PDF to Sheets.
FAQ
Can Google Sheets import data directly from a PDF?
No direct PDF import exists in Sheets. You must convert the PDF to CSV/Excel or use OCR to extract text first, then import that data into Sheets.
There isn't a direct import from PDF into Sheets; you need to convert or OCR first, then import.
What is the best method for simple tables in PDFs?
For straightforward tables, Google Drive OCR to a Google Doc and copy-paste into Sheets is quick. For better structure, export to CSV first and import, then adjust headers and columns.
For simple tables, OCR to Google Docs works well; for more structure, export to CSV and import.
Will OCR preserve tables perfectly?
OCR accuracy varies with scan quality and table complexity. Expect occasional misreads and spacing issues, requiring manual cleanup after import.
OCR isn’t perfect; you’ll likely need some cleanup after extracting.
How long does it take to convert a typical PDF?
Time depends on the PDF length and table complexity. Plan for 30-90 minutes for extraction and initial cleanup, plus additional time for validation.
It varies, but expect 30 to 90 minutes plus cleanup.
Can I automate this workflow?
Yes. You can automate recurring imports with Apps Script or use add-ons that schedule OCR-to-CSV conversions and automate imports into Sheets.
Automation is possible with Apps Script or add-ons.
Watch Video
The Essentials
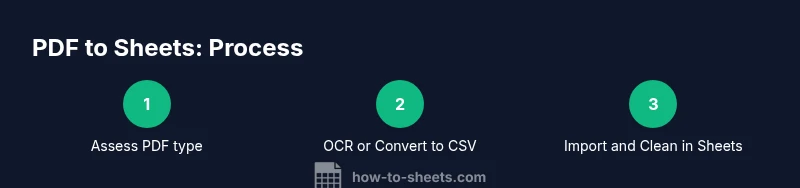
- Assess PDF type before starting
- Choose OCR or CSV conversion based on data structure
- Prepare a clean, header-driven Sheets template
- Import and then clean/validate data
- Automate recurring imports where possible