Free Inventory Template Google Sheets: A Practical Step-by-Step Guide
Learn how to set up a free inventory template in Google Sheets. Build stock trackers, apply data validation, 자동 reorder alerts, and simple dashboards—without paid tools.

Create a free inventory template google sheets by copying a ready-made sheet or building your own from scratch. Start with core columns (Item, SKU, Description, Quantity, Reorder Level, Supplier, Cost, Location), then add data validation, conditional formatting, and simple formulas to track stock levels. No paid tools required. This approach keeps setup flexible for any inventory size, from classroom supplies to retail stock.
Why a Free Inventory Template in Google Sheets Saves Time
If you manage stock for a classroom, small business, or side project, a free inventory template google sheets can save hours by standardizing how you record items, quantities, and movements. According to How To Sheets, templates built in Google Sheets offer accessible collaboration and zero upfront costs. A well-structured sheet reduces data-entry errors and makes audits easier. By choosing a free template you avoid licensing traps and can scale as your needs grow. In this guide, you’ll learn how to evaluate, customize, and extend a template so it fits your exact workflow, whether you’re tracking office supplies, lab reagents, or merchandise. Expect practical steps you can implement today, plus tips for keeping data clean over time.
Core Template Structure: Key Columns and Data Types
A solid inventory template google sheets starts with a few universal columns that capture every meaningful attribute of an item. At minimum, you’ll want: Item name, SKU, Description, Quantity on hand, Reorder level, Supplier, Cost, and Location. Use plain text for names, numbers for quantities, and currency for costs. When possible, store currencies consistently (e.g., USD) and use data validation to prevent typos in items like SKU or location. This consistency underpins reliable reporting and easy consolidation with other sheets in your Google Drive. As you design, think about future needs such as batching, expiration dates, or warehouse zones. The goal is a lean template that is easy to copy, share, and adapt.
How to Find and Evaluate a Free Inventory Template Google Sheets
There are many free templates available from reputable sources and Google’s own template gallery. Start by previewing templates that emphasize stock counts, reorder alerts, and supplier tracking. Look for: clear column labels, editable sample rows, and built-in formulas for totals. If you see advanced features that you don’t need, ignore them or simplify. Check compatibility with Google Sheets so you can collaborate in real time with teammates. When possible, choose templates that include a dashboard or summary tab, making it simple to view stock health at a glance. How To Sheets analysis shows that starting from a clean, vetted template saves time and reduces errors compared to building from scratch without a plan.
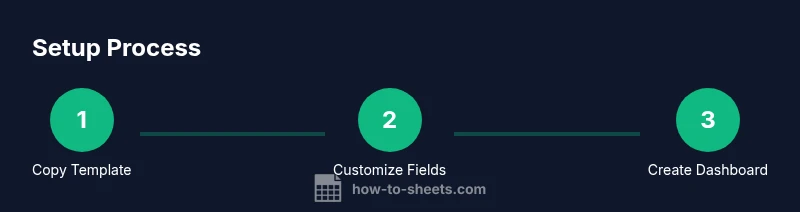
Step 1: Copy and Customize an Existing Template
Begin by opening a free inventory template you’ve found and immediately make a copy to your Drive. Rename the file to reflect your business or project. Remove any unnecessary columns and keep only those relevant to your workflow. Customize header fonts and alignment for readability, and ensure the first data row demonstrates the expected data types. This step establishes the baseline you’ll build upon. Pro tip: lock header cells once you’re comfortable with them to prevent accidental edits in shared sheets.
Step 2: Add Essential Columns for Stock
If your chosen template lacks a critical field, add it now. Common additions include: Location to track where items live, Batch or Lot number for traceability, Expiration date for perishable goods, and Category or Department for grouping. Use consistent naming conventions and decide on data formats (text, date, number) for each column. After adding columns, adjust column widths for readability. Pro tip: create a hidden helper column that standardizes units or formats for downstream calculations.
Step 3: Apply Data Validation and Conditional Formatting
To maintain data quality, implement data validation rules for key fields like Quantity, Reorder Level, and Location. Use drop-down lists for predictable entries (e.g., suppliers, locations) to minimize typos. Add conditional formatting to highlight low stock (e.g., quantities below reorder level) or overdue expiration dates. This visual cue helps you act quickly and keeps the sheet clean during reviews. Pro tip: set up a rule to color-code items by category for quick scans during audits.
Step 4: Build Reorder Levels and Alerts
Define a reorder level for each item to signal when stock should be replenished. You can implement a simple alert column that checks if Quantity on hand is less than Reorder Level and flags it with a color or a note. For more automation, set up a conditional formatting rule that highlights these rows in a consistent color. This ensures you don’t overlook critical restocking needs during busy periods. Pro tip: tie alerts to a separate dashboard tab to keep action items visible at a glance.
Step 5: Create Simple Formulas for Totals and Costs
Add formulas to compute total stock value, total items, and average cost per unit. A basic approach uses SUM for totals and SUMPRODUCT for value calculations when you have Quantity and Cost. If you track multiple locations, you may also total across sheets with a simple 3D reference. Keep formulas simple and well-documented so teammates understand how numbers are derived. Pro tip: label formula cells clearly and use range names where helpful for readability.
Step 6: Automate with Basic Scripts or Functions
If you’re comfortable with small scripts, Apps Script can automate repetitive tasks, such as replenishment reminders or exporting a CSV for suppliers. Start with a lightweight automation: a script that copies low-stock items to a reorder list, or one that sends an email to the responsible person when thresholds are crossed. Even basic functions like TODAY() used in expiration tracking can make your template much more capable over time. Pro tip: test scripts on a duplicate sheet to avoid disrupting live data.
Step 7: Create a Dashboard or Summary View
A lightweight dashboard consolidates key metrics: total items, total quantity, stock value, items below reorder level, and upcoming expirations. Use charts like column or bar charts to visualize totals by category or location. Pivot tables are helpful for deeper insights, especially if you have multiple warehouses or product lines. A clear dashboard helps non-technical teammates understand stock health at a glance. Pro tip: keep the dashboard in a separate tab with consistent color coding for quick recognition.
Step 8: Share, Protect, and Maintain Your Template
Set sharing permissions so teammates can view or edit as appropriate. Protect sensitive sections (like cost data or formula blocks) to prevent accidental edits. Schedule regular reviews of the data and update your template as your processes evolve. Documentation, even a simple README tab, helps new users understand how to use the sheet and what conventions to follow. Pro tip: create a versioned copy before major changes so you can revert if needed.
Ready-to-use Template Ideas and Customization Options
If you’re starting from a blank sheet, begin with the core columns and gradually add enhancements like supplier contacts, purchase order links, or barcode-ready IDs. For education or nonprofit settings, a lighter template focusing on items, quantities, and locations may be sufficient. For retail or manufacturing, you’ll benefit from including batch numbers, expiration dates, and cost tracking per supplier. The key is to keep your template adaptable while preserving a clean data structure that supports reporting and auditing. How To Sheets researchers suggest building templates in modular steps so you can remove or swap modules without breaking core calculations. This makes it easy to scale as your inventory grows or changes seasonally.
Next Steps and How to Maintain Your Template
After you’ve built the template, set a routine to review data quality and update your formulas as needed. Schedule periodic audits to verify that stock counts align with physical inventory, and adjust reorder thresholds based on demand. When you’re ready to share externally, export a read-only version or provide a link with restricted access. Finally, bookmark reliable sources for free templates and best-practice tutorials so you can keep improving your setup over time. The process is iterative, and small improvements compound into stronger inventory control over weeks and months.
Tools & Materials
- Google account with Google Sheets access(Needed to create and save templates in Drive)
- Google Sheets (web)(Open a new or existing sheet to host your template)
- Stable internet connection(Required for cloud-based editing and collaboration)
- Starter inventory template (free)(Use a free template you’ve found, or start from scratch)
Steps
Estimated time: 60-90 minutes
- 1
Copy a starting template
Open a free inventory template you’ve found and make a copy in your Drive. Rename the file and ensure you can edit all core fields. This creates a safe sandbox to customize without altering the original source.
Tip: Always keep the original template as a read-only source for future reference. - 2
Create core columns
Set up essential columns: Item, SKU, Description, Quantity, Reorder Level, Supplier, Cost, Location. Ensure each column has a consistent data type and clear header formatting to improve readability.
Tip: Use short, descriptive headers and avoid ambiguous abbreviations. - 3
Populate sample data
Enter a few representative rows to test formulas and validations. Include typical quantities, supplier names, and locations to ensure your rules apply correctly across the sheet.
Tip: Include at least one low-stock example to validate alerts. - 4
Add data validation
Apply dropdowns for fields like Location and Supplier to minimize typos. Set numeric validation for Quantity and Reorder Level to prevent invalid entries.
Tip: Use a centralized list for dropdown options to ease maintenance. - 5
Set up basic formulas
Add totals for quantity and stock value. Use simple SUM and, if needed, SUMPRODUCT for cost calculations. Document the formulas so teammates can understand them.
Tip: Label formula cells clearly to aid future updates. - 6
Configure reorder alerts
Create a condition that flags rows where Quantity is below Reorder Level. Use color-coding so you can spot restock needs at a glance.
Tip: Keep the alert logic simple to avoid confusion. - 7
Build a simple dashboard
Create a summary tab with key metrics and a small chart showing stock by category. Dashboards help non-technical users quickly assess stock health.
Tip: Limit dashboard to essential data to avoid clutter. - 8
Share and protect
Set appropriate access permissions and protect critical cells and formulas. Share with teammates and establish a maintenance cadence for data cleanliness.
Tip: Rotate access permissions to minimize risks.
FAQ
What is a free inventory template Google Sheets?
A ready-to-use sheet you can copy and adapt for stock tracking. It includes fields for items, quantities, suppliers, and costs, plus simple formulas.
A ready-to-use sheet you can copy and customize for stock tracking, with items, quantities, suppliers, and costs.
Can I use it for multiple warehouses or locations?
Yes. You can extend the template with a Location column and optionally add a separate tab to summarize by location or warehouse.
Yes, add a Location field and you can summarize by location in a separate tab.
Do I need Excel to use this template?
No. Google Sheets works online and supports real-time collaboration. You can export to Excel later if needed.
No, Google Sheets works online with collaboration, and you can export to Excel if required.
How do I protect sensitive data in Sheets?
Use editing permissions, protect cells that contain formulas, and keep cost data in a restricted sub-tab if sharing broadly.
Limit access, protect formulas, and restrict cost data to trusted users.
Is Google Sheets scalable for larger inventories?
For very large inventories, Sheets may start to lag. Use modular templates and consider databases for extremely large datasets.
Sheets works for many sizes, but very large inventories may need a more scalable solution.
How often should I update the template?
Regular updates are best—after stock checks, supplier changes, or monthly audits. Keep a revision log for transparency.
Update after stock checks or audits, and keep a simple revision log.
Watch Video
The Essentials
- Learn the core columns for stock tracking.
- Use data validation to maintain data quality.
- Create simple alerts to prevent stockouts.
- Keep formulas and dashboards simple and maintainable.